Raevenfea

Maker of various fabric things

This is a static export of a blog I put on ice many years ago, that still has personally relevant content. No promises can be made around linkrot, styles, or working functionality.

Posts categorized: Learning

What’s In a Roll (or, not all Jelly Rolls are equivalent)
Posted in Learning

  • Cutting
  • Fabric
  • Pre-cuts
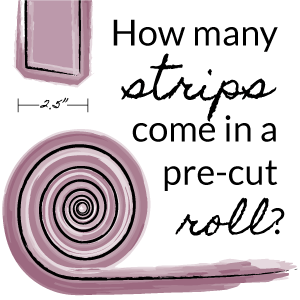
How many strips come in a roll?

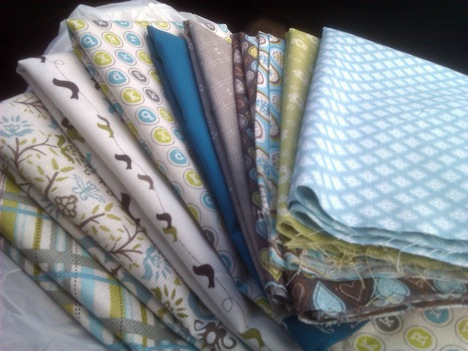
I’ve been using 2.5″ strips a bit lately—commonly called Jelly Roll strips. But, my recent purchases haven’t been fabrics by Moda, so I’ve quickly learned that not all rolls are equal. Here’s a breakdown of commonly available rolls and the number of strips included.

What is a Jelly Roll?

A Jelly Roll (which is a term specifically for Moda rolls, but is commonly used to describe all strip pre-cuts) is a pre-cut fabric assortment of strips measuring 2.5″×Width of Fabric (~40–44″). They typically contain at least one strip from every print and colorway in a fabric collection, and sometimes contain duplicate prints to reach a specific strip count.

How many strips are in a Jelly Roll?

The number of strips in a roll varies by manufacturer, and sometimes even within a manufacturer’s offerings.

Strip Count Manufacturer and Name
† count is dependent on number of prints in collection
* Riley Blake Designs has a few Rolie Polies made of blenders that come with as few as 11 strips, and at least one solids Rolie Polie with 45. Free Spirit sometimes has 36 strips in their Designer Rolls for larger collections (and possibly other numbers). Kauffman has Solid Roll Ups that often come with 40 or 41 strips and batik sets with as few as 28.
11–28† Connecting Threads Sample Strips
20 Joann Fabrics Fabric Palette/Central Jellie
20 Moda Junior Jelly Roll
21–28*† Riley Blake Designs Rolie Polie
28-45* Robert Kauffman Roll Up
30* Free Spirit/Westminster Designer Roll
40 Hoffman Fabrics Bali Pop
40 Moda Jelly Roll
40 Northcott Stone Strips
40 Timeless Treasures Tonga Treat

Strip count in a roll sometimes varies, even in the ones I didn’t mark with an asterisk, so always check the description of what you buy online or look for a number in store (or count, if you have to).

There’s also the rare occasion that a strip is cut incorrectly and not caught by quality control (I have had this happen multiple times with Moda charm packs, less often with rolls), so when picking patterns to make with your precuts or planning out your own, try to build in a small margin of unused strips. And, make sure to count your strips before starting the project!

Where To Buy

You can find these all in various online fabric shops and it seems like more and more local shops also carry them. Depending on what fabric brands a shop carries, you may not be able to find every type in a single location.

Prices also vary. You’re typically going to pay slightly more per equivalent yard (40 strips is just over 2.75 yards), and while the price generally relates to number of strips, that’s not always true. And, of course, manufacturers charge different amounts per yard (and have differing qualities of fabric), so the different roll prices will reflect that.
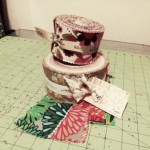
20120910-221029.jpg

Watch out for store-made rolls!

Not that they are inherently bad, but be on the look out for store-made rolls as opposed to official releases by the fabric companies. These rolls may have a different amount of strips, fewer prints or more duplicates, be cut in half the width of fabric instead of full, have strips larger or smaller than 2.5″ tall, or any number of other variations (yes, I’ve purchased one with all of those attributes).

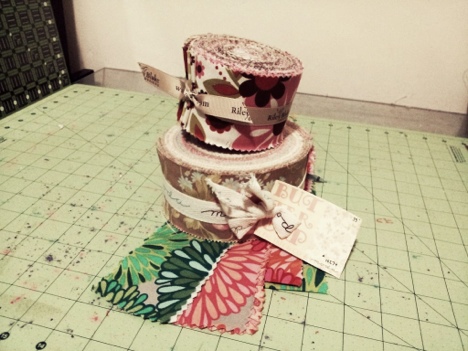
Official rolls typically have printed tags and are bound by ribbon printed with the manufacturer’s name or come shrink wrapped.

Know what you’re buying, ask questions if things aren’t clear, and be happy sewing!

If you think I’ve missed any strip collections, please let me know in the comments.

September 11th, 2012

Lessons Learned

Posted in Learning

  • Advice oh sage ones?
  • The Baby quilt

Sometime around now (give or take a month) is the nebulous second anniversary of when I started quilting and sewing again in earnest. I think I have a ton more to learn, although I know I’ve learned a great deal in the intervening months.

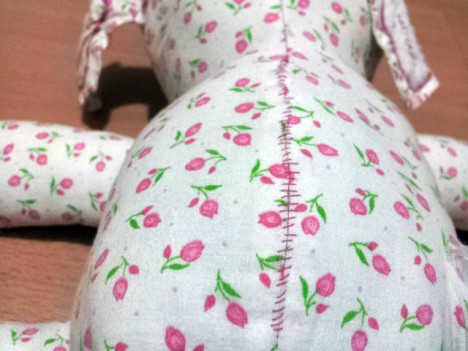
While finishing up another stuffed animal last night, I was really amazed at the difference a little experience with hand-sewing binding and closing up stuffies can do for hiding the stuffing hole seam. Compare the first one I made a little more than two years ago, when I really only knew how to whip stitch (poorly, at that)…

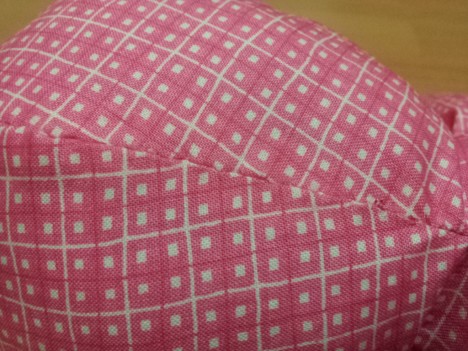
… to this latest one (which I’ll post about after it’s delivered to the recipient’s father once he’s back at work):

I think the stitch is called the ladder stitch, if you want to look it up. My actual stitch is some sort of hack I figured out when starting to bind quilts and not wanting the thread to show, so it’s probably not precisely the ladder stitch.

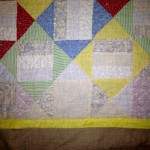
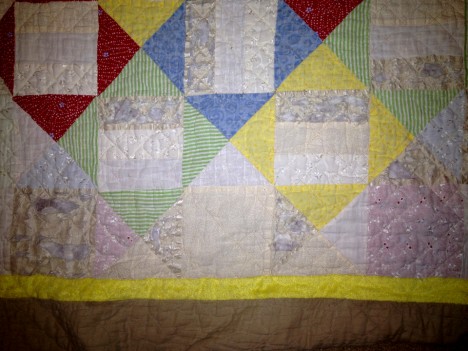
But, sometimes the lessons are a little harder. When I set out to start quilting by making a baby quilt for my oldest friend’s son, I knew absolutely nothing about quilting. Sure, I’d been sewing on and off for about fifteen years, which is why some of my choices probably didn’t faze me at all, but it’s really not very smart quilt production. It has faux-Minky, flannel, silk, eyelet, linen-textured cotton and cheap quilter’s cotton all thrown together.

It’s also incredibly well loved—to an extent that I only hope the rest of my quilts can ever match, possibly all together. As a result, I got a message from my friend showing that the silk is starting to completely wear away.

I think the only solution is to applique a better-lasting fabric over the top of those pieces, correct? (Short of completely deconstructing the quilt and re-piecing, which is not an option.) I would love any advice you have about fixing damage like this.

Two years into my journey, I still don’t think that you can’t use non-quilting cotton in quilts, but there are disadvantages, and I feel pretty safe in saying don’t use silk in a baby quilt.

What have you learned over the years? Have you encountered bad choices that you’ve had to compensate for down the road?

August 28th, 2012

Blog Etiquette: Giving Proper Attribution

Posted in Learning

  • Copyright

First off, a little fan-girl squee: one of my quilts appeared on a blog run by a famous quilt historian/author/designer. Whee! That said, I was surprised to see my quilt appear on the blog, only finding out out because I subscribe to it.

Some are quick to blame Pinterest and other plug-ins and bookmarklets that make it simple to cross-post content from one part of the Web to another for muddying the waters of IP and making us bloggers turn into rude content thieves.

But, stealing content without attribution or request started long before those technologies and services came about, and I’m certain they weren’t in use in this situation.

I’ve covered asking for stolen content to be removed, but what if you don’t mind that it was taken, you just want proper attribution?

That’s a question I’ve been struggling with since I saw the post—especially since the only method of contact I could find for the author was to comment on the post—they didn’t have an email address posted or a contact page.

So, ideal world time: we, as responsible bloggers, should endeavor to always give proper attribution and get proper permission to use other’s content. And, we should provide a way for others to easily contact us so that they can do the same.

It’s the second part that’s really bothersome in this situation. My only recourse is to comment on the post—a public forum. I’m not angry that content was stolen, I just want to request—privately—that they give proper attribution.

So, what should you do in this situation?

Since the photo in question actually belongs to someone else, (it was taken by the newspaper, not me) I contacted the photographer so that they can handle it in the way that they see fit. I can’t speak for them, but I can (and should) alert them. I did leave a comment thanking the author for the mention, and gently correcting the spelling of my name.

I kept getting hung up on ā€œthis person is famous, and it’s just little old me!ā€. Objectively, they should be even more aware of these types of issues—to cover their own famous bums and to set an example of how they want their own IP to be treated. So, while I am completely honored to have my quilt appear, ultimately, I deserve the same respect of IP and attribution that I would give them. In other words, feeling honored doesn’t mean you shouldn’t request your due rights.

I’ve come up with a stock message in case this happens in the future, that I hope is polite but firm about adding a notice that the photo is mine. It mentions that my policy is, as clearly stated on my blog, that they’re welcome to use my images so long as I’m credited. Hopefully, it only ever needs be sent in private, but perhaps if it must be put in a comment, it will encourage others to take another step toward that ideal world of asking, attributing, and inviting contact. I say stock, because while I’ll likely modify it in each situation, it removes the temptation of fan-girl spinelessness—I have the message, I will send it in every instance.

If you haven’t already, make sure you have information about your own copyright stance somewhere on your blog, be it a separate page or in your sidebar. If it is on its own page, make sure a link appears on all pages of your blog. While you’re at it, make sure that you provide a way to contact you. Yes, we all worry about spam (and yes, there are readers who think they should give unsolicited advice about your life), but people do need to contact you on occasion, and that should outweigh your other worries. Plus, there’s a delete button in your email client.

Think about your own stock message so that a response can be automatic without you having to stew over it.

And in the end, really? It seems like a published author should know better than to take images from various places on the Web without attribution of some kind…

What would you do in this situation? Is it something you’ve dealt with before? I admit, sometimes I’m not perfect about proper attribution, but I try to make it clear where all content and images come from.

August 2nd, 2012

In Defense of Big-Box Fabric

Posted in Learning

  • Fabric
  • Fabric stores
  • Research

One piece of advice I see in or on just about every quilting blog, forum, magazine, book—you name it—is that if you care at all about your quilting (which you obviously should), you absolutely have to buy ā€œquilt shop qualityā€ (QSQ) fabric. If any rule can be broken in quilting, I think this one can once you have some experience under your (piecing) foot.

It’s difficult to explain to a new quilter what good quality fabric feels like—drape, good weave, and hand are hard concepts to describe with words. So blanket rules may save some heartache, but that limits the rest of us—rule breakers, experimenters, or just people with a solid grasp of the craft—to a fraction of the fabric that is out there.

Reasons why not to buy big-box fabric

There are valid reasons why not to buy big-box fabric.

June 4th, 2012

Machine Minutes—Mitering Corners for Applique

Posted in Learning

  • Machine minutes
  • Technique

Shh, don’t tell Carl, but I’m admitting it: I could do much of my quilting and crafting on a cheaper machine. But, my fancy Husqvarna Viking Ruby can make certain things much simpler—if I know how to use them. So, here is the first in what I hope will be an ongoing series about using advanced features of the machine. For those of you who own other machines, I hope this inspires you to figure out how to do it on your own machine.

So, here is how to miter corners when satin stitching around an applique using a Ruby. These instructions will also be very similar for how to do it on a Diamond or Diamond DeLuxe, but the screens might be slightly different.

February 6th, 2012

Short Software Tutorials

Posted in Learning

  • Interesting link
  • Technology
  • Tutorials

I’ve mentioned before that when I do digital mockups of my quilts or play with designs before quilting, I do so in Adobe Illustrator. I have nothing against EQ or any other quilt software, it’s just that I don’t actually have that software; I do have Illustrator (albeit an older version from when I was in college).

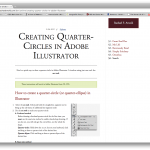
I’ve been using Illustrator for just shy of a decade, so it is absolutely shameful that I didn’t know how to draw a quarter-circle until a few months ago. So, for anyone else in that boat (I know some of you use Illustrator too), I posted a quick tutorial on it over at my Web dev blog on rachaelarnold.com. (Once upon a time I had a grand ideas of having a few different blogs. I even updated them all. These days, I pretty much stick to this one here, but on rare occasions I update the one on Web development, too.)

A quarter circle

There’s also one on quickly drawing half-square triangles.

Perhaps eventually I’ll get ahold of a copy of a real quilting program, but Illustrator works well for now, even if it is a 4+ year old version.

What do you use, software-wise?

February 4th, 2012

Using Fusible Thread for Applique

Posted in Learning

  • Applique
  • Technique
  • Thread

After watching Superior Threads’ videos on using fusible thread for applique, I was determined to try it out for myself. In fact, I rushed to the store and bought the only fusible available: Gütermann’s polyester/nylon blended fusible. It was perfect timing, considering I was just starting the Kaleidoscope/Tula quilt, which has a lot of applique on a large scale.

January 30th, 2012

Lasting Impressions

Posted in Learning

  • Conservation
  • Notions

Leah Day posted about the chemicals we use in quilting a while ago, and how those may affect the life of our projects. The researcher in me was especially interested in a scientific study on adhesives used in quilting that she linked, which ran tests on the effect certain spray bastes, fusible webs, and fusible battings have on fabric over time.

January 26th, 2012

Labels (For Us, Not for Projects)

Posted in Learning

  • Advice oh sage ones?
  • Labels

I really wish I were an illustrator, so that I could draw something out to show you the image that pops in my head every time I read the word ā€œsewerā€. For now, words must suffice. Picture this, if you can:

Michelangelo—no, not the painter, the Teenage Mutant Ninja Turtle—chillin’ in front of a late ’70s Singer Touch and Sew, chain-piecing HSTs in the TNMT’s sewer lair from the ’80s/’90s animated show. He keeps screwing up the corners and is getting increasingly agitated.

Splinter looks on, counseling ā€œPossess the right thinking. Go slow, it is not a race.ā€

Mikey gets one right and yells, ā€œQuiltablocka, dude!ā€

Okay, so maybe we should’t go into my head all that often…

December 8th, 2011

A Custom Medallion for the 1812 Quilt

Posted in Learning

  • 1812 Quilt Challenge
  • Fabric

Fair warning: I’m not actually going to show you my medallion yet—partly because I don’t have it yet, and partly because I want it to be a surprise. But, I would like to talk a bit about options beyond the typical reproduction and 19th-century-look fabrics that are available. Between royalty-free images or your own artistic skills and digital printing, you can create your own custom fabric or medallions for a federal-era quilt.

August 11th, 2011

Ā Previous Posts

© 2008–2025 Raevenfea