Raevenfea

Maker of various fabric things

This is a static export of a blog I put on ice many years ago, that still has personally relevant content. No promises can be made around linkrot, styles, or working functionality.

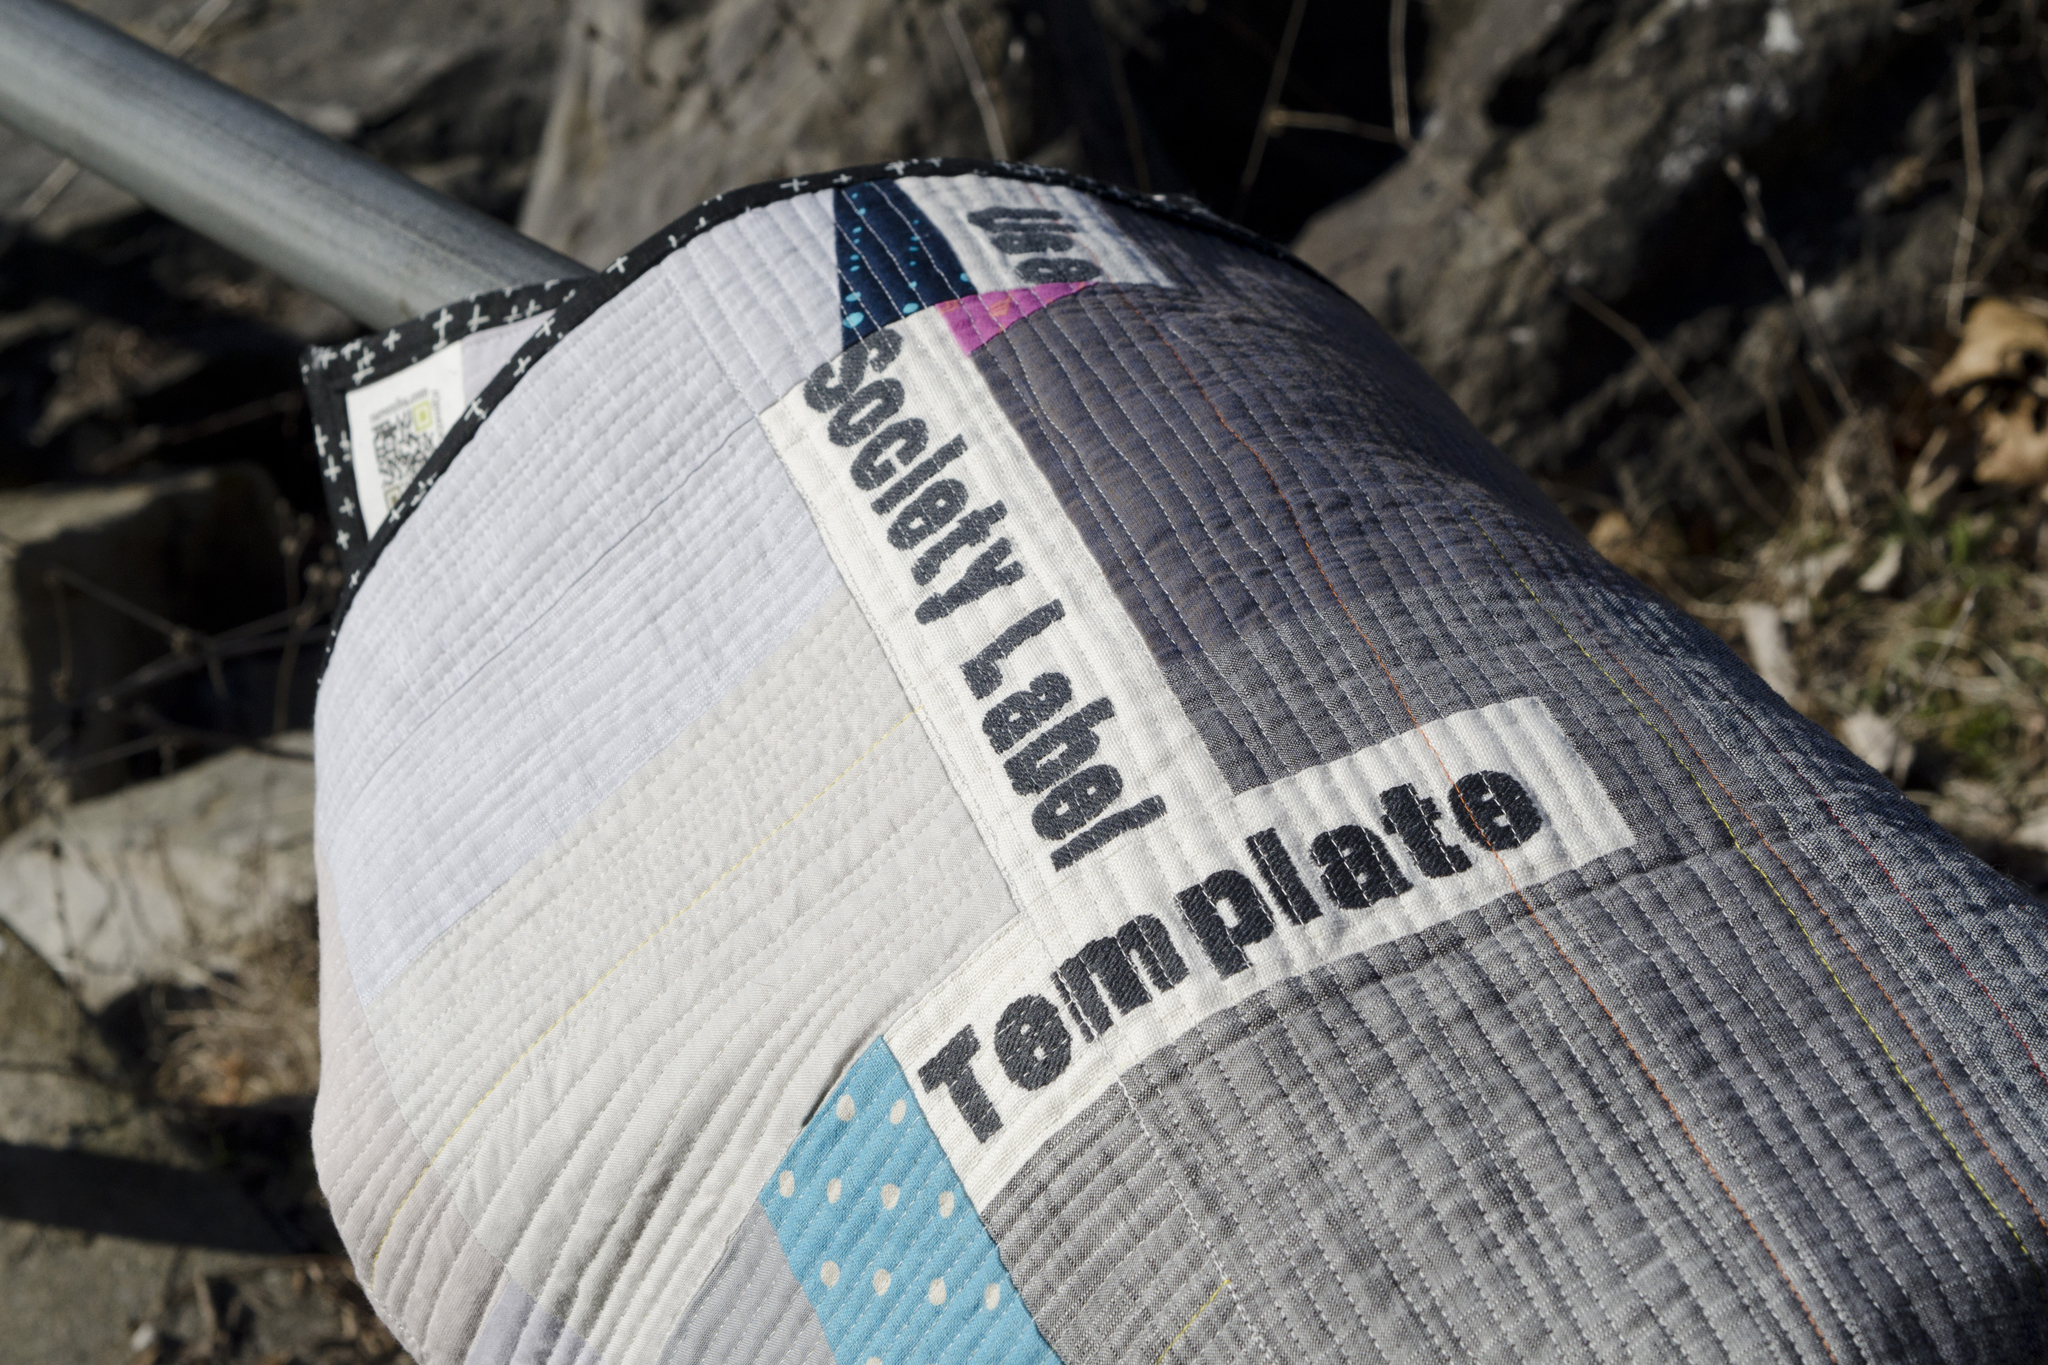
Society Label Template

Posted in Quilting

  • Finished projects
  • Q016DC
  • Statement quilts

While in the middle of working on the F Word Quilt (Feminist), I thought a lot about labels, discrimination, and qualifiers. Sometime during the experience of sewing the myriad straight lines of quilting and trying to puzzle out how to do quilted lettering, I came up with the idea for this quilt.

“Human”, Rachael Arnold, April 2016, 56″x56″. Photo by Carl Pfranger.

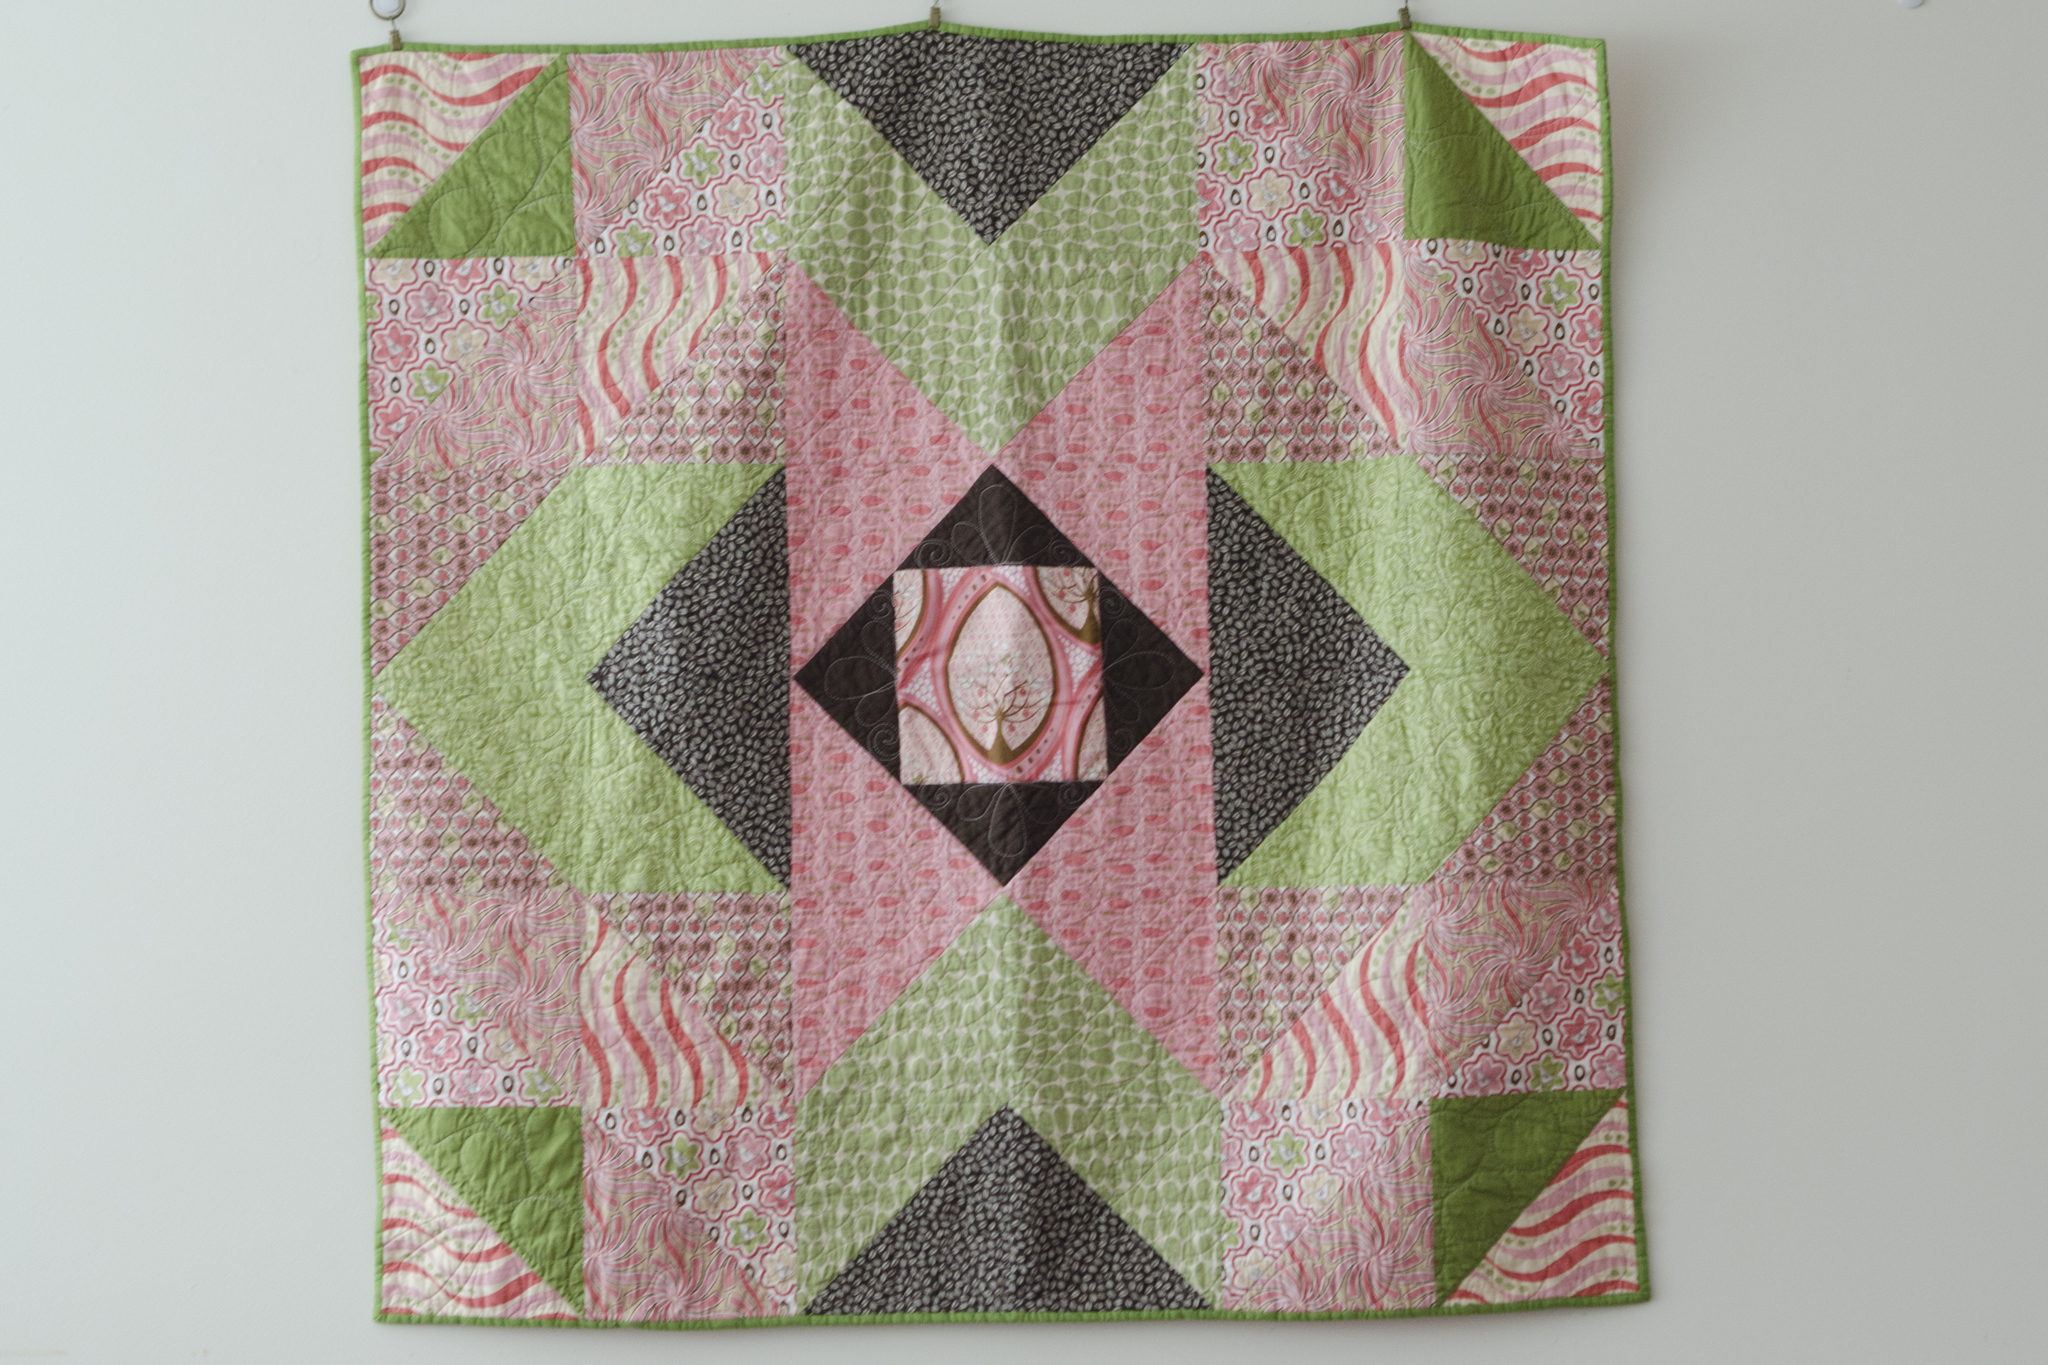
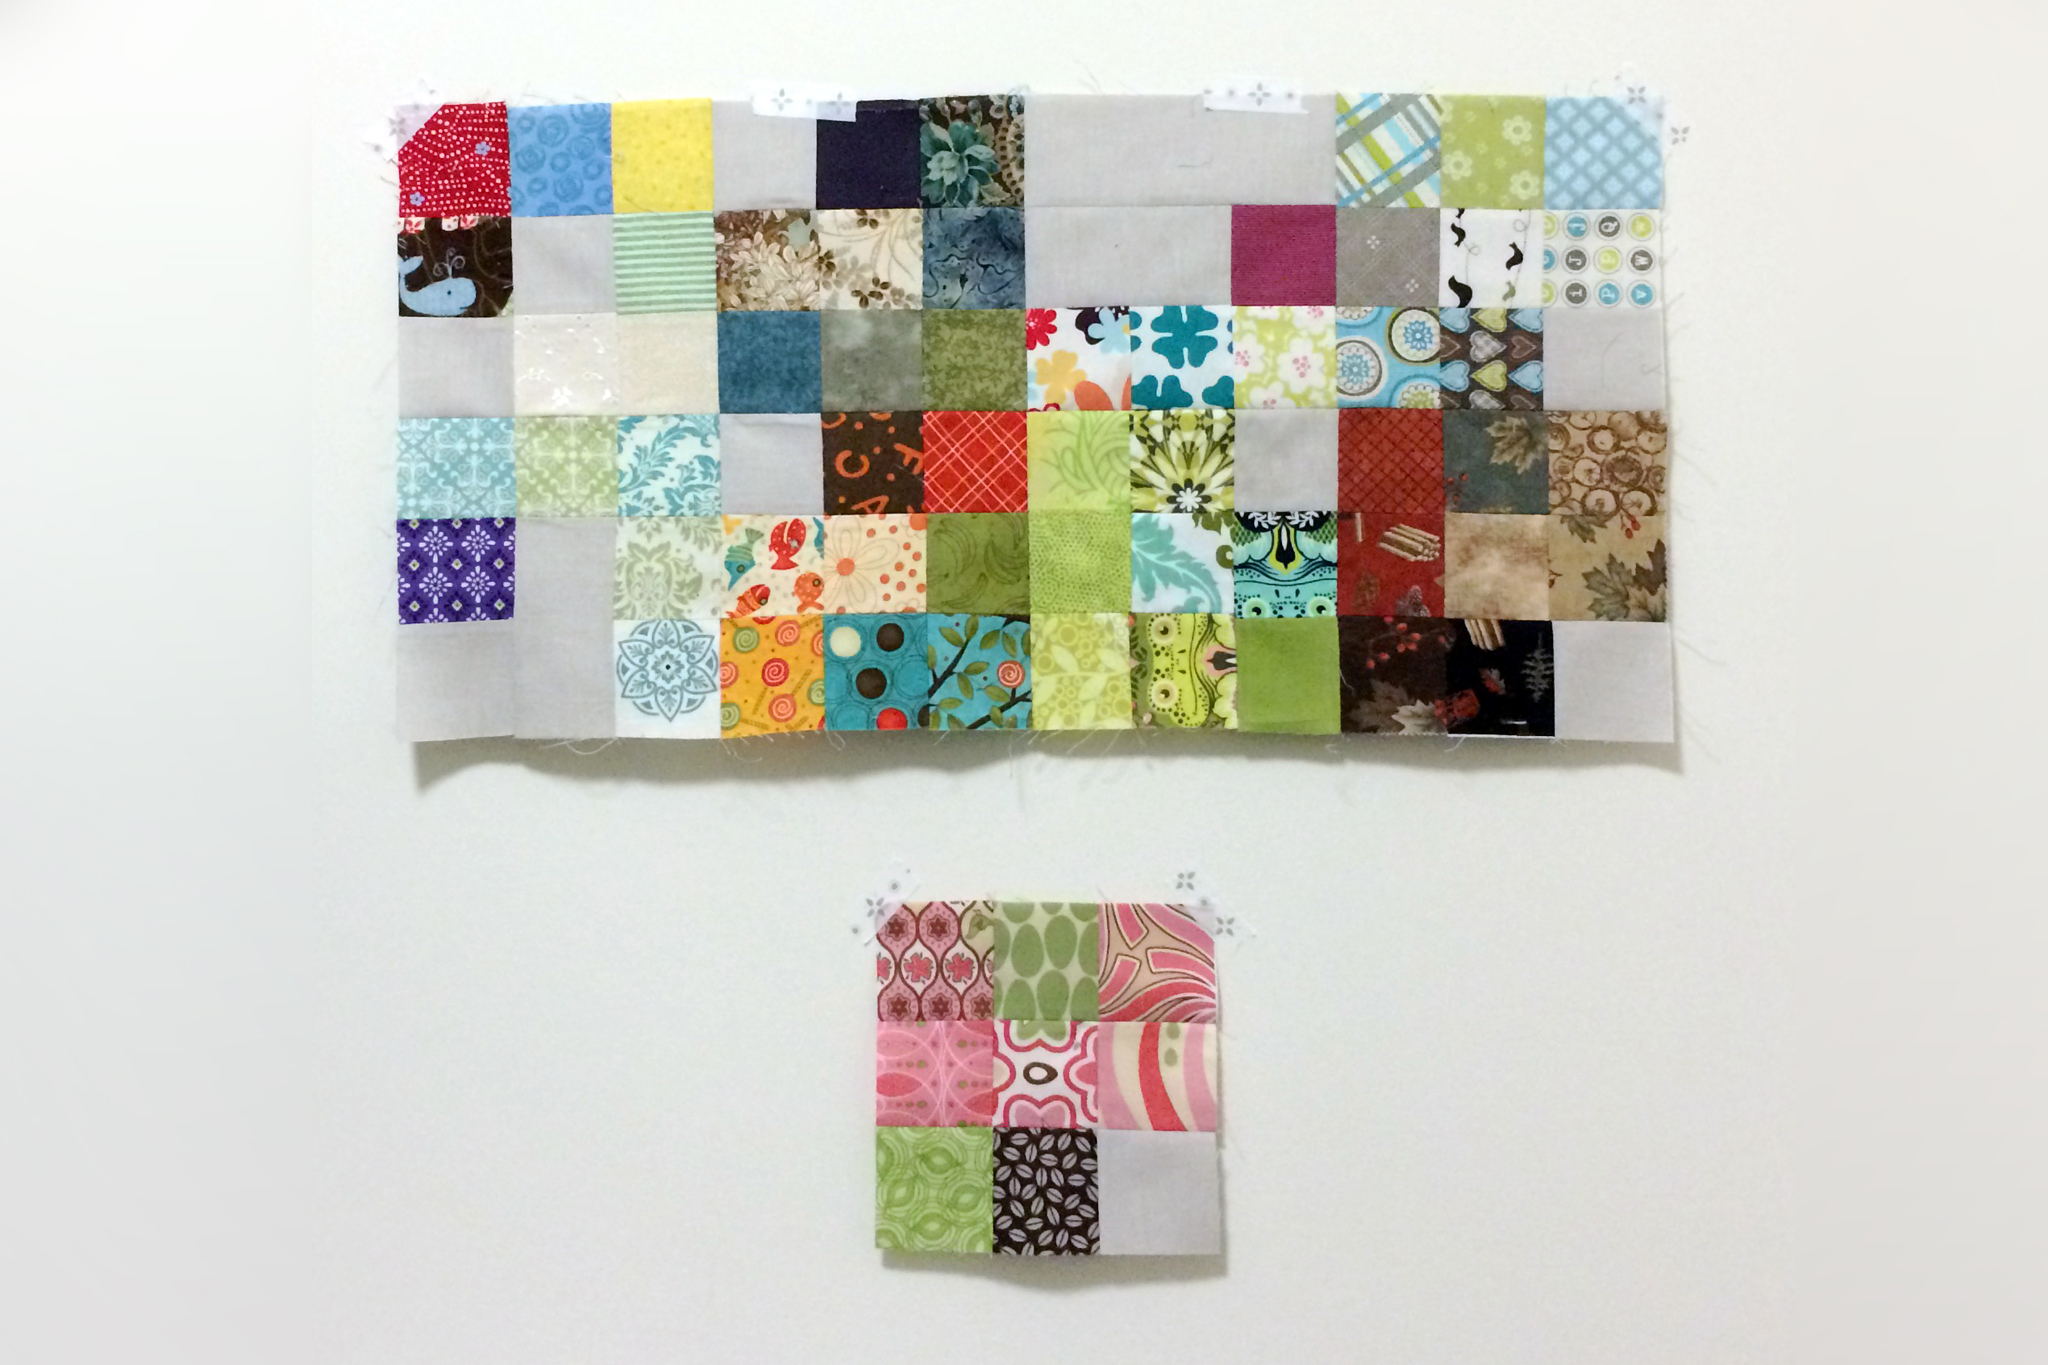
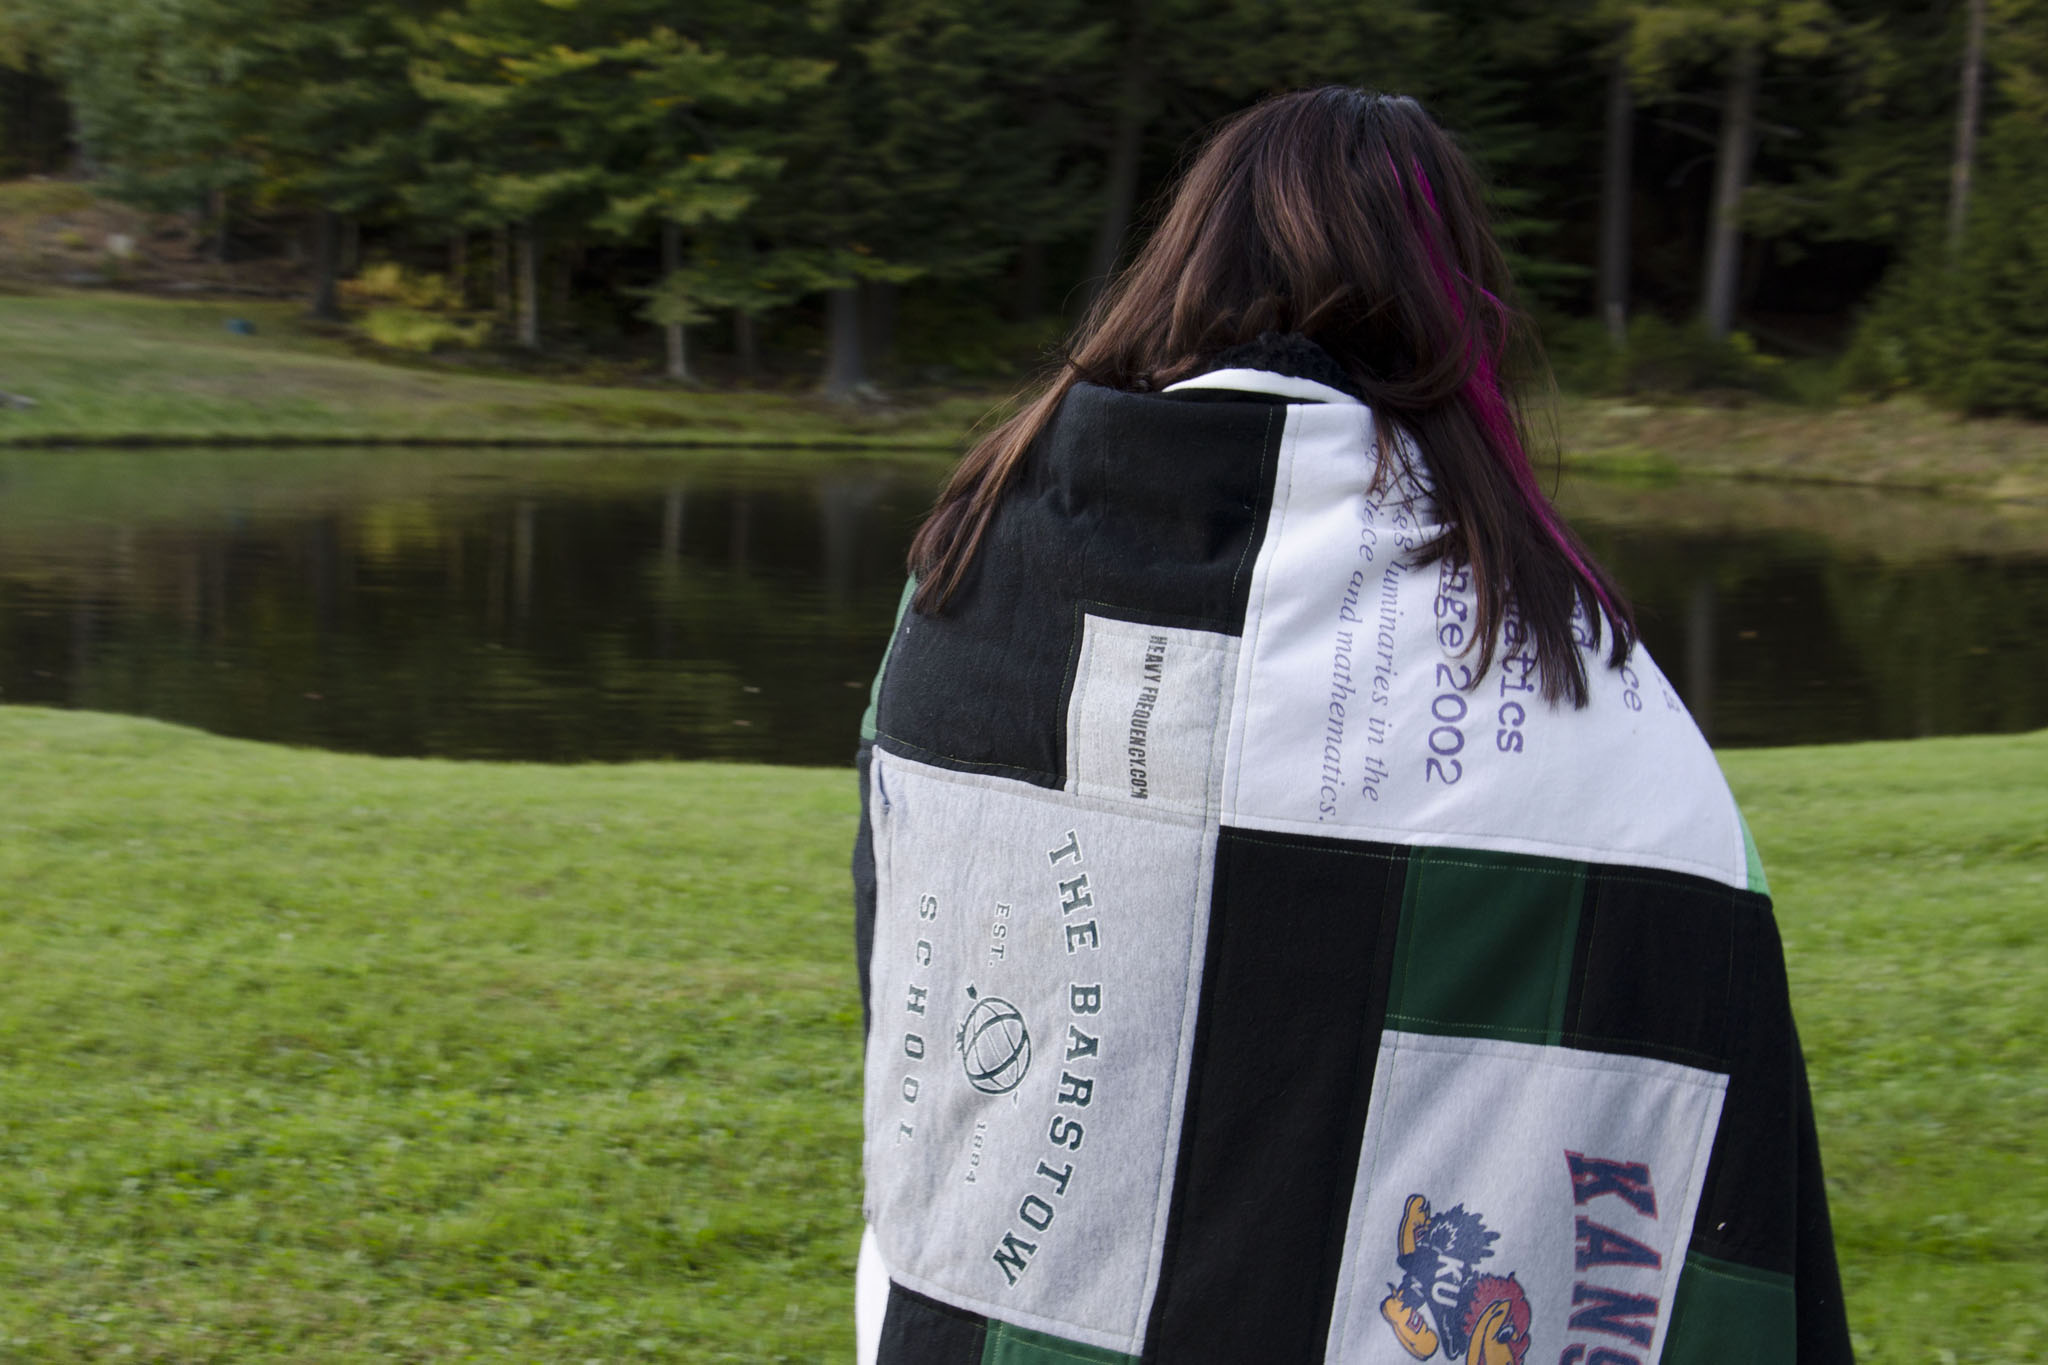
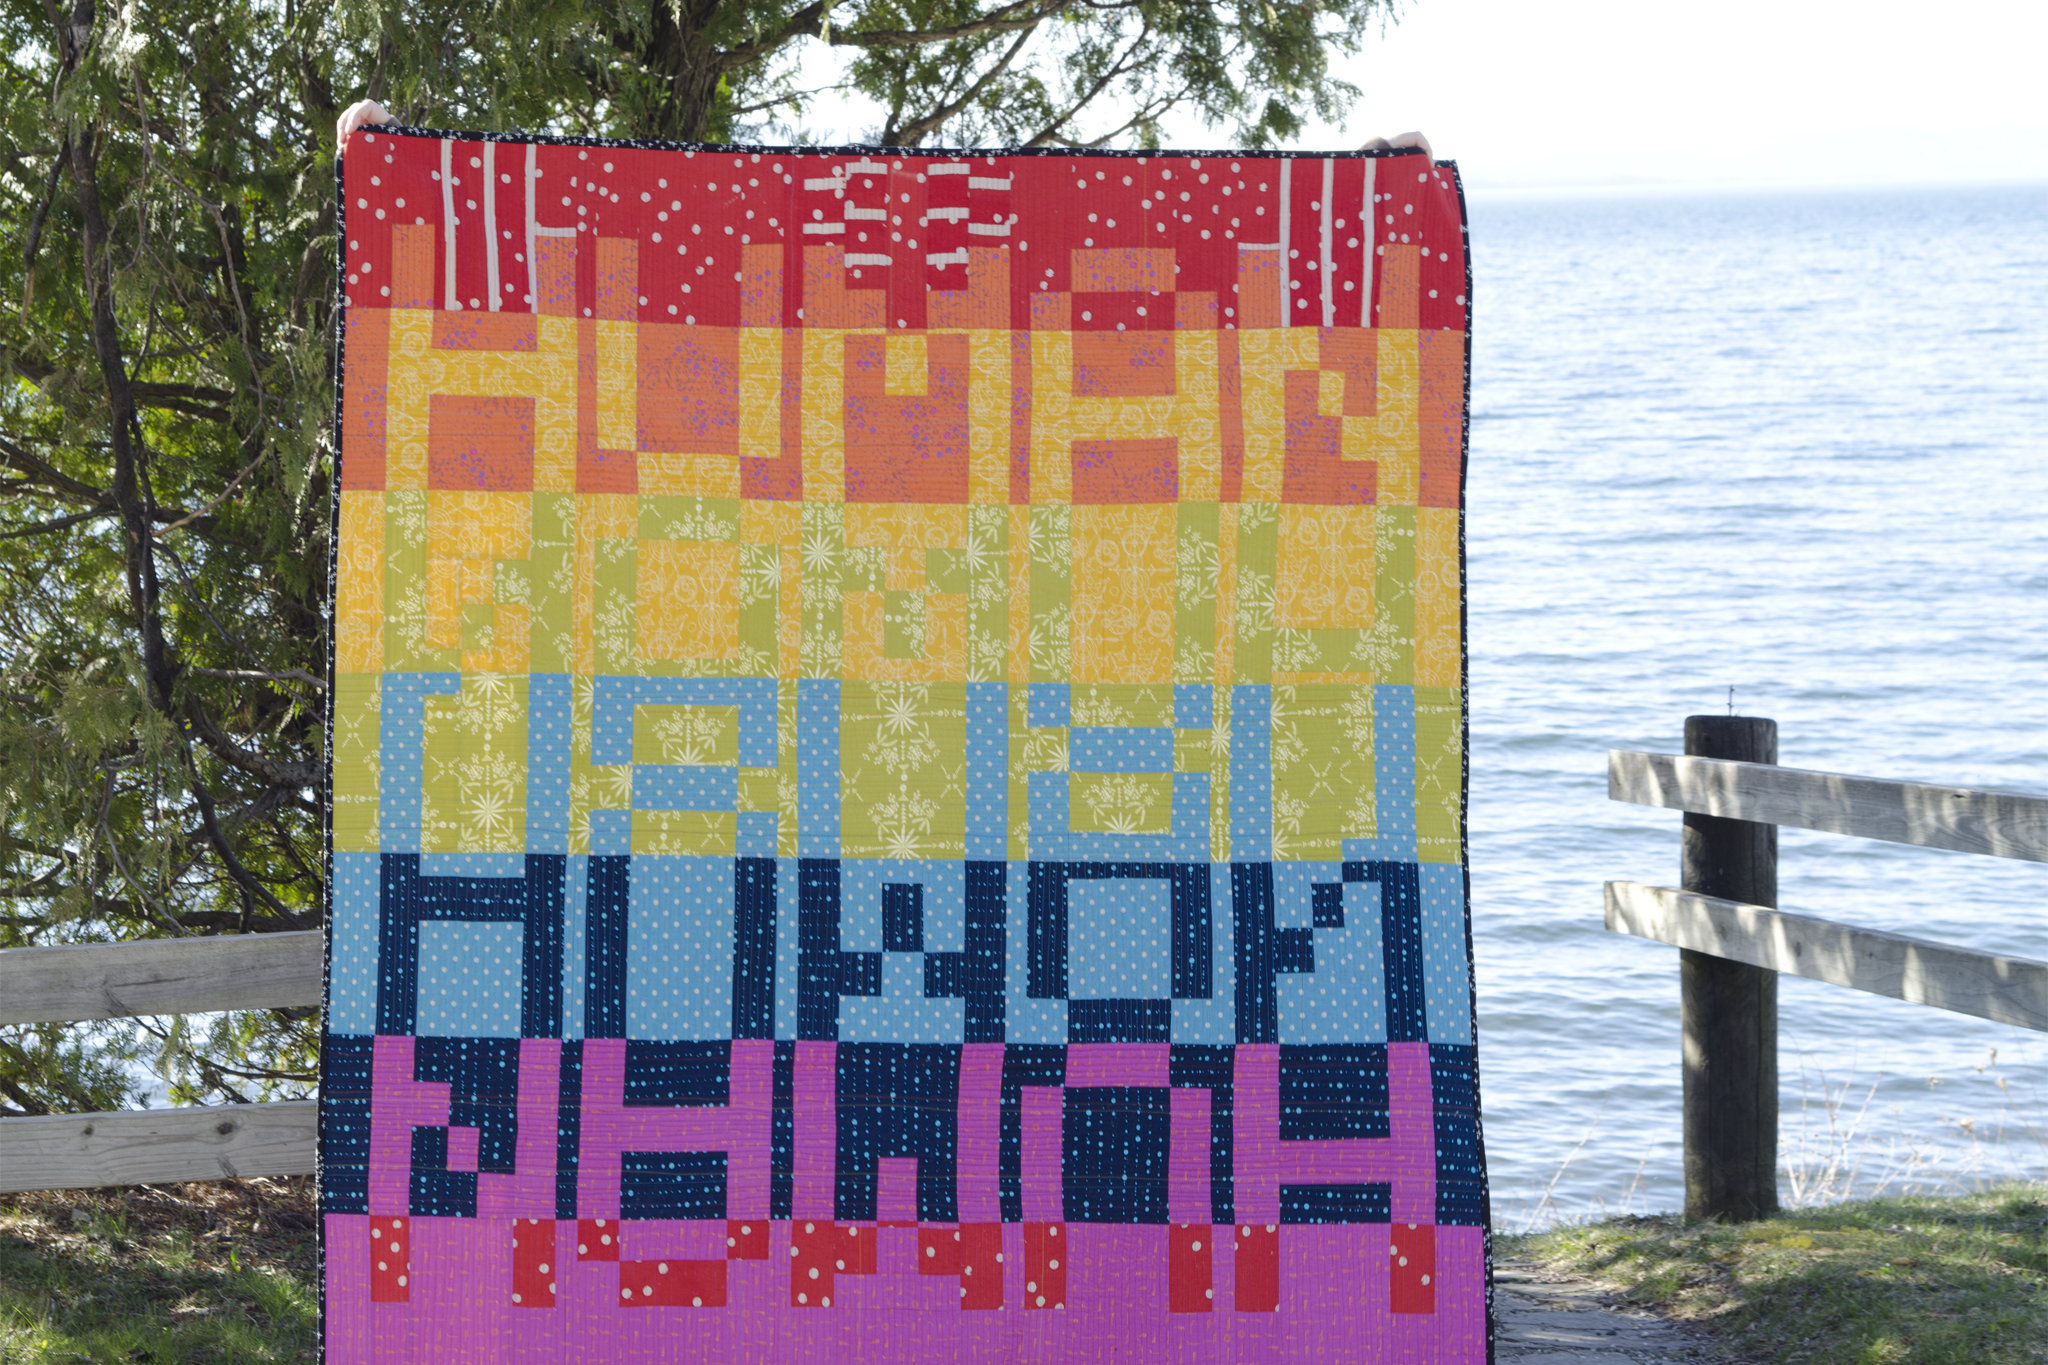
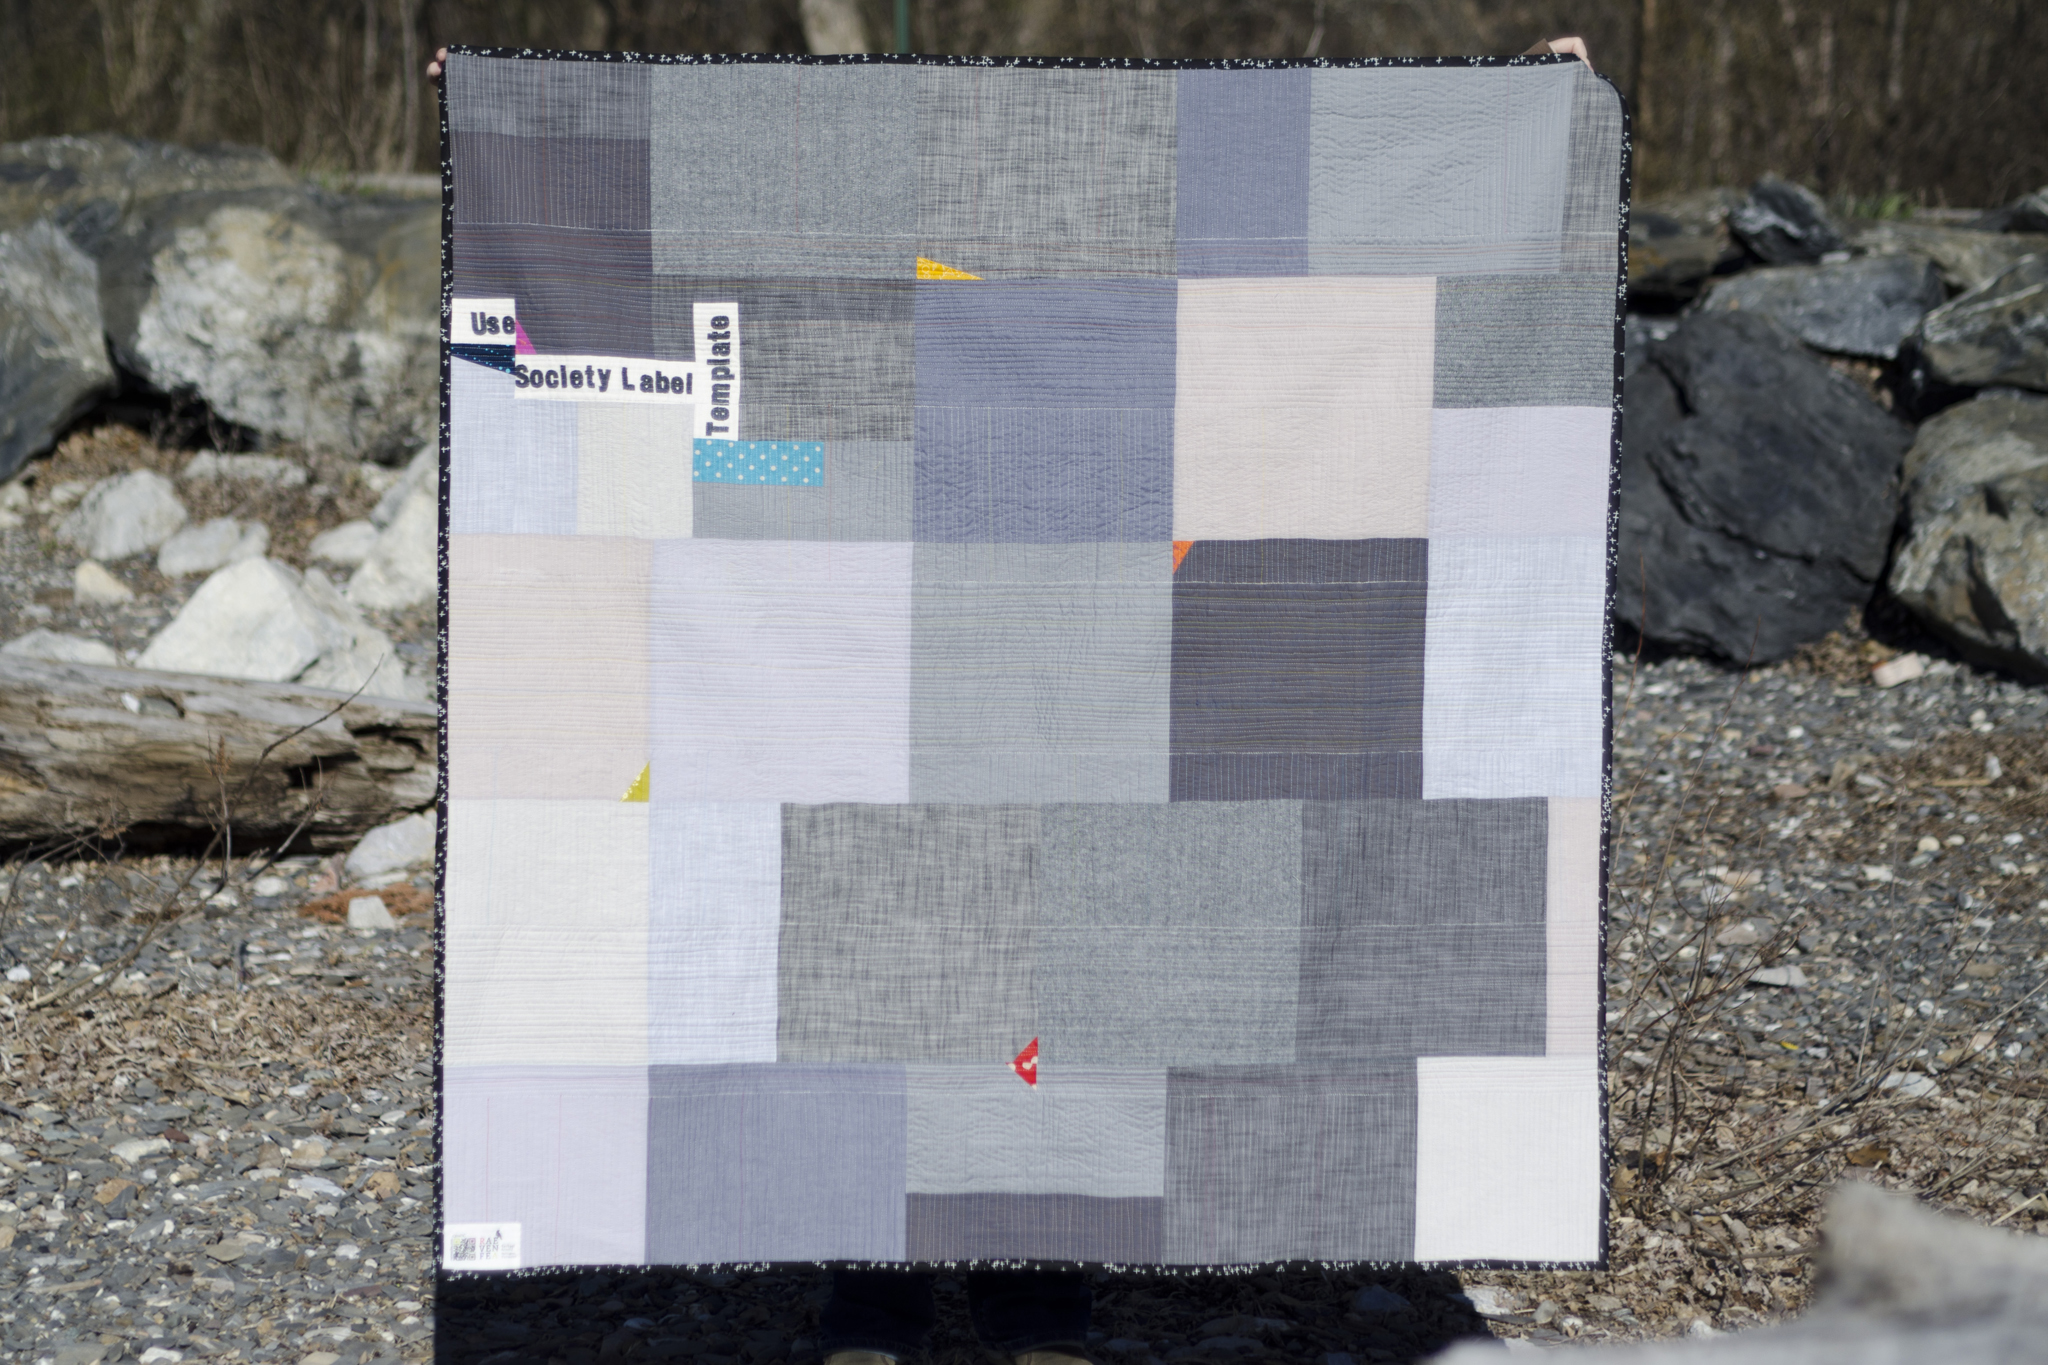
In between piecing what I thought was the back of this quilt and preparing a wholecloth front, I changed my mind about what was what and how I should do the front (back?). The black-on-white embroidery from the wholecloth edge was cut out and pieced into many shades of gray and a few leftovers from the front. The original embroidery was meant to parody the instruction text on inkjet printer adhesive label sheets, with the original quilting plan to mimic those label outlines and various words one might print to label someone. Now it’s fractured.

“Human” (back), Rachael Arnold, April 2016, 56″x56″. Photo by Carl Pfranger.

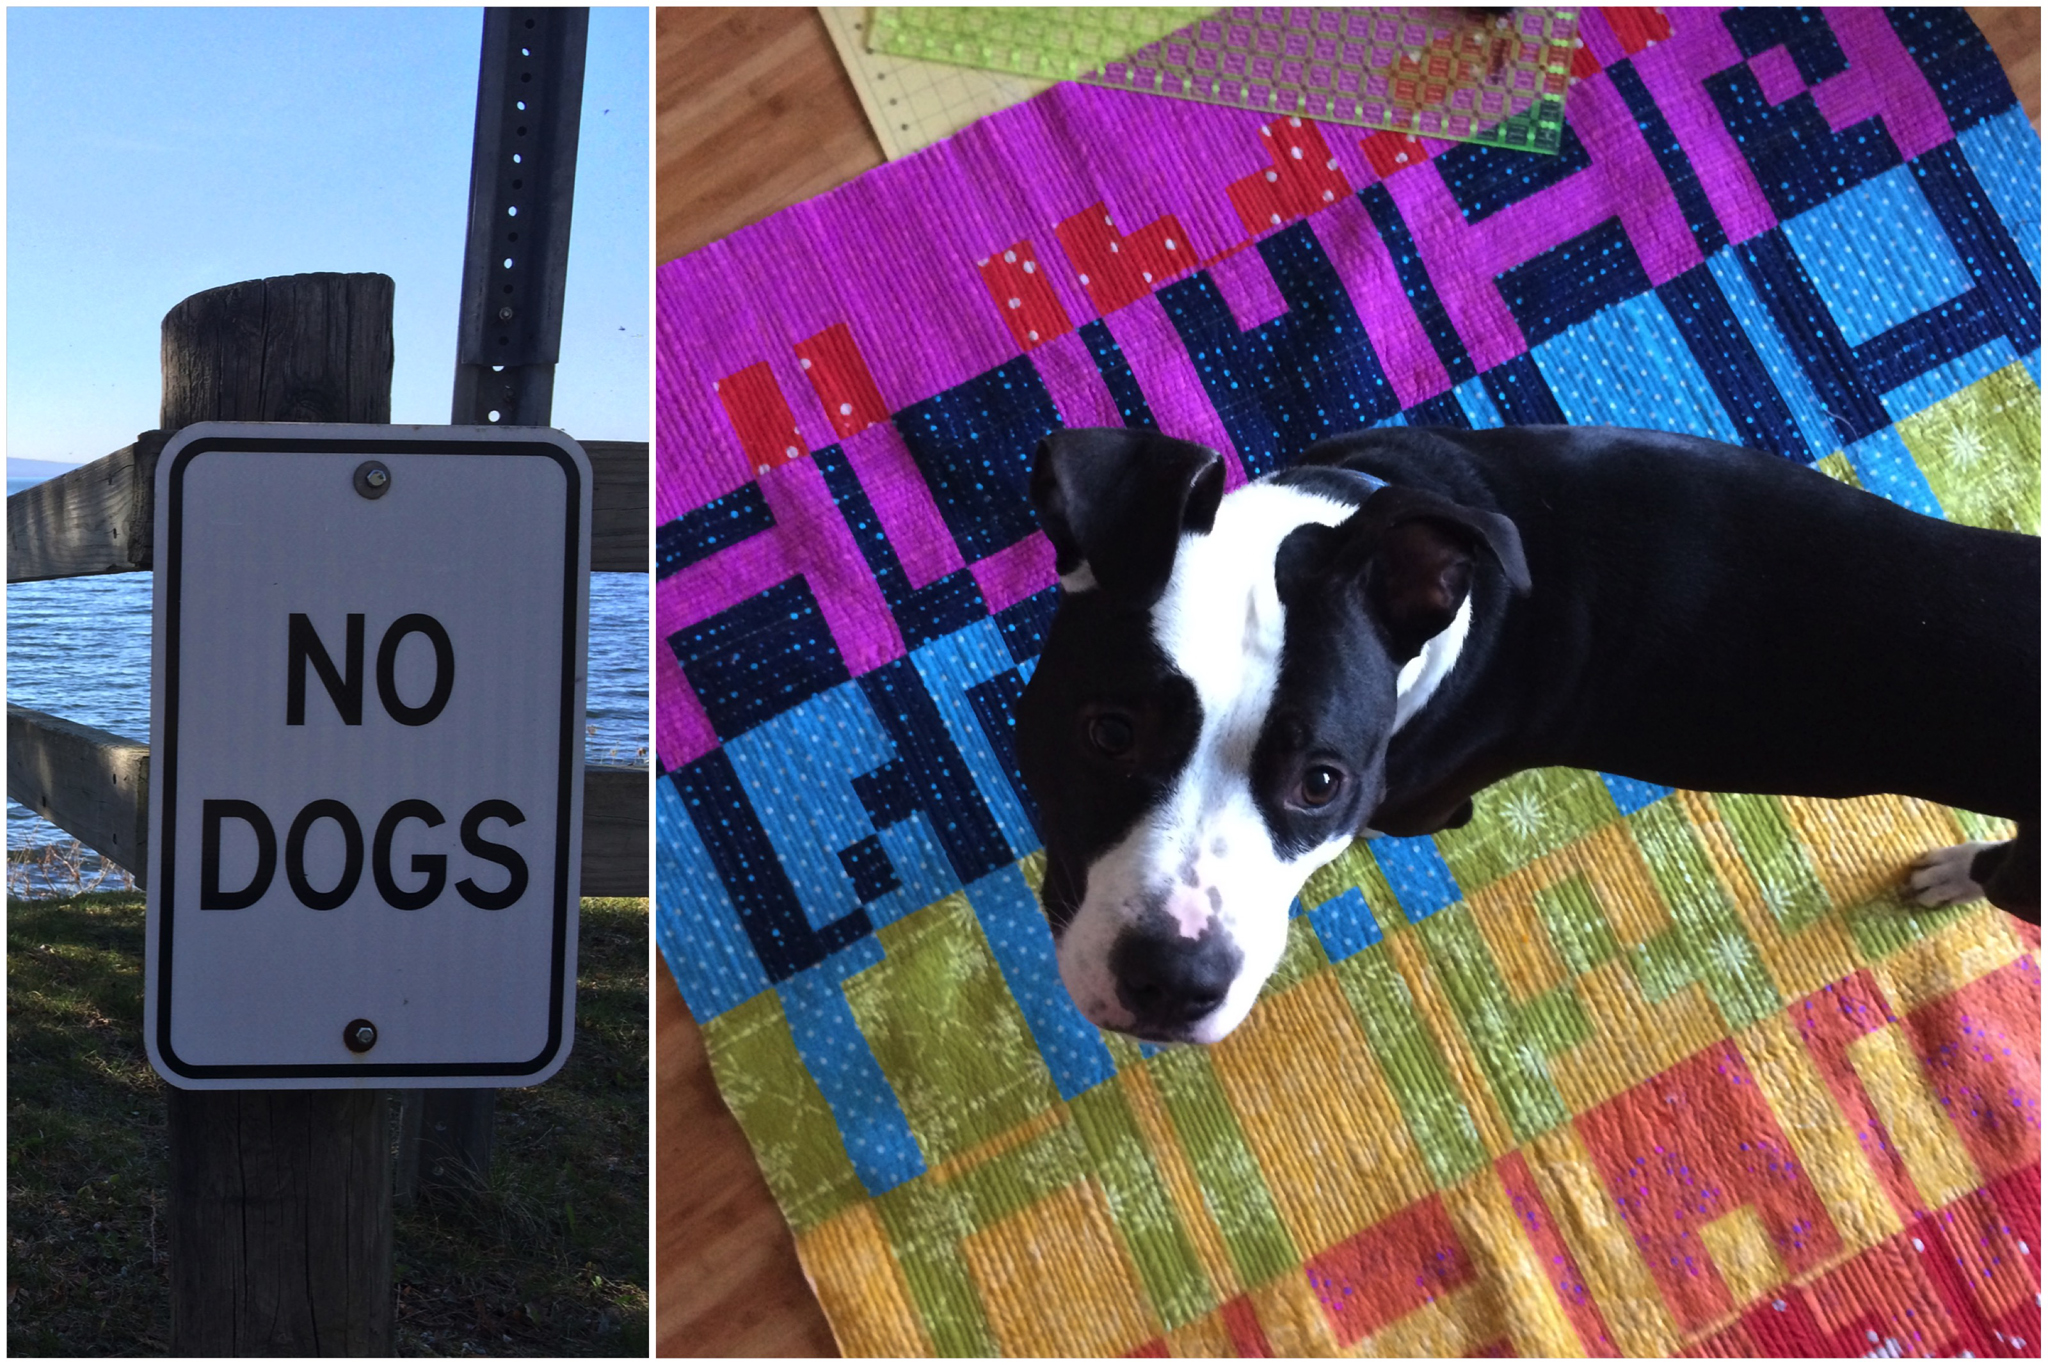
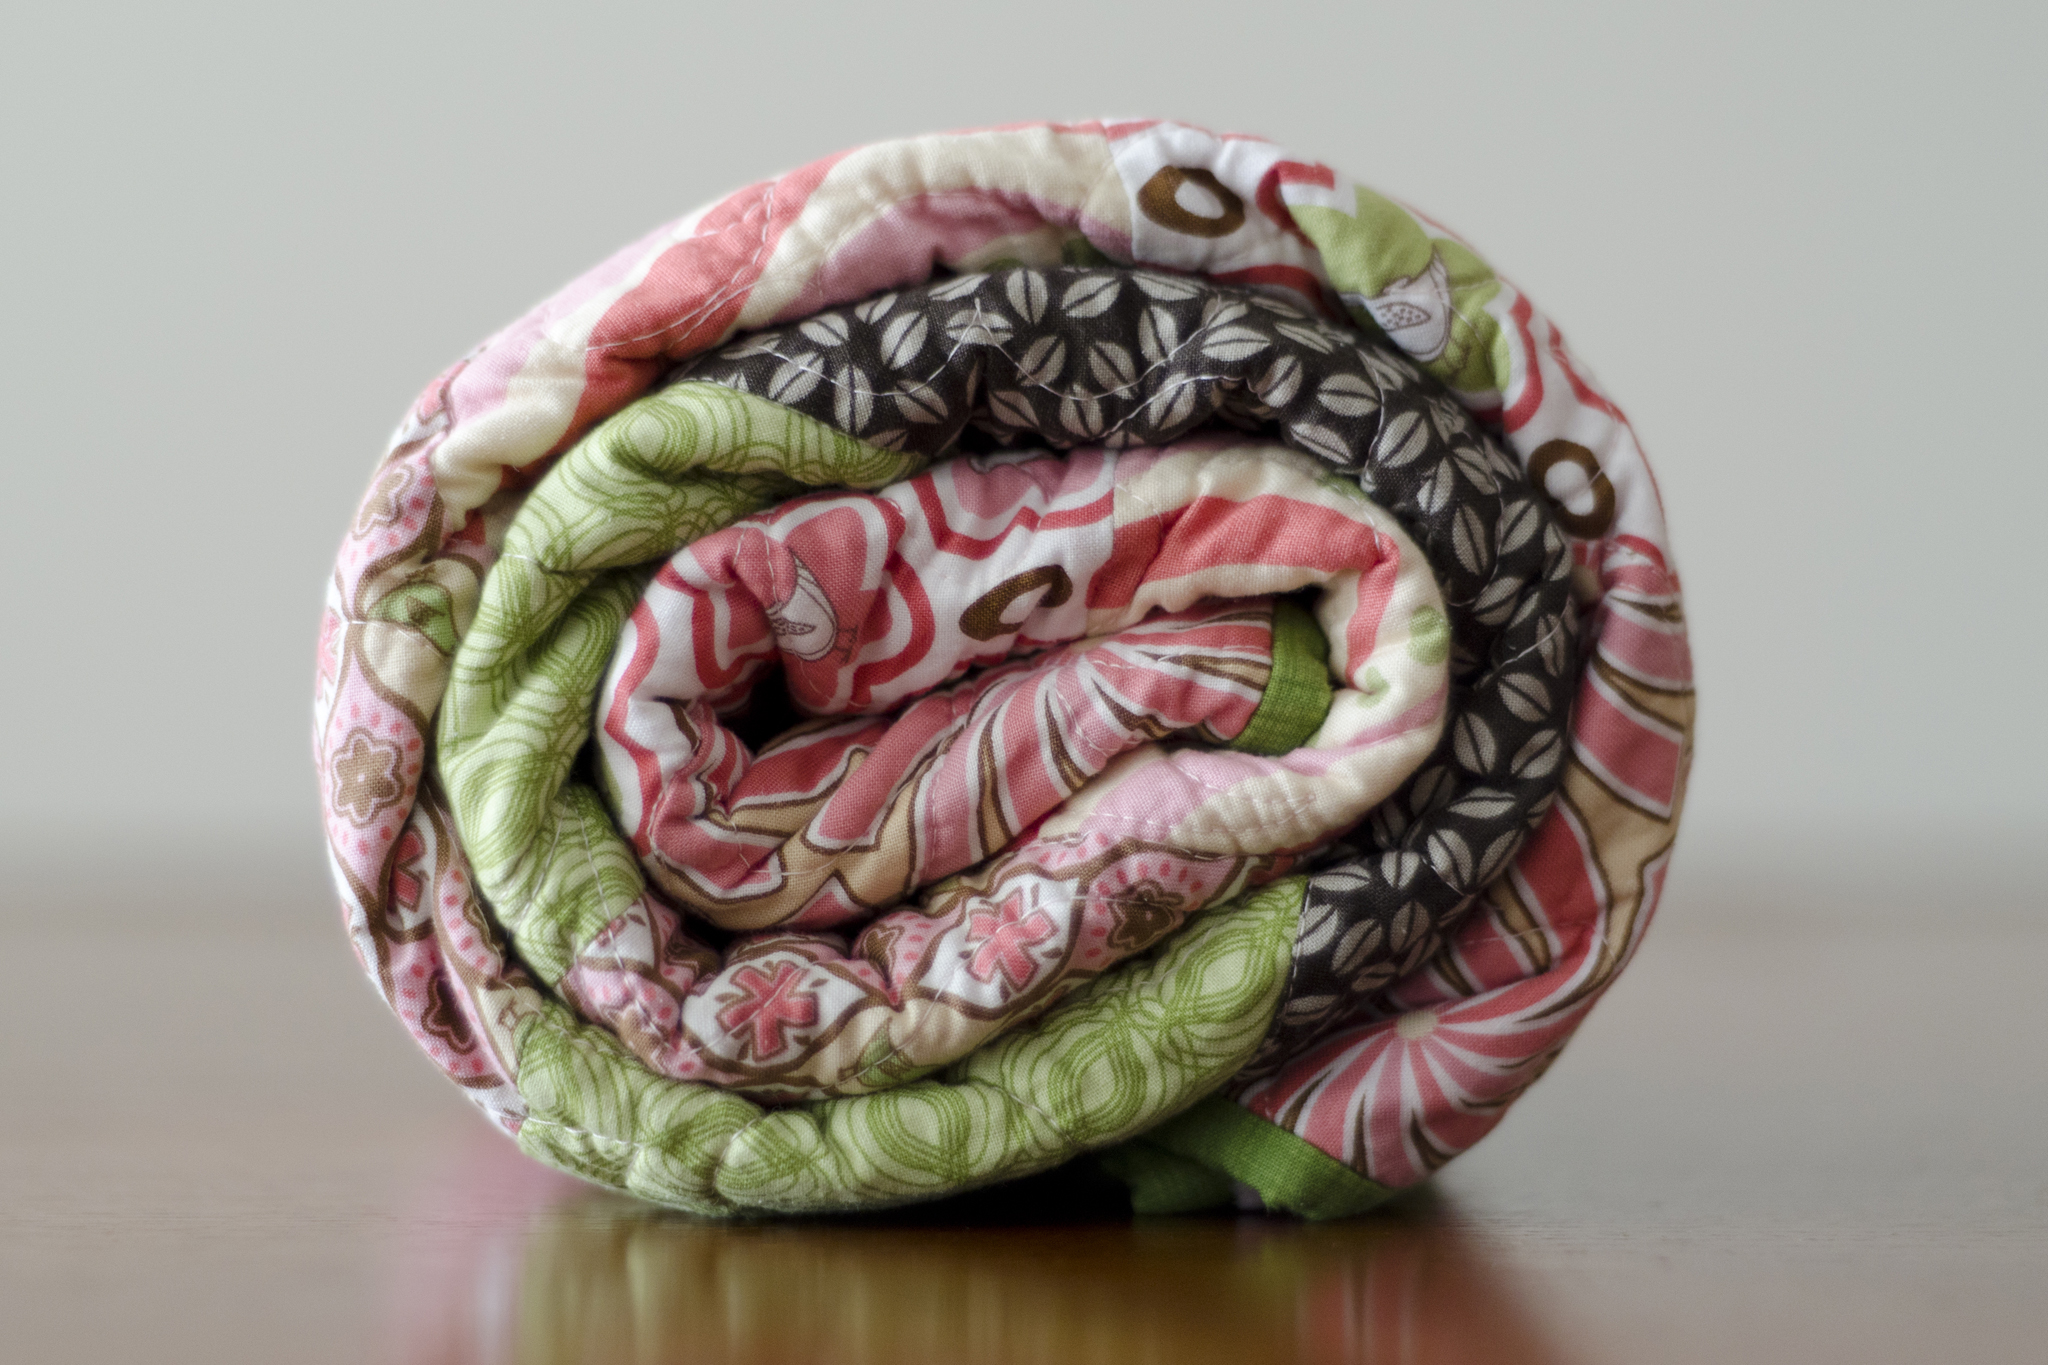
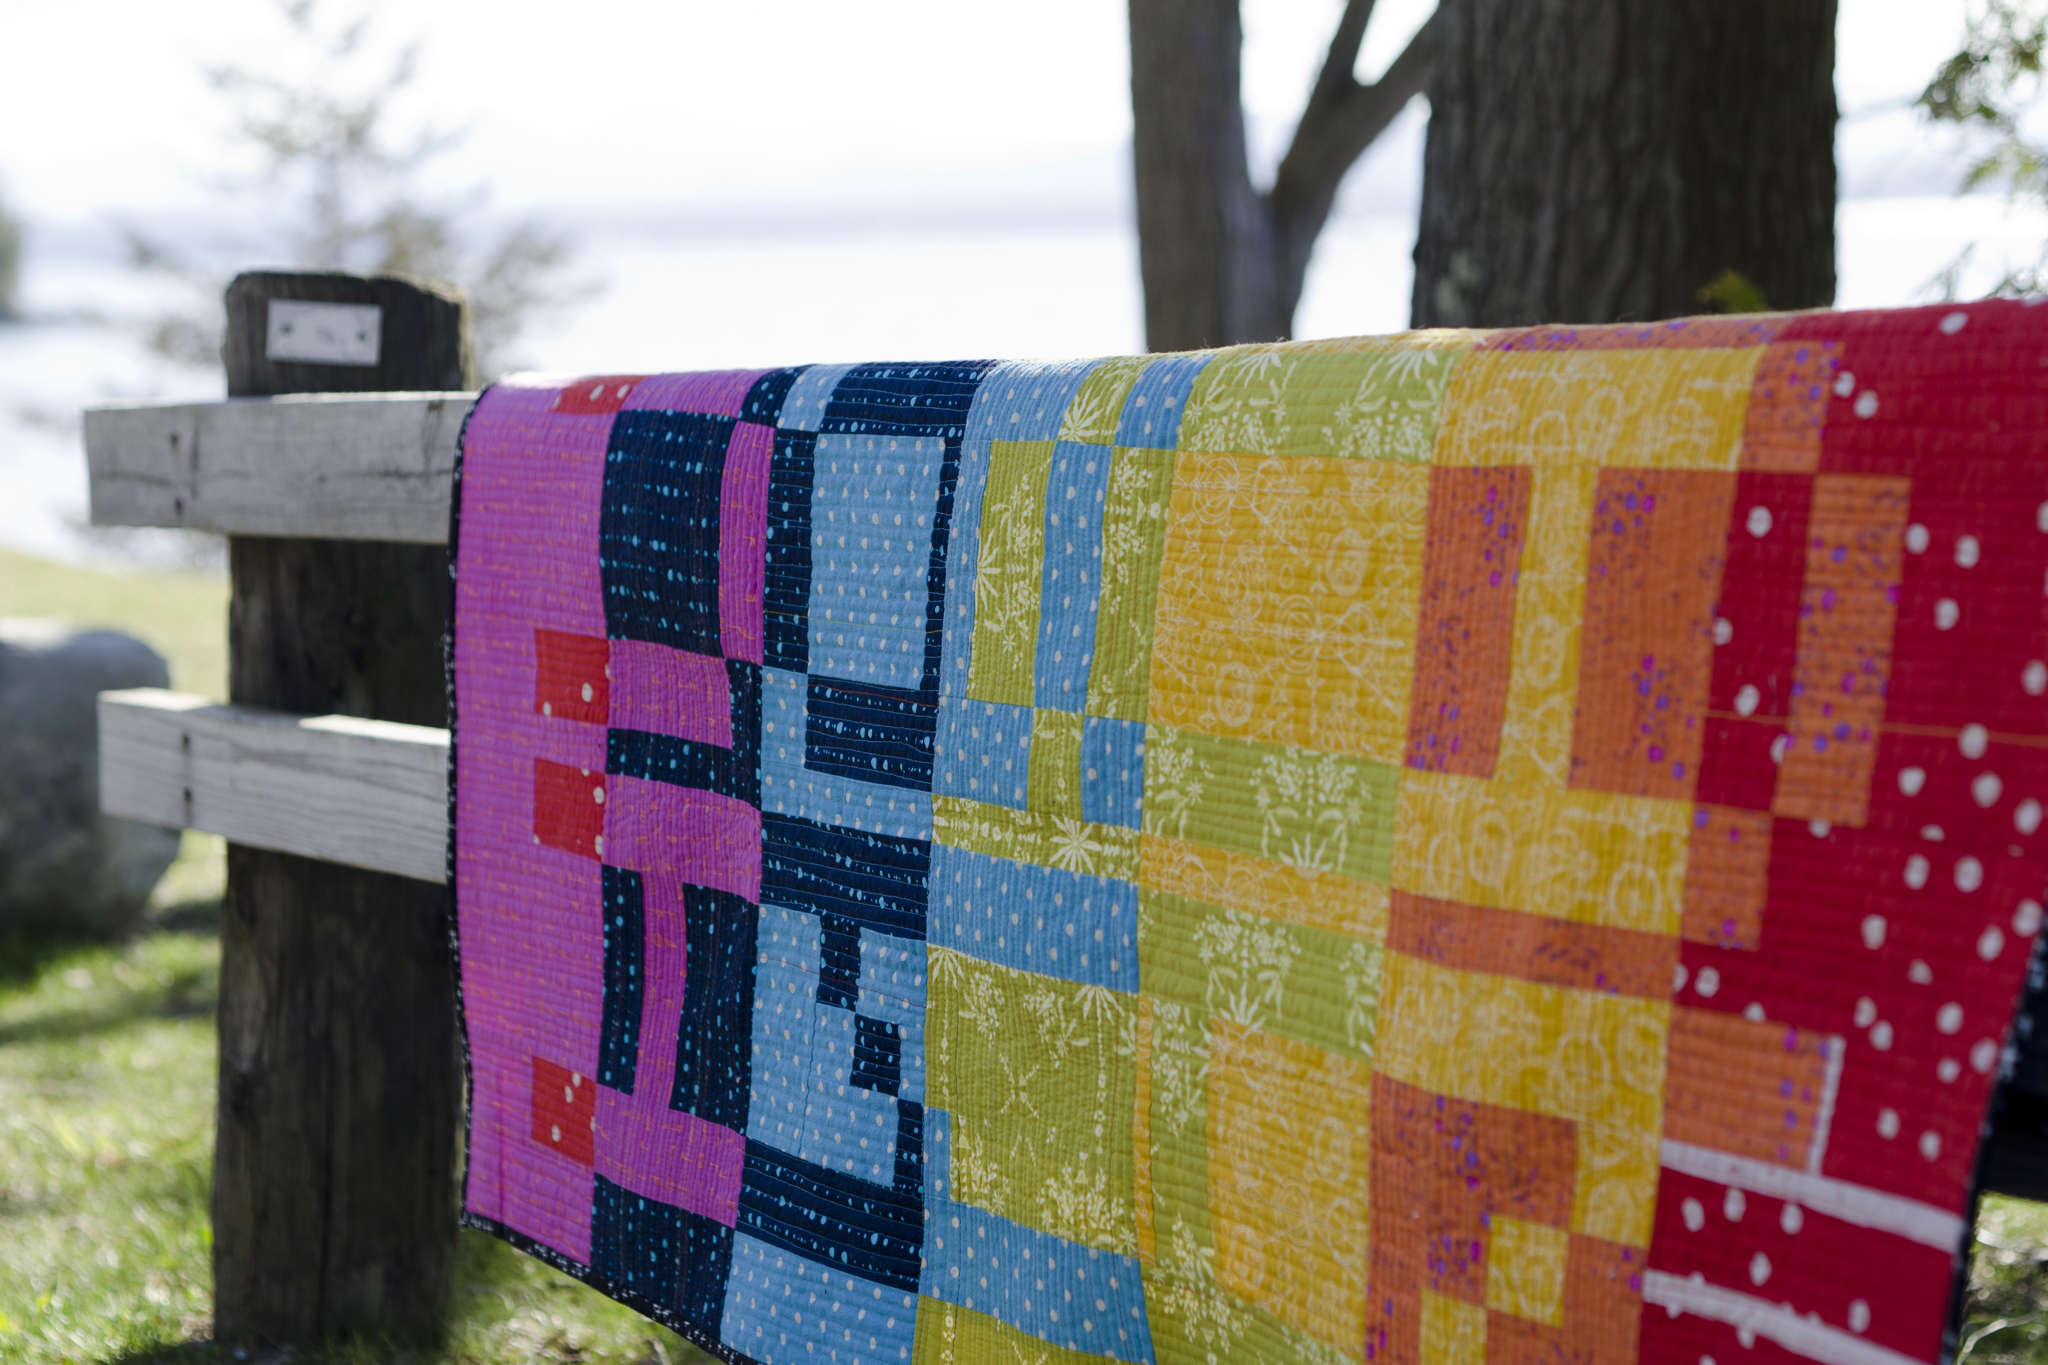
The other side is pieced, based on a pixelated font reading ‘human’. It’s busy by design, the words flipped and mirrored, blending between sections, flowing through the rainbow. There’s no right side up or up side down on this side.

“Human”, Rachael Arnold, April 2016, 56″x56″. Photo by Carl Pfranger.

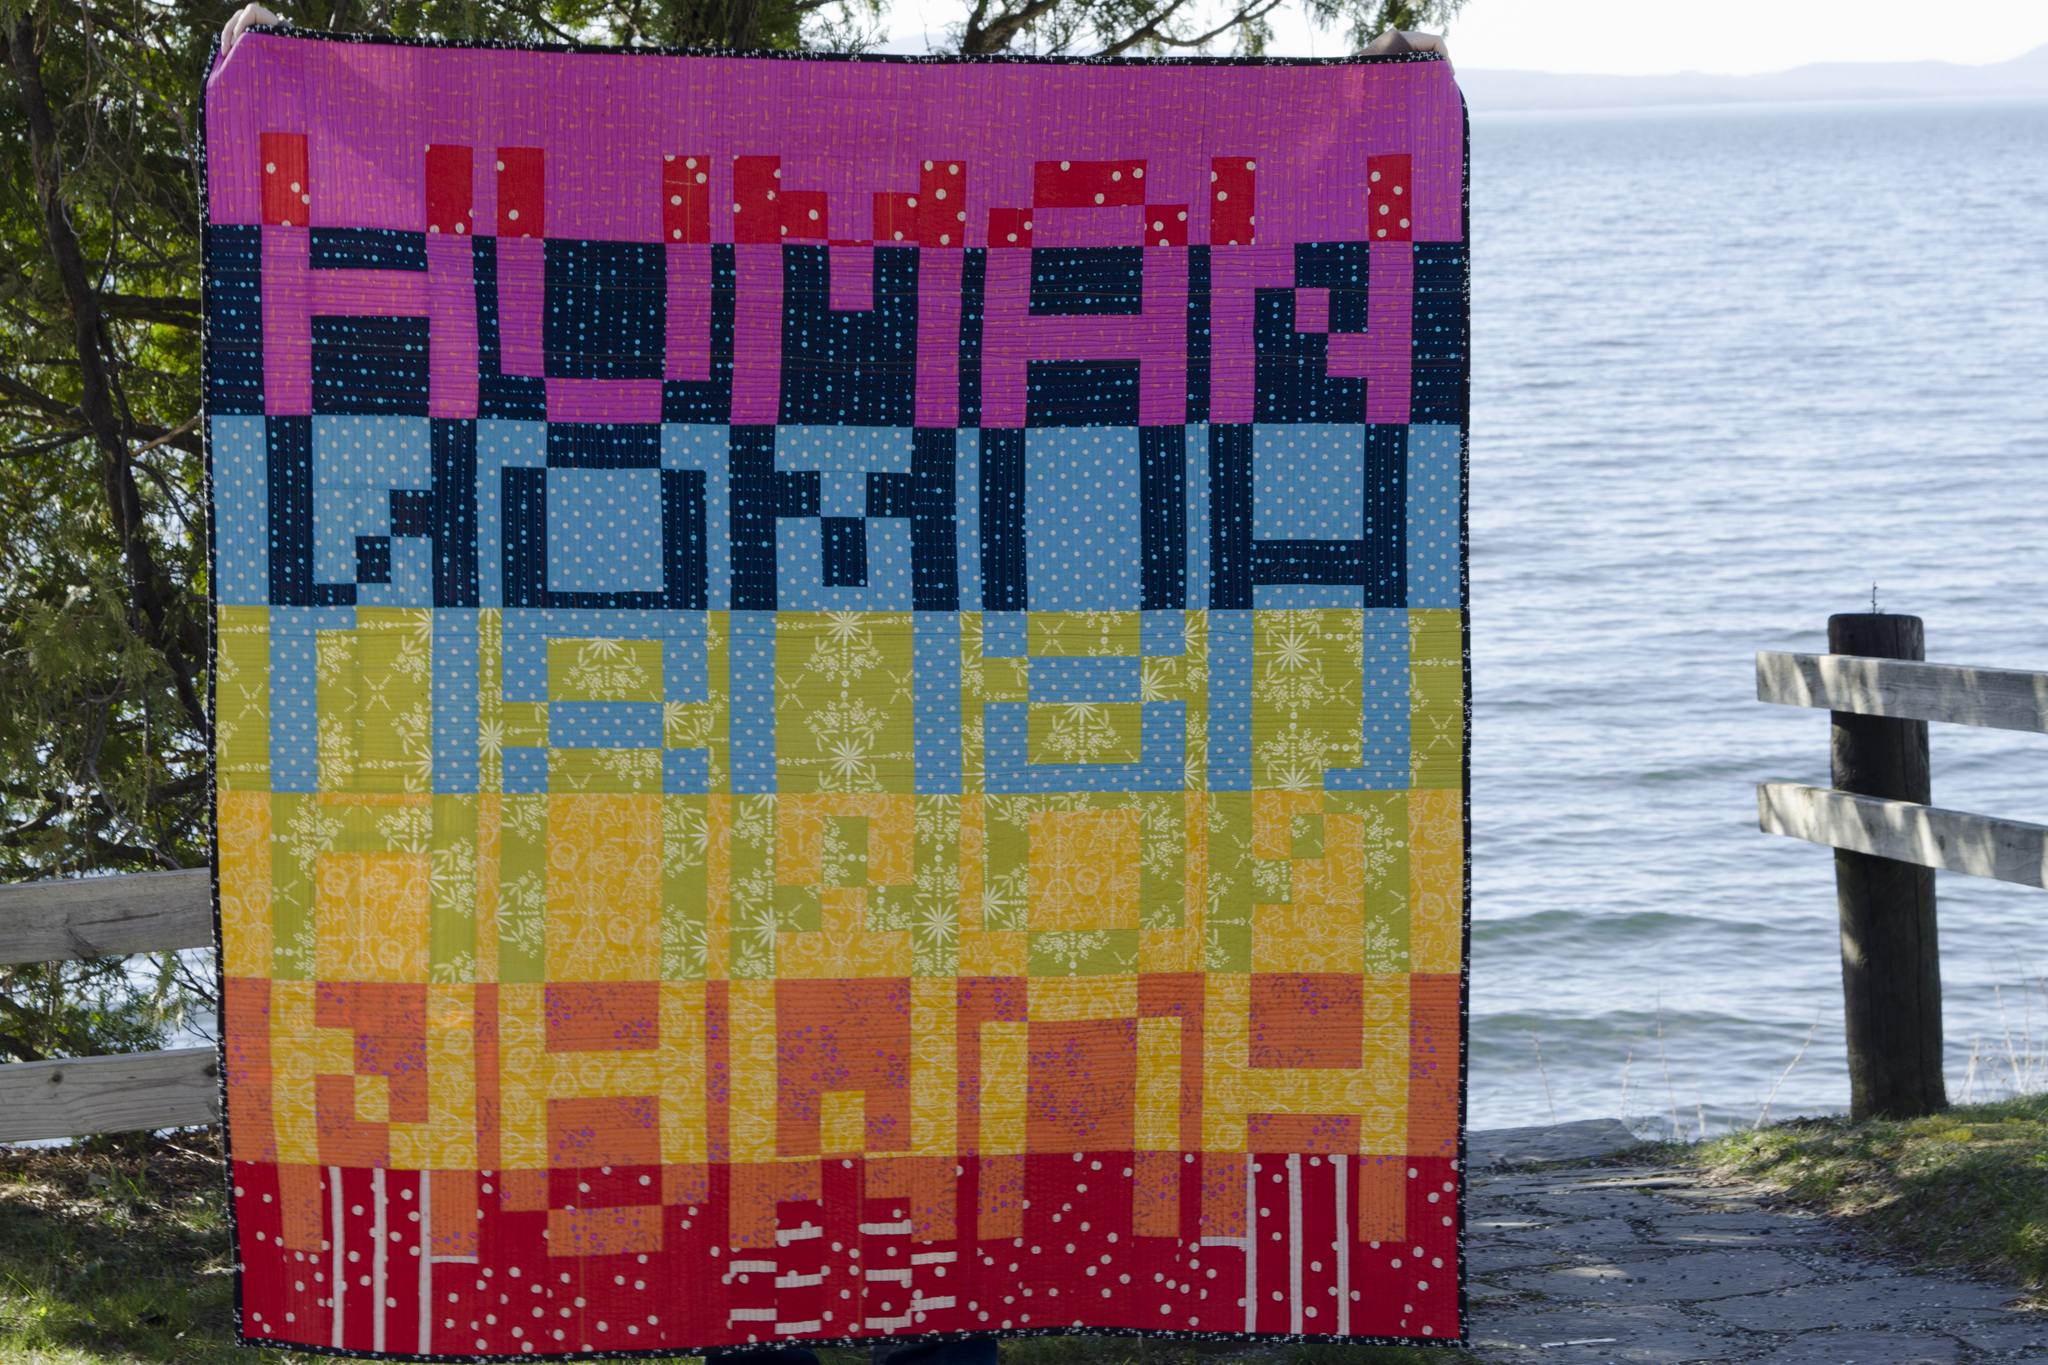
From #lovewins to the passage of North Carolina’s HB2 and similar proposed bills across the nation (if there’s any question, I celebrated the former and decry the latter), discrimination based on how we label ourselves and each other has been on my mind daily in the past year (coincidentally the span of time from this quilt’s conceptualization to completion).

“Human” (detail), Rachael Arnold, April 2016, 56″x56″. Photo by Carl Pfranger.
“Human” (Detail), Rachael Arnold, April 2016, 56″x56″. Photo by Carl Pfranger.

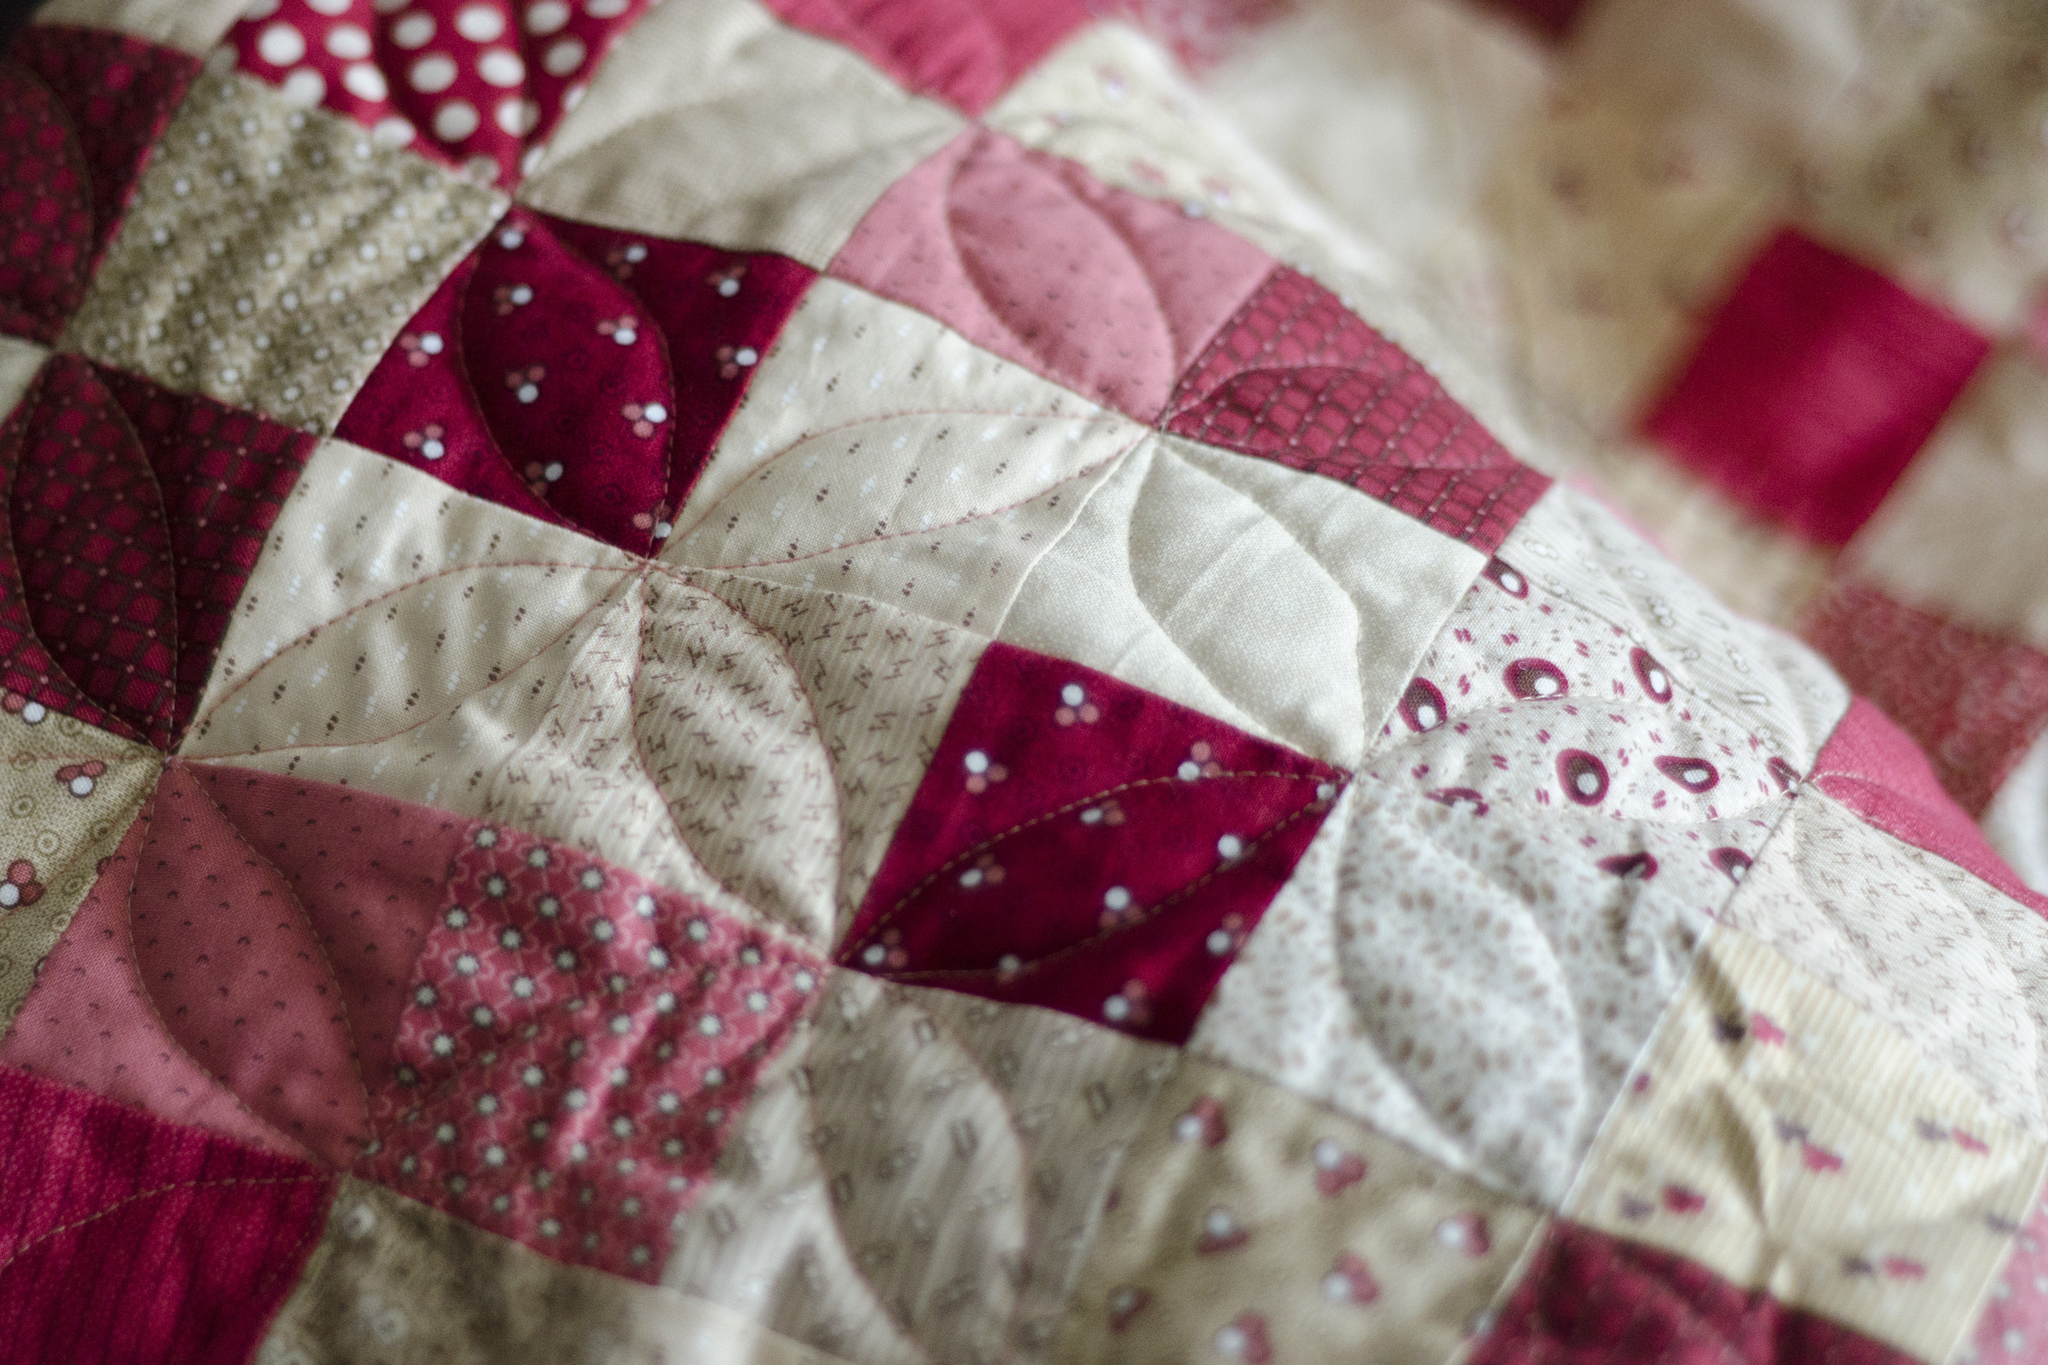
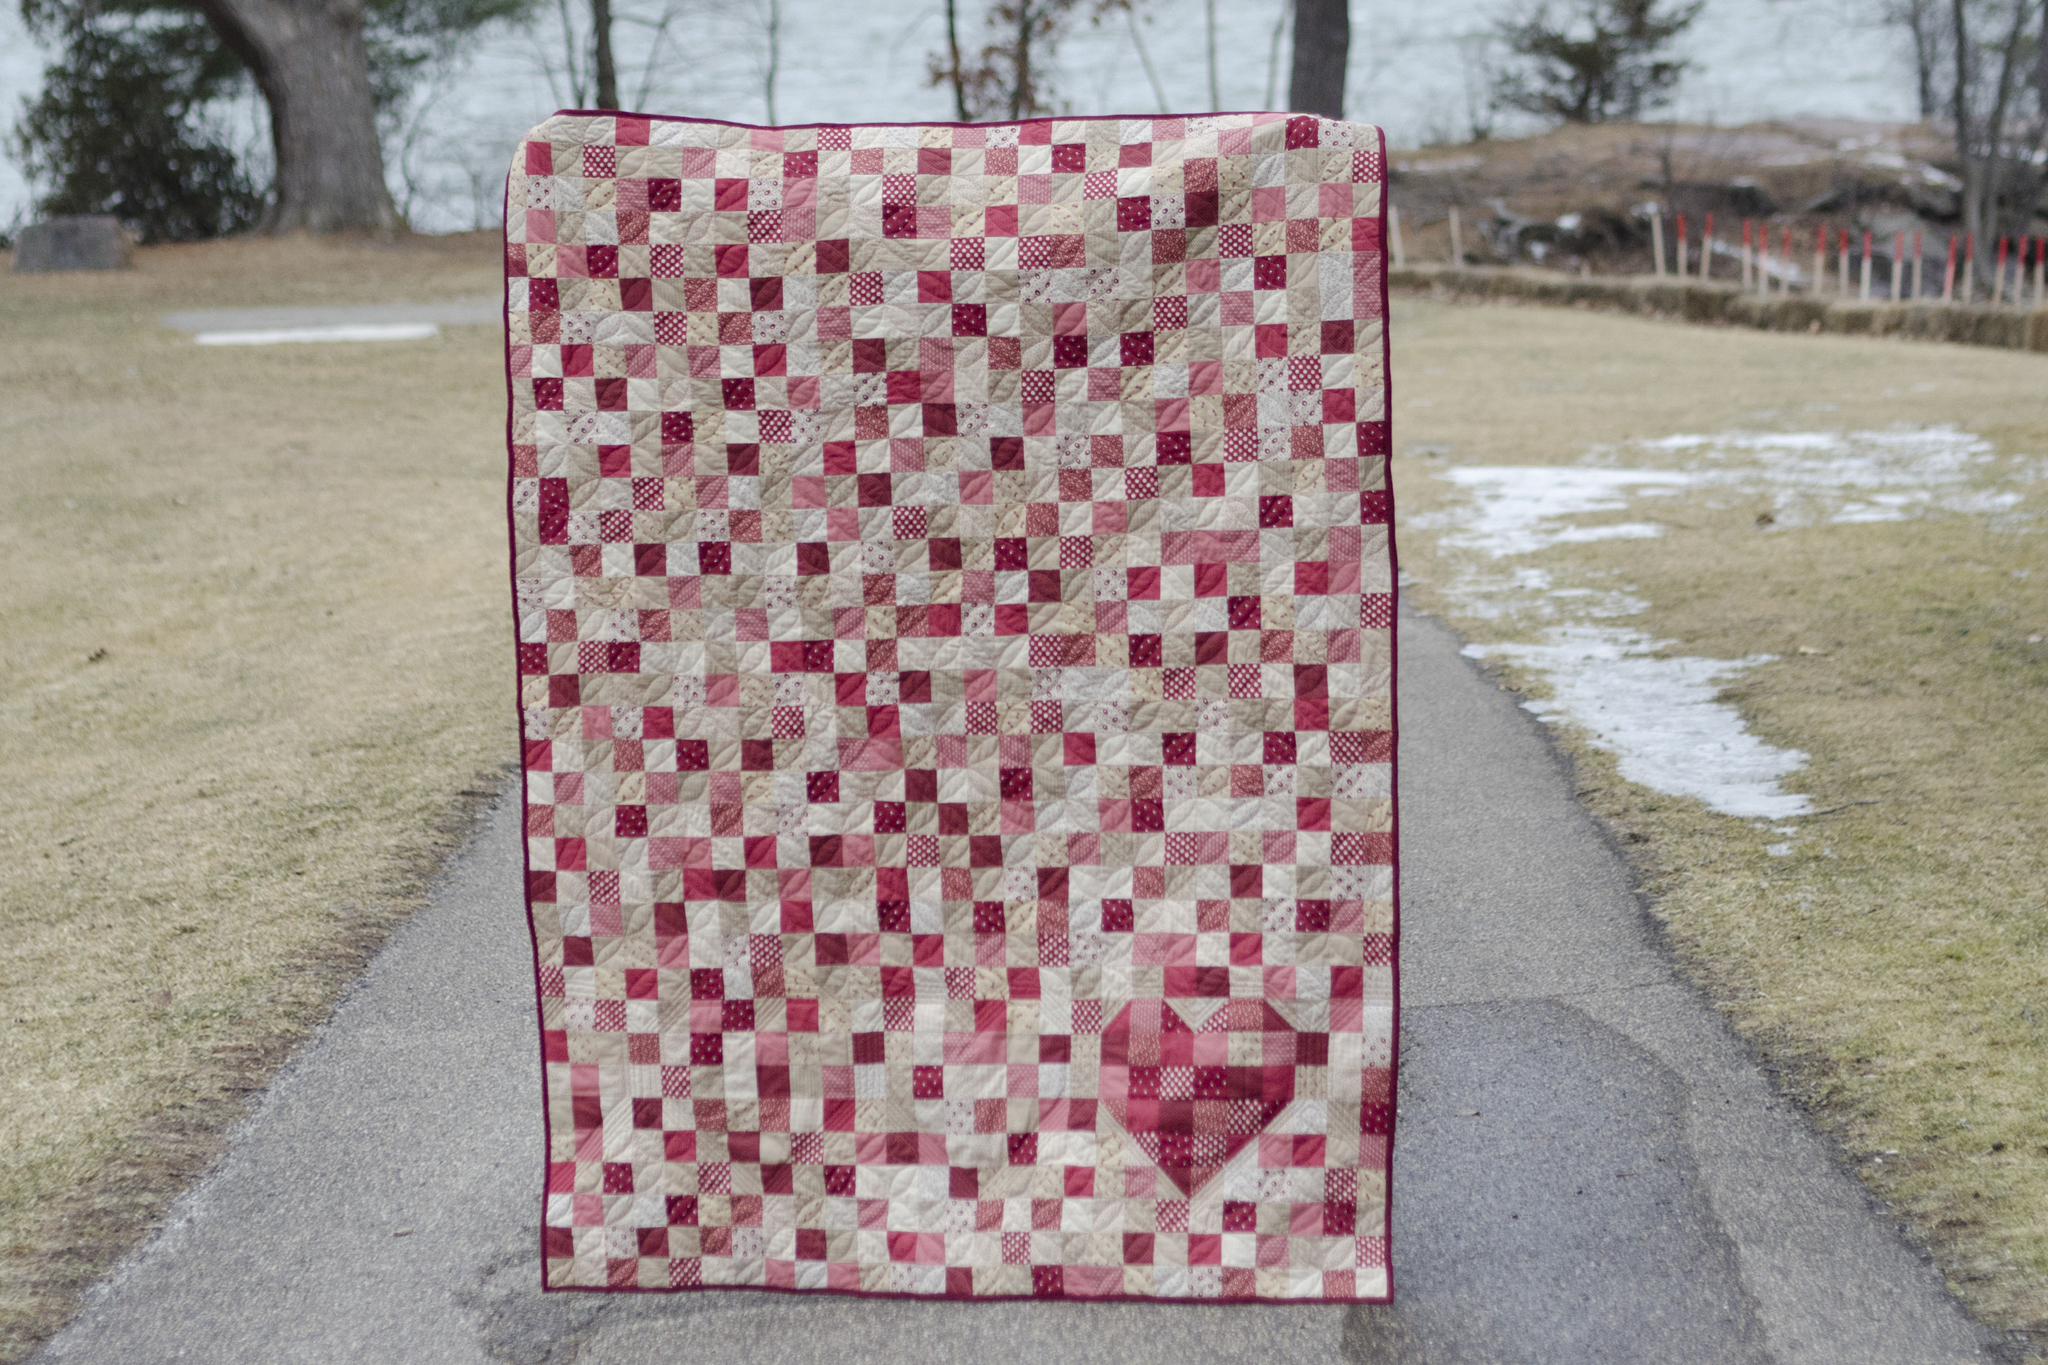
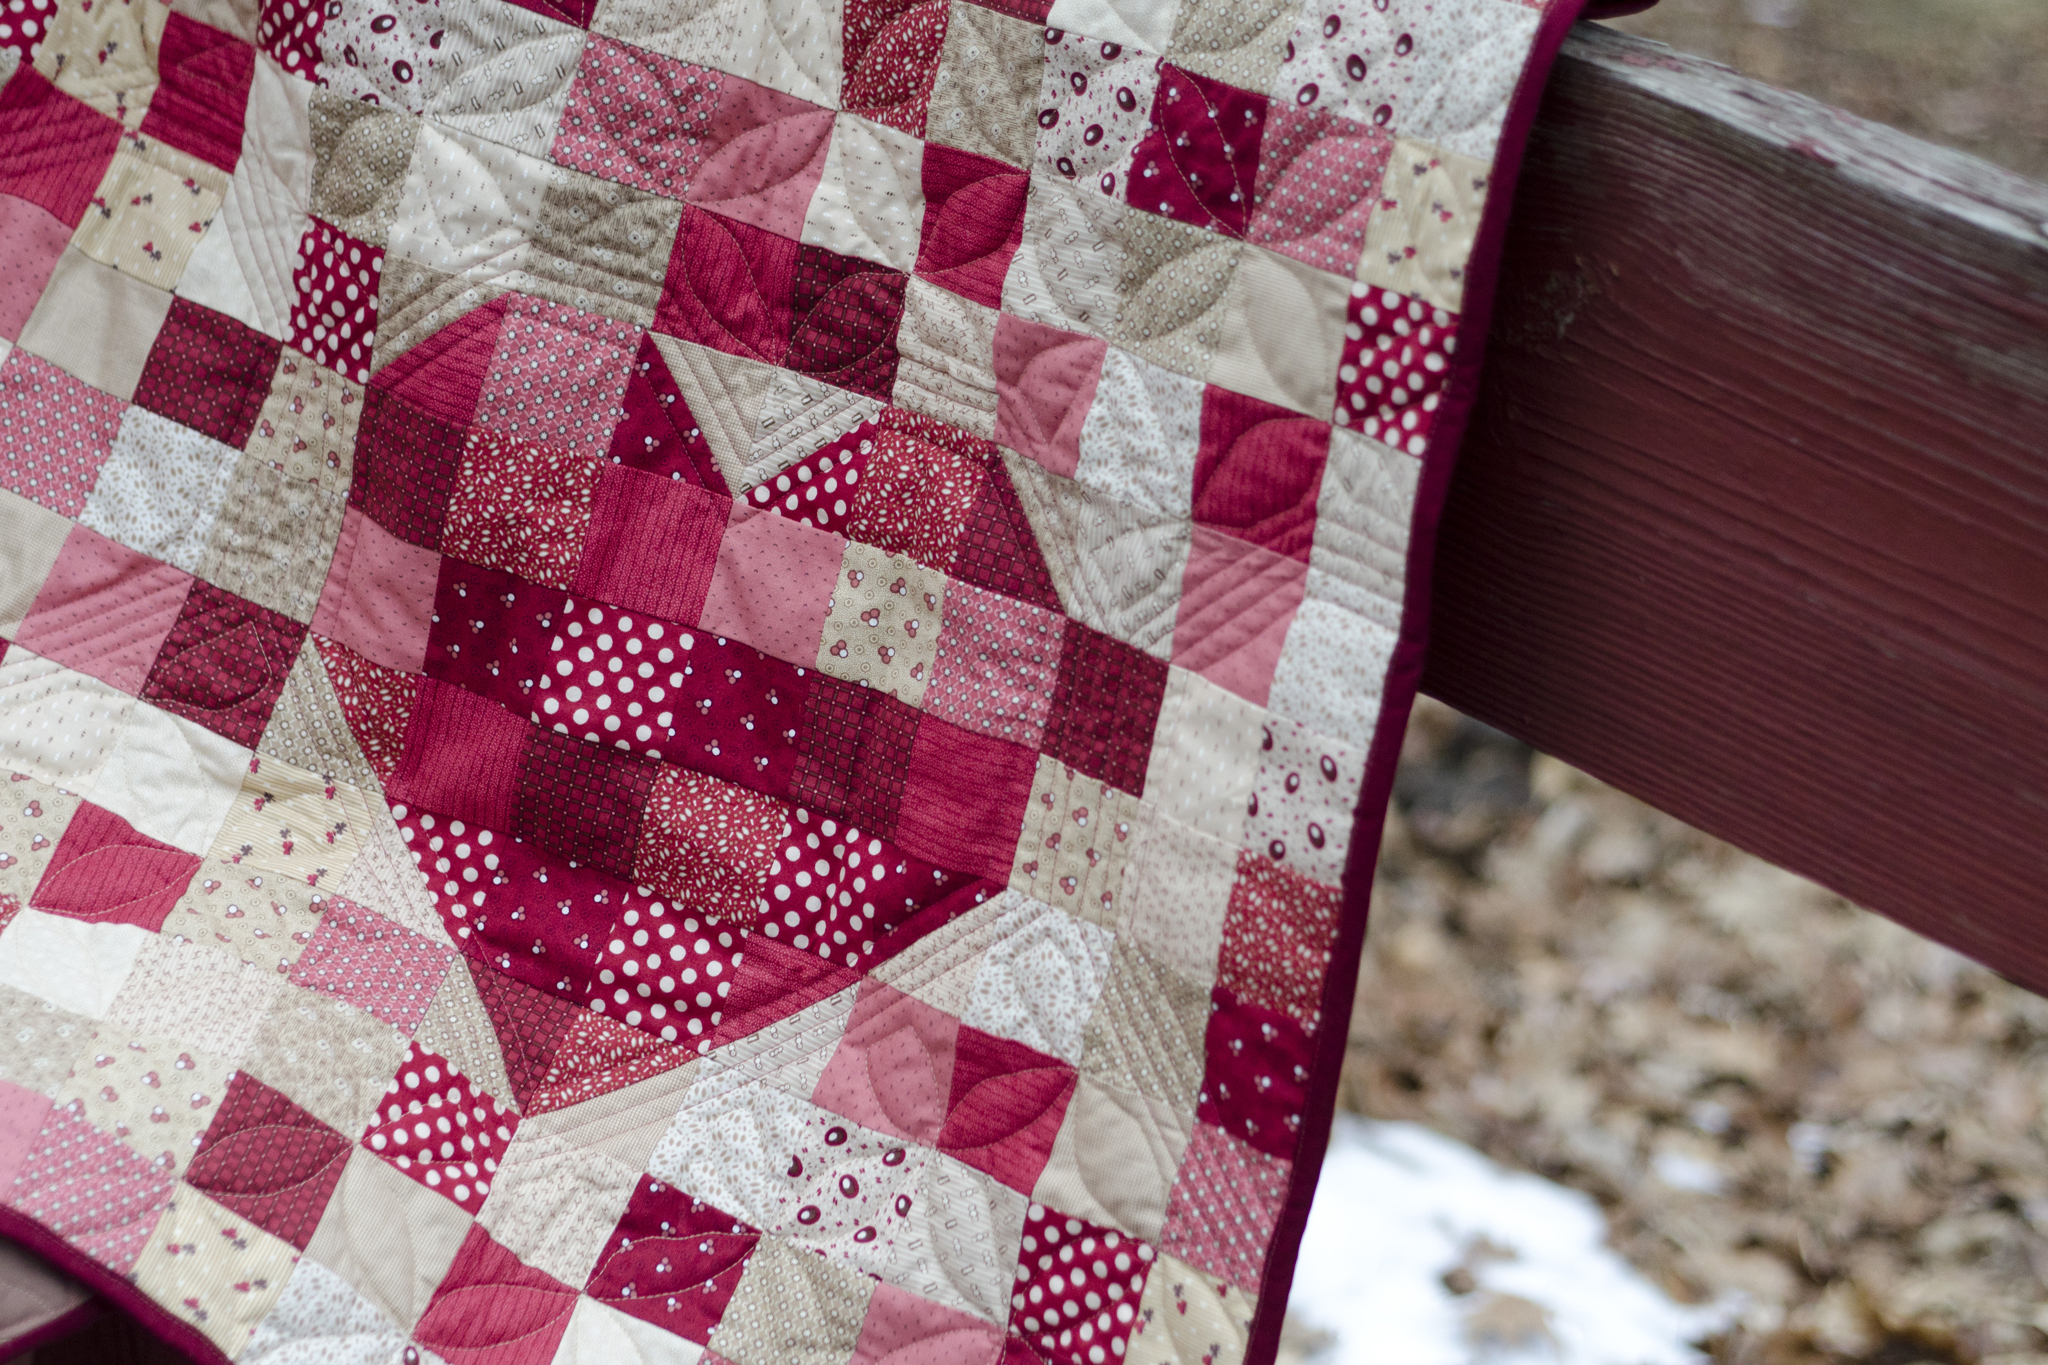
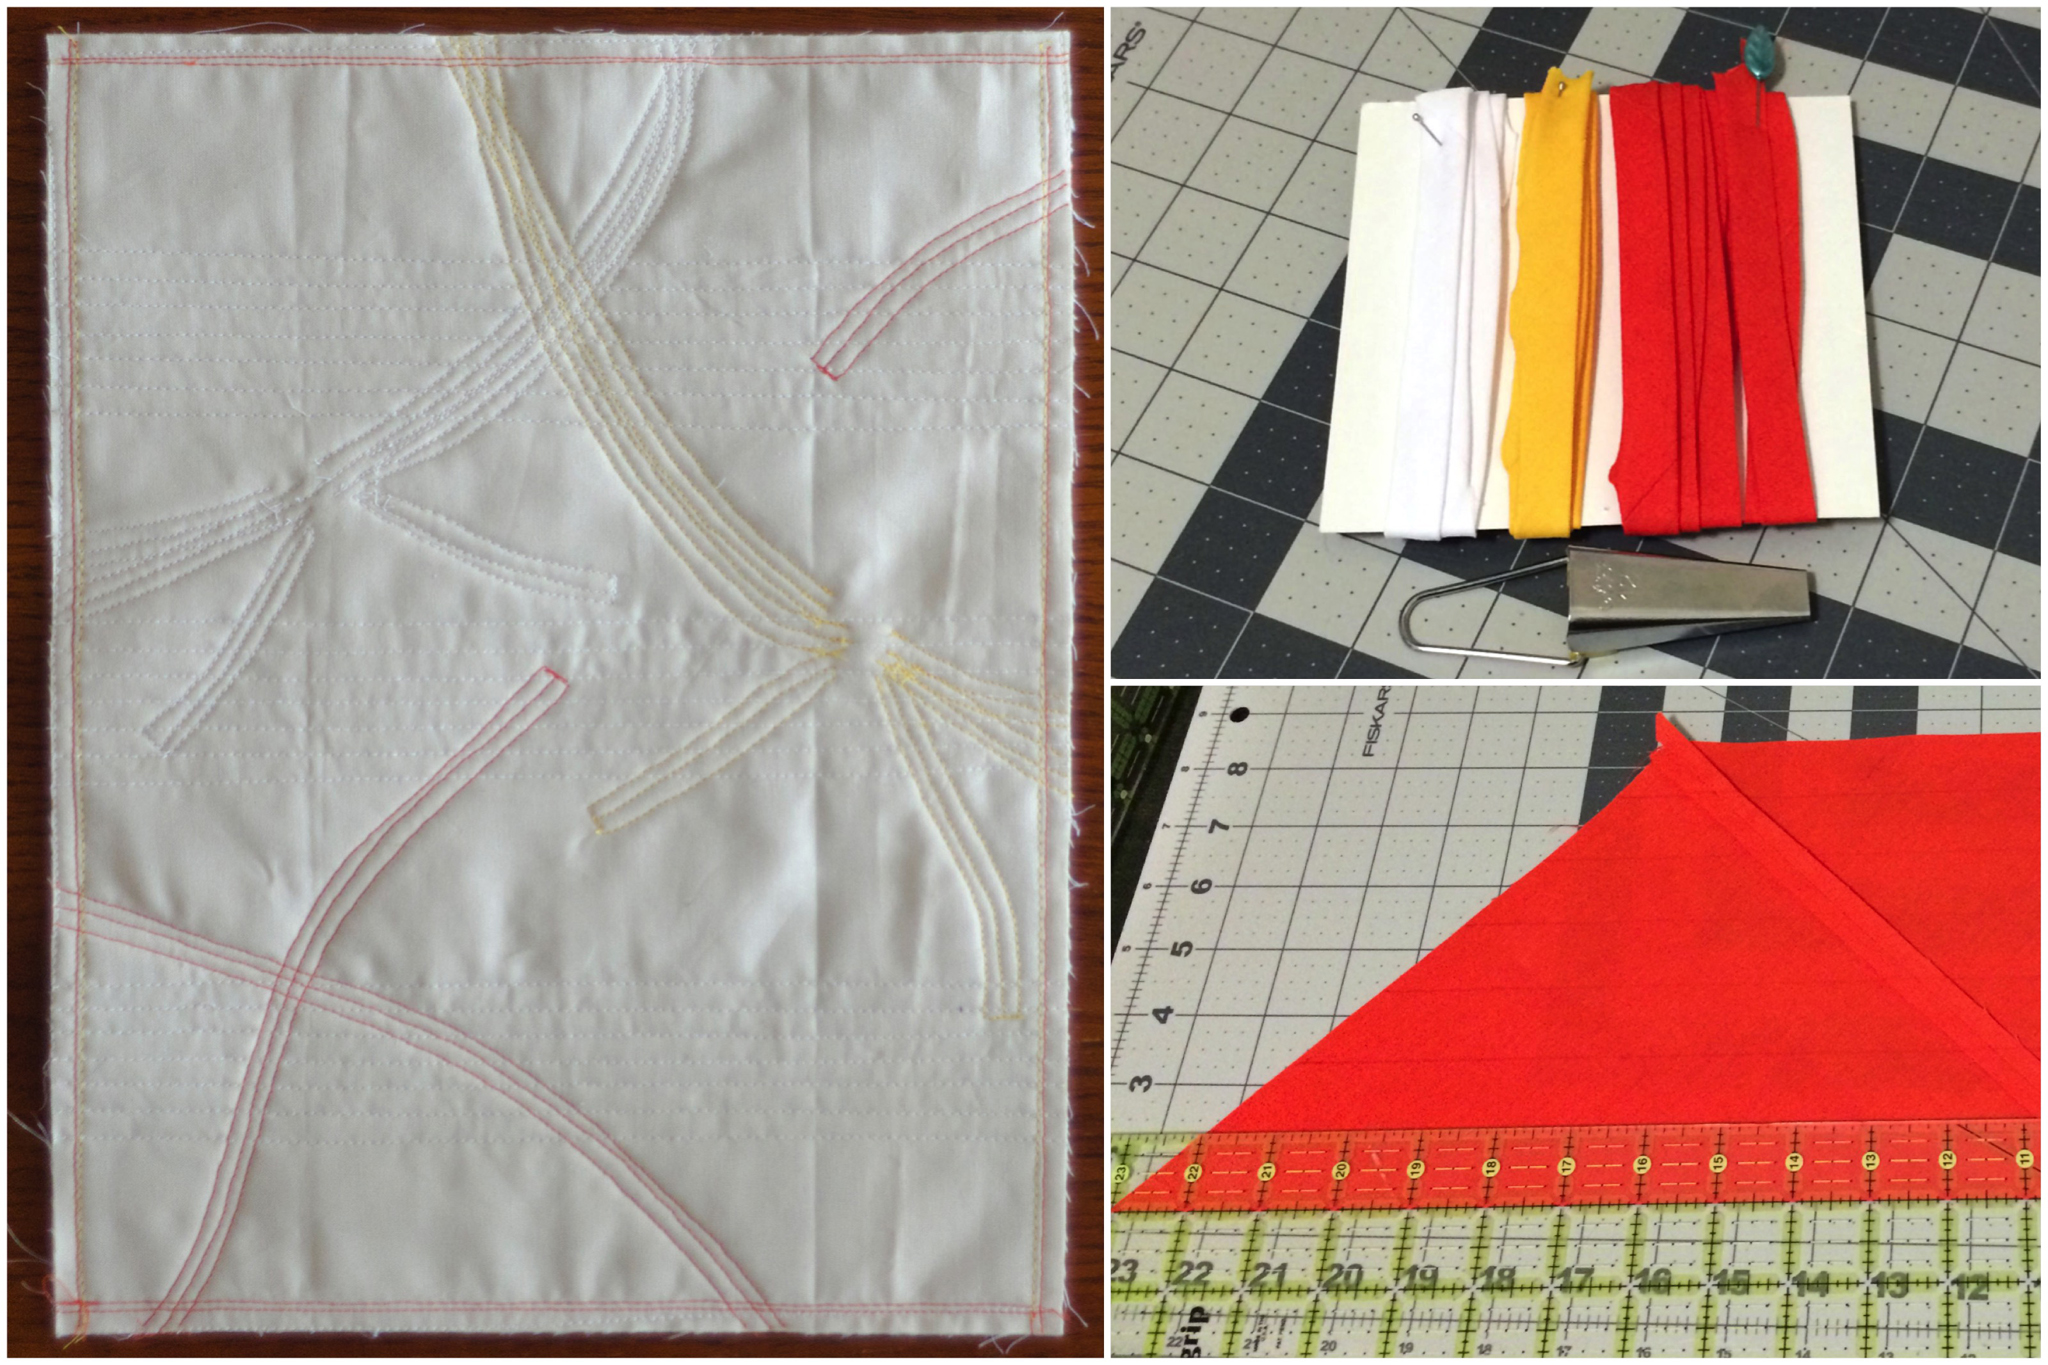
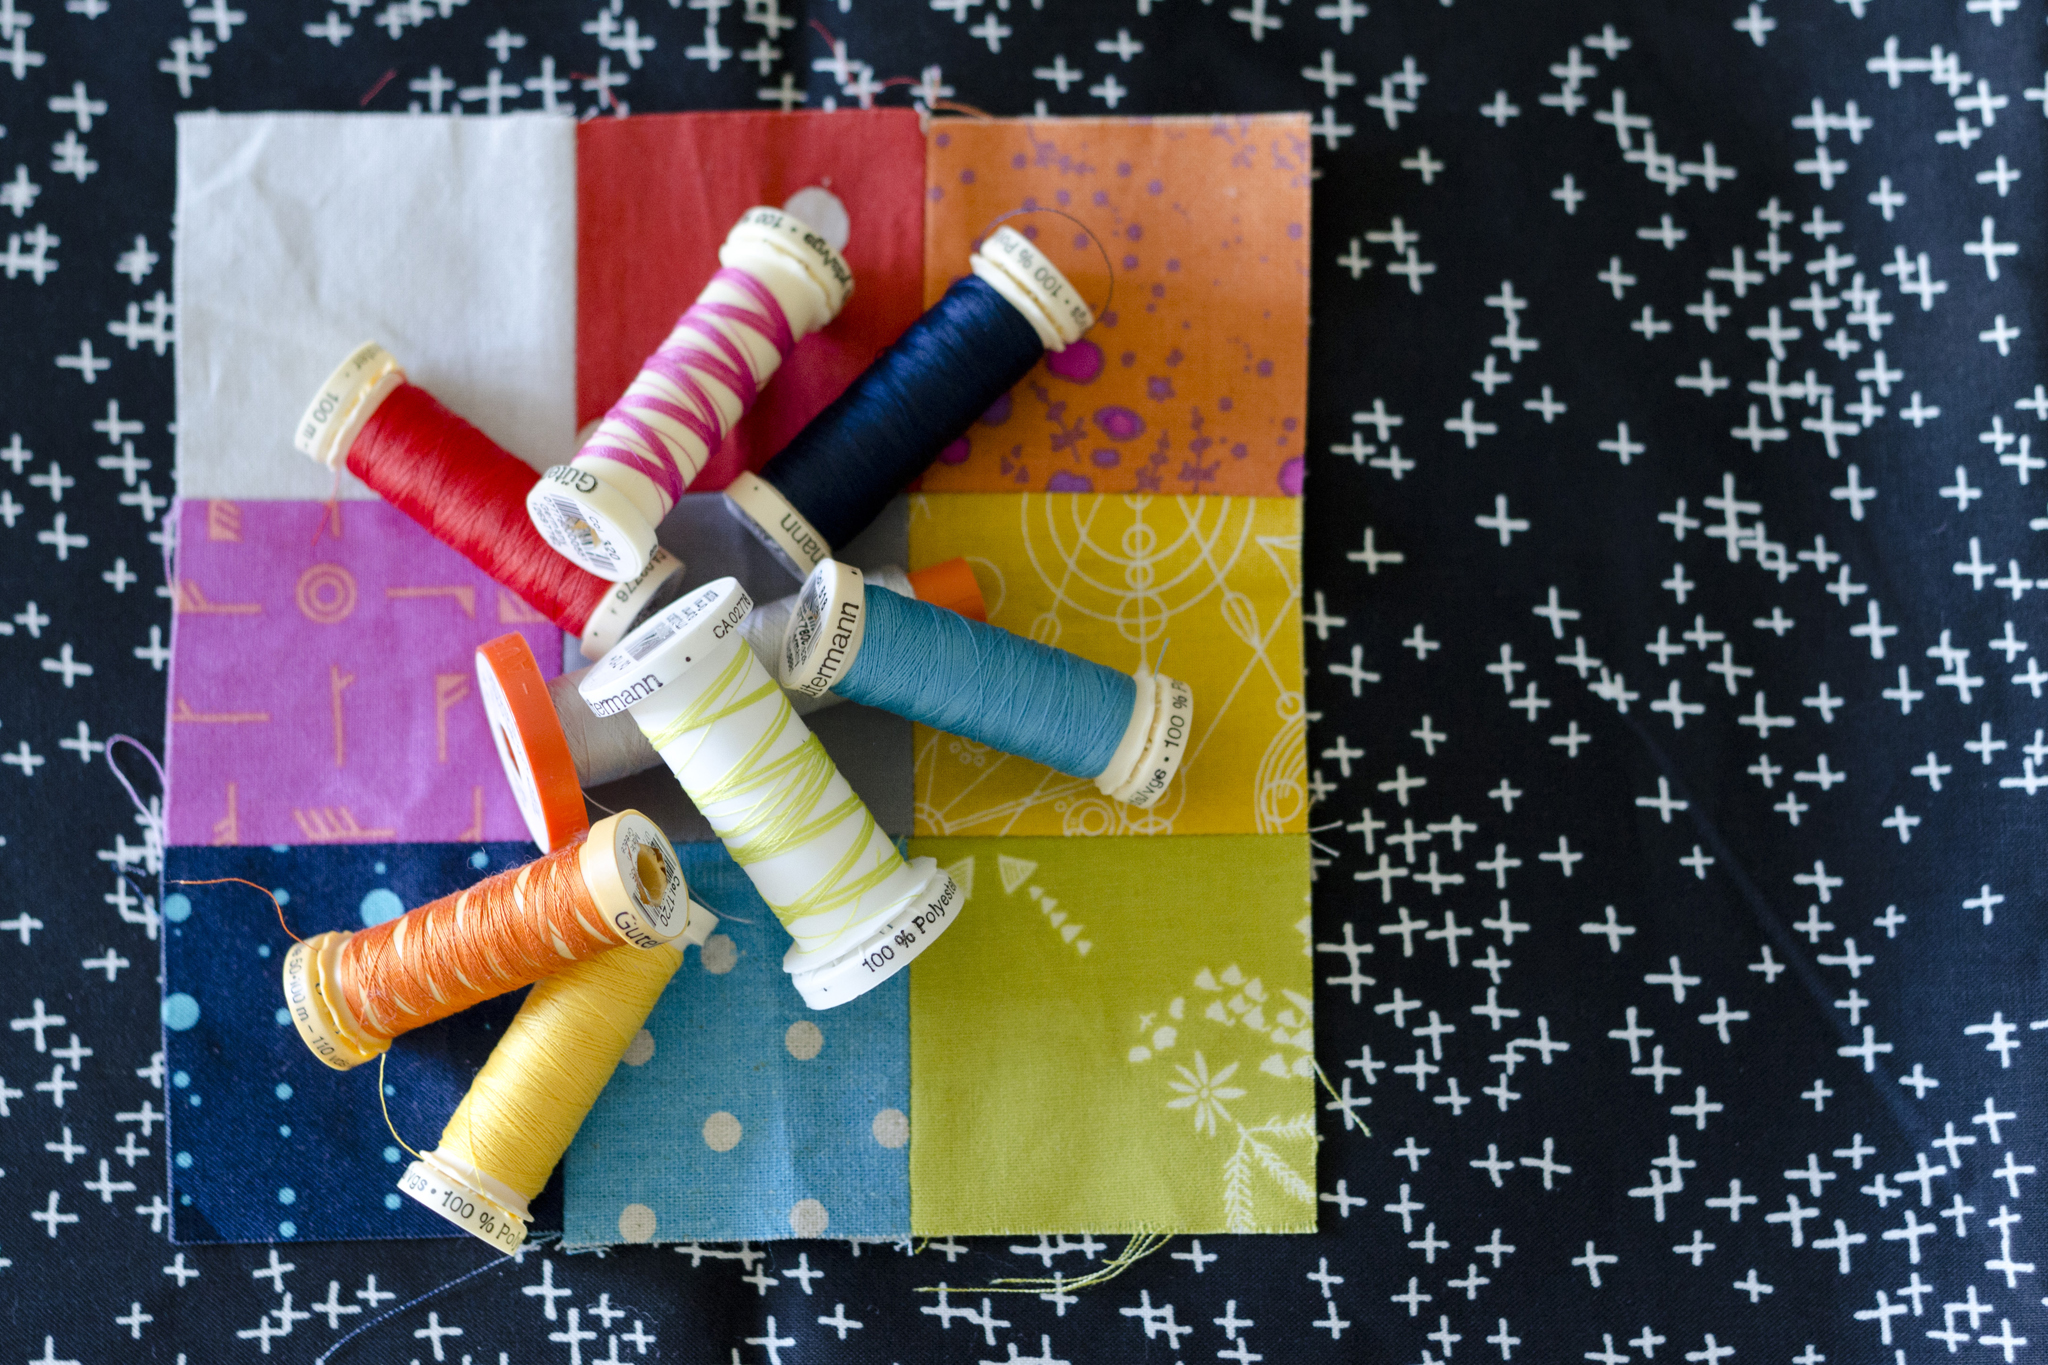
My initial vision included quilting a few different labels that describe aspects of me, but the final quilt isn’t auto-biographical. Despite barely carving out any sewing time in the last few months, I matchstick quilted this quilt. There is a meditative quality about going back and forth, closer and closer, over and over, a welcome respite from everything else on my todo list. While that decision was at the expense of working on any other type of sewing project, it was the right one. I did each section in matching thread, toggling between vertical and horizontal quilting, with a line or two of all the other colors in each row. I used a medium gray in the bobbin (mostly), which blends with the gray side.

“Human” (detail), Rachael Arnold, April 2016, 56″x56″. Photo by Carl Pfranger.

I used Quilter’s Dream Cotton (Request) for the first time, and am impressed by the drape despite the very dense quilting. I also relied solely on 505 Spray to baste, but used a tip from my quilt guild’s president: after spray basting, iron the quilt from the center out to really smooth out the surface. Doing that made a huge difference in shifting and puckering (or lack thereof) while quilting. I recommend both of the products and the ironing process.

“Human” (detail), Rachael Arnold, April 2016, 56″x56″. Detail photos by Carl Pfranger.

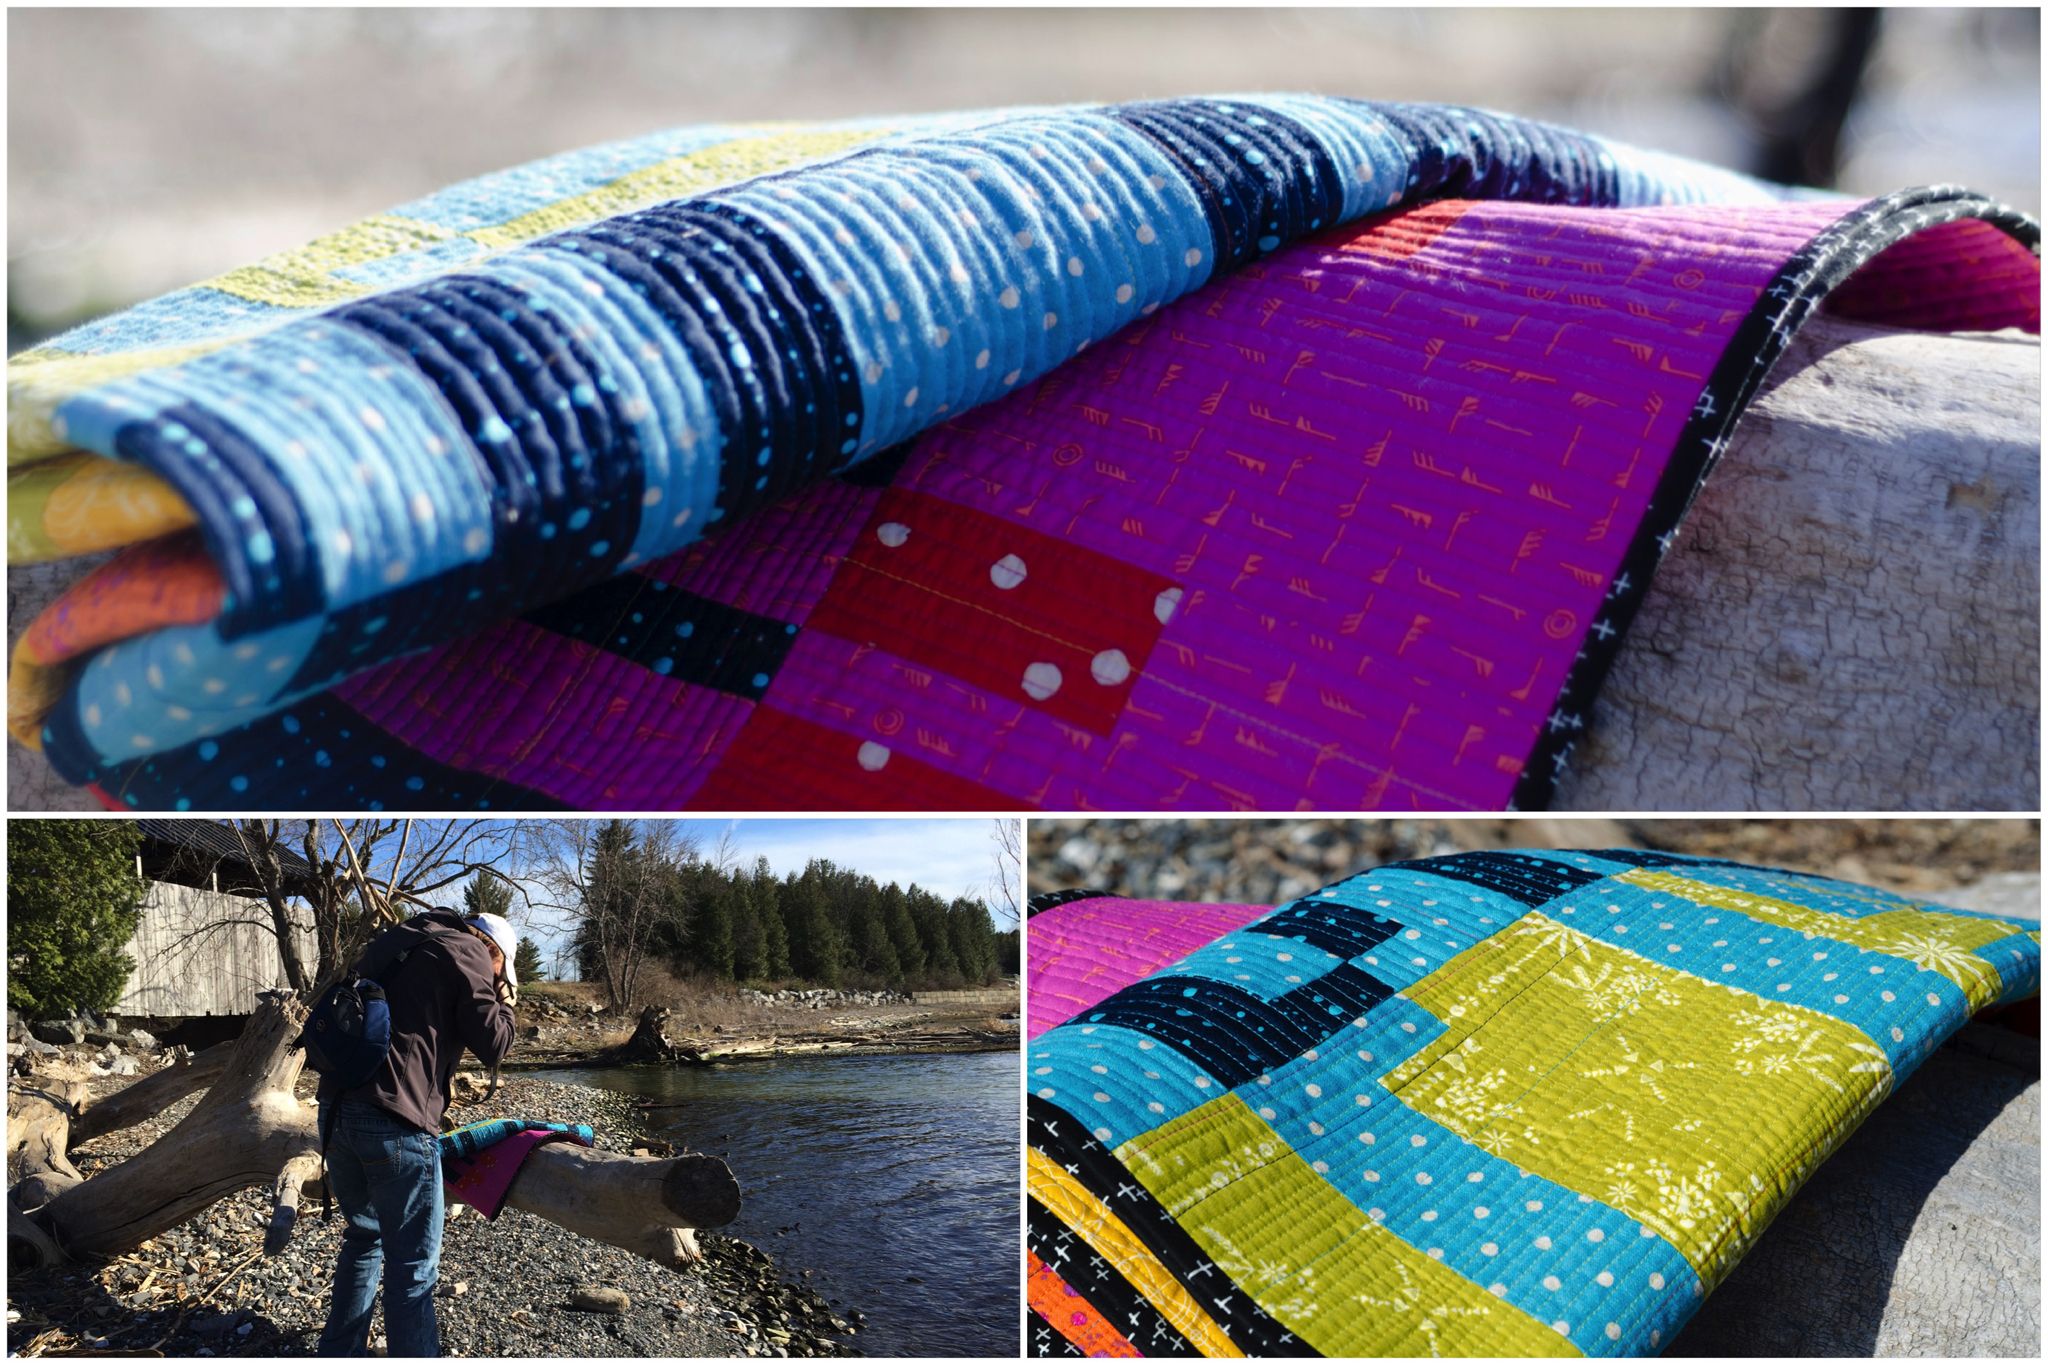
I kept the binding simple, black fabric with white plus signs (Cotton + Steel). I attached it by machine, using Steam-a-Seam Lite 1/4″ fusible web tape to secure it to the back before stitching in the ditch from the front. It’s one of the better machine binding jobs I’ve done!

“Human” (detail), Rachael Arnold, April 2016, 56″x56″. Photo by Carl Pfranger.
“Human” (detail), Rachael Arnold, April 2016, 56″x56″.

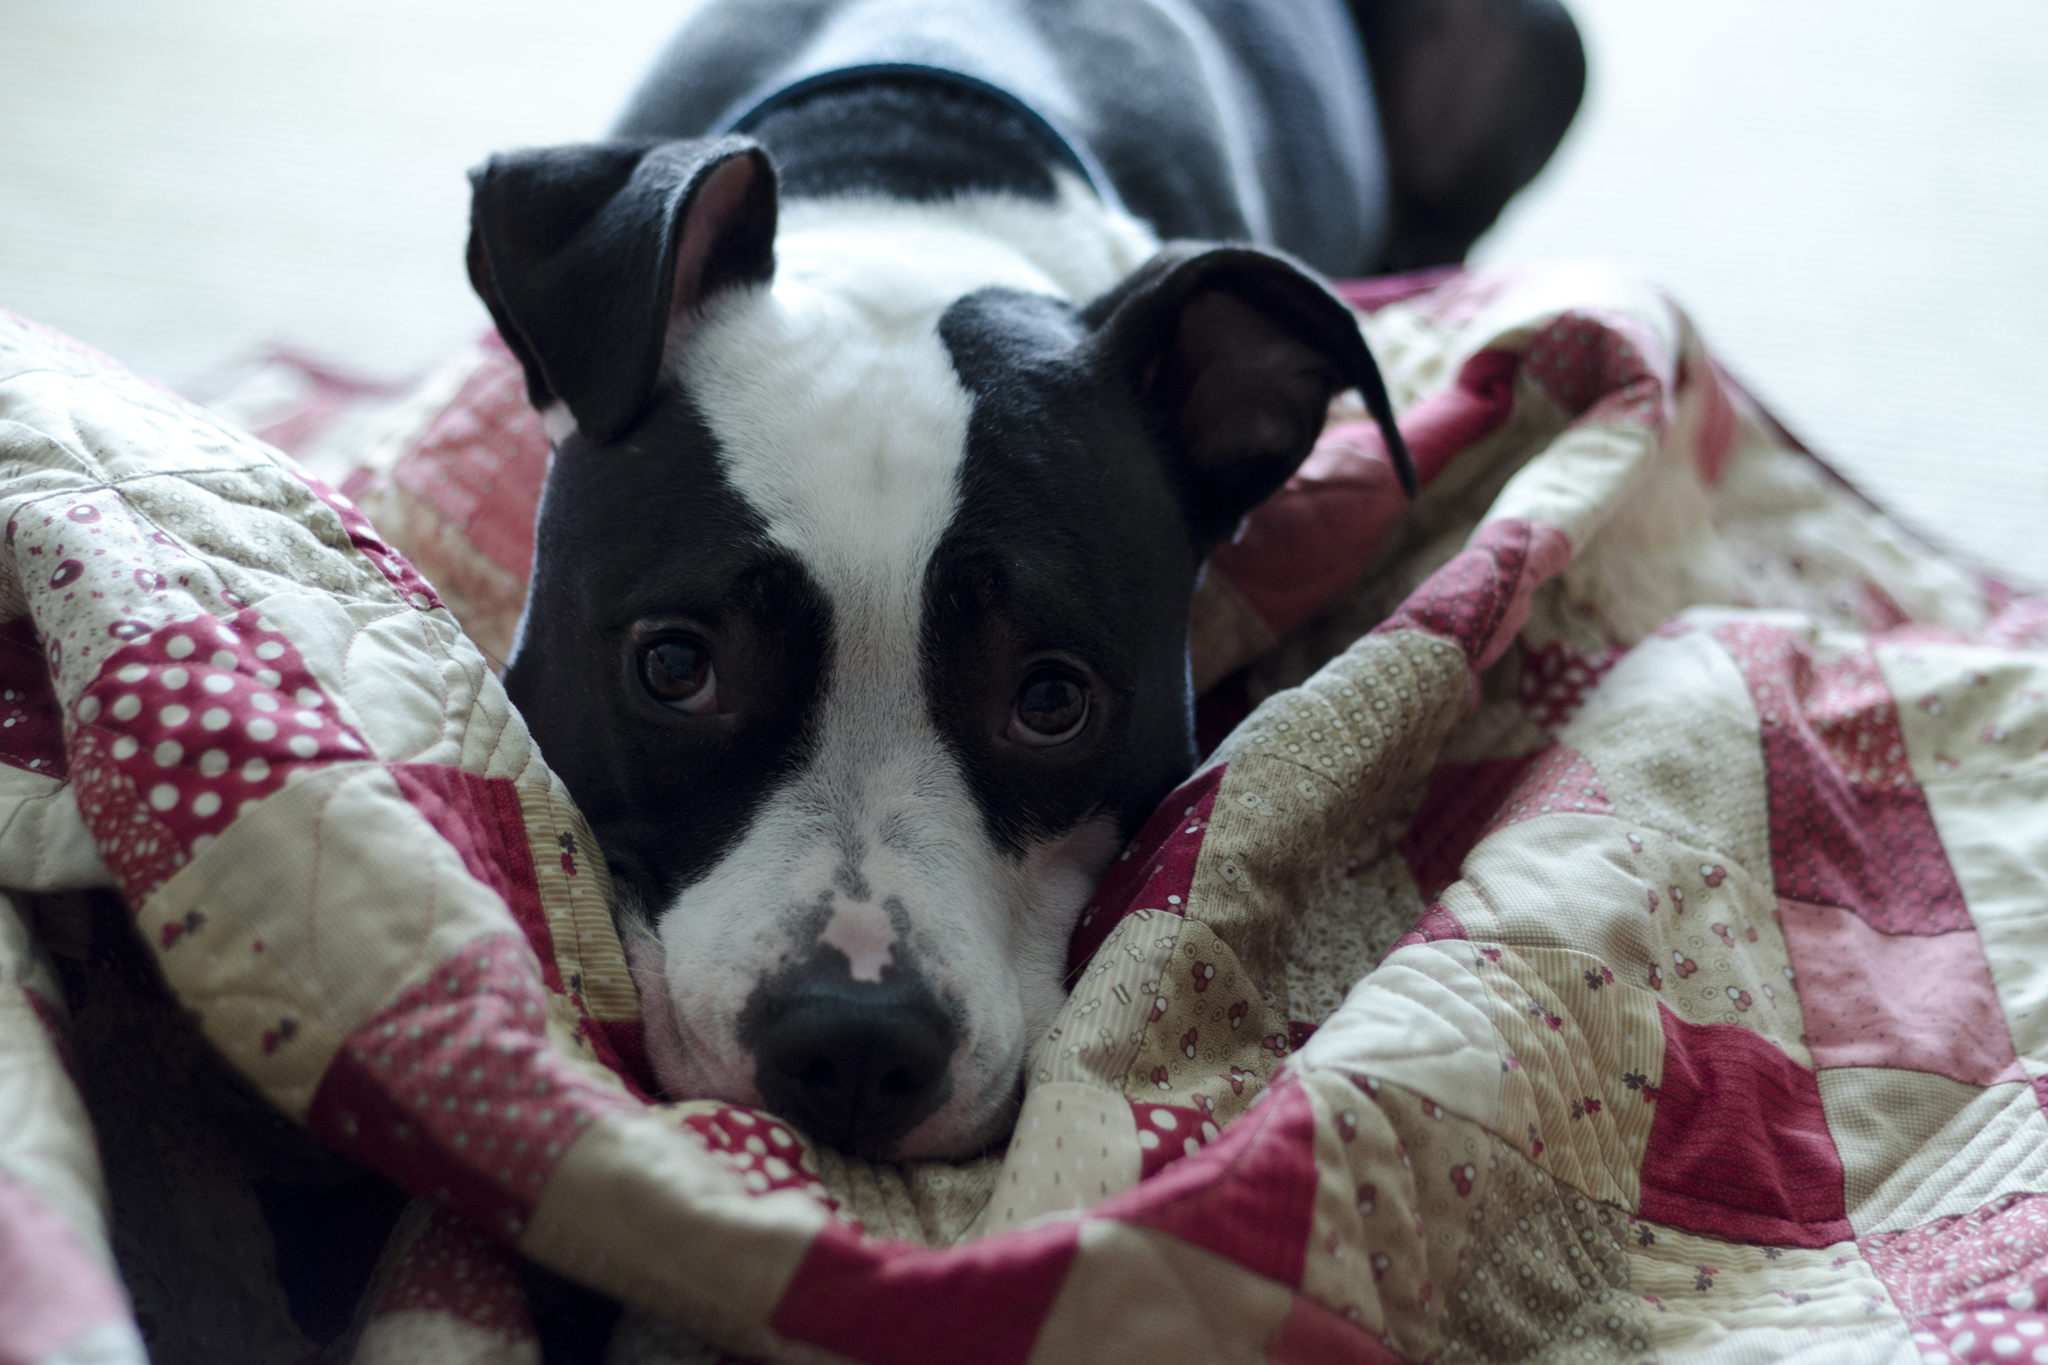
Moof isn’t sure what to think. First, I made a quilt that said Human, then I photographed it in a place that doesn’t allow dogs. Sorry pup.

no-dogs-human

April 30th, 2016

Maxing out Miniatures

Posted in Quilting

  • Batting: wool
  • Fabric: Reproduction-style
  • Finished projects
  • Q016DB
  • The Miniatures Nine-patch

In 2015, I worked my way through some of my oldest unfinished projects, turning boxed-up, almost forgotten fabric into quilts. This second quilt of 2016 is more of the same. This one started life as a pack of 18 fat quarters in February 2011 (my fourth quilt started), and is now a 54×72″ quilt using up almost every bit.

"Miniatures Heart", Rachael Arnold, February 2016, 54"x72".
“Miniatures Heart”, Rachael Arnold, February 2016, 54″x72″. Photo by Carl Pfranger.

I planned out this nine-patch with a twist, cut all the fabric out, sewed the heart section, and even created all the strip piece components for the blocks, then packed it away. The remaining construction comprised sewing lots of three-patch strips together into nine-patch blocks, then the row and column piecing.

"Miniatures Heart" (detail), Rachael Arnold, February 2016, 54"x72".
“Miniatures Heart” (detail), Rachael Arnold, February 2016, 54″x72″.

I finally finished the top during a self-designed mini retreat when I found myself spending a snowy vacation day in Utica (thanks to Shelly and Sew Wilde Quilt & Co for providing workspace for me and my machine that day!).

"Miniatures Heart" (detail), Rachael Arnold, February 2016, 54"x72".
“Miniatures Heart” (detail), Rachael Arnold, February 2016, 54″x72″. Photo by Carl Pfranger.

I don’t recall why I purchased the fabric or started this quilt (although I think the inner dialogue may have been “hey, buy, buy, fabric, sale, sale, Fat Quarter Shop, buy, buy buy”). I do vaguely remember wanting to quilt it ambitiously for one of my first few quilts, but can’t pinpoint exactly how. The end is a rather scrappy quilt with very little thought into where each block would go apart from the pieced heart, and quilting that is far beyond anything I’d previously attempted when I cut the first pieces.

"Miniatures Heart" (back), Rachael Arnold, February 2016, 54"x72".
“Miniatures Heart” (back), Rachael Arnold, February 2016, 54″x72″. Photo by Carl Pfranger.

The backing and binding are solids that I bought years ago for this quilt. While not my first choice as my style has evolved, I stuck with them to get them out of stash. I considered doing something more complicated in piecing the back together somehow, but I only had the six 2.5″ squares leftover after finishing the top and a nine-patch for my history quilt. The brown reminds me of the ubiquitous brown glazed underlining in Victorian bodices, continuing the theme of old-timey romanticism with the color scheme, heart, and reproduction fabrics.

"Miniatures Heart" (detail), Rachael Arnold, February 2016, 54"x72".
“Miniatures Heart” (detail), Rachael Arnold, February 2016, 54″x72″. Photo by Carl Pfranger.

I quilted a few ghost hearts into the quilt, then did the rest in an orange peel pattern that was simple to pull off with the nine-patch construction of the quilt (although far from perfect). It seems appropriate that the orange peel quilting looks like exes and ohs. The hearts are quilted in two shades of pink, while the orange peel is mostly beige with a few pink highlights.

"Miniatures Heart" (detail), Rachael Arnold, February 2016, 54"x72".
“Miniatures Heart” (detail), Rachael Arnold, February 2016, 54″x72″.

I used wool batting for the first time since my War of 1812 Challenge quilt, and am not sure what I feel about it. It is wonderful to cuddle under during winter here in VT, but I’m not sold on the texture and drape of the finished quilt. I’m also worried about washing this one, uncertain how the Quilter’s Dream will react.

"Miniatures Heart" (detail), Rachael Arnold, February 2016, 54"x72".
“Miniatures Heart” (detail), Rachael Arnold, February 2016, 54″x72″. Photo by Carl Pfranger.

As my mother very bluntly noted on an in-progress social media post, the colors and design of this quilt are really not “me”. Yet I’d count it as one of my favorites. There’s just something about it that makes me happy, and it’s pretty apropos to the time of year. I foresee it being my quilt of choice here at home until spring comes around. That is, if Moof doesn’t keep stealing it.

"Miniatures Heart" (detail), Rachael Arnold, February 2016, 54"x72".

February 28th, 2016

Pear Tree of Life

Posted in Quilting

  • Baby quilts
  • Fabric Designer: Thomas Knauer
  • Fabric: Pear Tree
  • Finished projects
  • Q016DA

Just as 2015 kicked off with a baby quilt, so has 2016. The recipient of Disappearing Seven Wonders is now a big brother to a baby sister who needed her own quilt.

"Pear Tree of Life", Rachael Arnold, January 2016, 48"x48"
“Pear Tree of Life”, Rachael Arnold, January 2016, 48″×48″

After pulling out a bundle of Pear Tree and coordinating fabrics a few months ago, all progress stopped. I couldn’t settle on a design for the quilt. Then I came across the Into the Wild pattern and was inspired to cut into the stack. I wasn’t incredibly faithful to the pattern (although it was great visual inspiration), but I like how it turned out with the fabrics I used.

"Pear Tree of Life" (detail), Rachael Arnold, January 2016, 48"x48"
“Pear Tree of Life” (detail), Rachael Arnold, January 2016, 48″×48″

The most obvious change to the pattern was adding a square in a square (in a square) to the center, highlighting a motif from the eponymous print in the line. I also added in a few more half-square triangles where the original pattern had squares, and dropped the top and bottom rows in favor of a square quilt due to the amount of fabric I had.

"Pear Tree of Life" (detail), Rachael Arnold, January 2016, 48"x48"
“Pear Tree of Life” (detail), Rachael Arnold, January 2016, 48″×48″

It’s backed with blush-colored, star-embossed Minky, using 70/30 Cotton/Poly blend batting in between. The batting is a bit higher loft than I normally buy—I bought it a few months ago for a different project, but decided to use it for this quilt instead, knowing that the high poly content works out fine with the polyester cuddle fabric. It gives the quilt a good texture in the looping quilting.

"Pear Tree of Life" (detail), Rachael Arnold, January 2016, 48"x48"
“Pear Tree of Life” (detail), Rachael Arnold, January 2016, 48″×48″

I quilted it with pink 40wt Aurifil in alternating free-motion patterns, building out from the center. My ability to free-motion stitch in the ditch has not improved since my first attempts, from what I can tell, but my consistency with feathers has improved. It’s bound in a textured green print. I’m very happy with how the quilting stands out on the back.

"Pear Tree of Life" (detail), Rachael Arnold, January 2016, 48"x48"
“Pear Tree of Life” (detail), Rachael Arnold, January 2016, 48″×48″

After a few months of not sewing (much), it was nice to jump back in with a relatively simple quilt. I hope it keeps the baby warm through her first winter and beyond.

February 4th, 2016

Bias Tape Challenge Orange Belt

Posted in Quilting

  • Applique
  • Bias tape
  • mightylucky
  • Mini quilts
  • Quick project

January’s challenge from the Mighty Lucky Quilting Club was to use bias tape to construct curves based on something in your sketchbook. I’m not much of a sketcher, nor do I have a sketchbook, but I do occasionally snap photos for inspiration, and often find it in my surroundings. The bit of inspiration I decided to memorialize was also an accomplishment of mine during the month. Seeing my newly-retired yellow belt hanging alongside my white belt sparked the idea of a design, with the added complexity of knots in the bias tape. The result is this 11″x14″ mini-quilt.

#mightylucky Bias Tape Challenge — Orange Belt by @raevenfea
“Bias Tape Challenge Orange Belt” (front and inspiration), Rachael Arnold, January 2016, 11″×14″

Rather than add the bias tape to the block, then quilt, I made a quilt sandwich and sewed down the bias tape through all layers after quilting the background. I used a walking foot for all of it to reduce shifting. The knots wrap around one strip of bias tape that was intentionally left with a gap in the top-stitching.

#mightylucky Bias Tape Challenge — Orange Belt details by @raevenfea
“Bias Tape Challenge Orange Belt” (details), Rachael Arnold, January 2016, 11″×14″

The technique of using bias tape isn’t any more of a challenge than other types of applique—so long as you don’t try using straight cut strips to get curves (it’s bias for a reason). The intent part of the challenge was much more difficult for me. I’m not sold on the idea of making a normal-sized quilt just to try a new technique unless I’m really excited about it—both from a materials and time cost standpoint. At the same time, I’ve never been a huge fan of mini quilts.

#mightylucky Bias Tape Challenge — Orange Belt details by @raevenfea
“Bias Tape Challenge Orange Belt” (back and progress shots), Rachael Arnold, January 2016, 11″×14″

I suppose this isn’t even technically complete. I haven’t decided how to finish off the edges of the quilt. I don’t want to bind it. I considered doing a faced binding. I’ve also thought about just leaving the edges raw and framing it. But for now, I can call my foray into bias tape on quilts done, and admire all of the gorgeous creations being posted on social media under the hashtag #mightylucky.

January 30th, 2016

A Long-term Scrap Project

Posted in Quilting

  • Meta Quilt
  • Piecing
  • Scrap projects
history-piecing-2011

I’ve tried to keep a 2.5″ square of most fabrics from each quilt project I’ve done. This week, I finally decided on a layout for a meta-history quilt of my quilting journey and started piecing together some of the blocks.

So far, I have a block for the first eight quilts I made (2010-2011), and one for the quilt I need to baste and quilt this month.

The eight early quilts represented:

  1. The Baby Quilt
  2. The Bargello Quilt
  3. Wingéd Whirling
  4. Mother’s Day Quilt
  5. Kaite’s Damask Quilt
  6. Lollipop Quilt
  7. Froggy Synchronized Squares
  8. Star of Bethlehem

I’ve filled in with Cloud9 Limestone Cirrus where I didn’t have enough fabric scraps for a project.

I’m considering doing this as quilt as you go row-by-row, but am not decided. I’m looking forward to watching it grow.

January 5th, 2016

2015 In Review

Posted in News

  • Yearly review

2015 was an odd year—it went by in a flash and I sewed much less than I have in recent years. We traveled more than in the past and for longer stretches of time. I started a new role that is less about development and more about guiding a team, became co-leader of our local Girl Develop It chapter (an organization that aims to teach women to code), and made progress with the learning curve of both of those changes. Sewing (especially quilting) took a back seat. What I did sew, I did with real intention and a certain level of dumping things out of my brain and sewing space.

2015-in-review

At the end of 2014, I made a resolution to clean out my works in progress (the quilting ones, at least). Three-fifths of my quilt finishes this year came from that collection, and I worked on a few others. The second part of the resolution—that I not add to the list—wasn’t met. I started two projects that are still unfinished.

Quilt Finishes

  1. Puzzle Bop
  2. Wheeling Ruffles (Sevillanas)*
  3. Altered Steps*
  4. The F-word
  5. State Line Memories*

* denotes a long-term work in progress that I finished

For the first time, this year was about finishing things—and in one case making a statement—not about gifting. In fact, the only quilt of the five gifted was the first—a quilt for a new cousin in my generation.

Getting the F-word out of my head and into a quilt was extraordinarily satisfying, and one of the unfinished projects is something else in that vein.

Sartorial Projects

My one wearable was a Halloween/Cosplay costume for Mary Sanderson. I’ve loved Hocus Pocus for 20 years, and was happy to jump in when my coworkers wanted to dress up as the three Sanderson Sisters for our office costume contest.

Crafty Things

Not only was this a slow year for quilting, I sewed very few smaller craft items.

My Art Student and the Cottage Garden bag is an all-time favorite and took about the same amount of effort as a typical quilt.

Samplers, Meetups, and Exchanges

I contributed blocks to two charity quilts for my guild, pieced the back for one of those, and made a block for a quilt Thomas Knauer is doing.

But, I did nothing with others that will end up in a project of my own.

The Backlog

Again, this was the year of cleaning out works in progress. I went into detail on the ones I made progress on in a Mid-year Progress post.

Progress since the progress report: I finished one quilt, decided Drunkard’s Compass will never be completed as designed and returned the fabrics to my stash (there are a few blocks finished that may turn into a pillow cover or something next year), and found the heart block for the Miniatures 9-Patch during a massive organizational spree in November.

Progress made:

  • Farmer’s wife / EPP Crosses
  • Miniatures 9-patch
  • Witches Bubble Brew
  • Drunkard’s Compass
  • Meta history quilt

Untouched:

  • Organic Spins
  • Double Wedding Ring
  • 2013 Samplers

New:

  • I Am Human
  • Work in Progress (such a meta name)

A Resolution

I have a couple of very specific finishing goals for 2016: I Am Human, Work In Progress, Miniatures 9-patch, and a baby quilt in January.

Beyond that, the majority of my guild (including me) decided to participate in the Mighty Lucky Quilting Club so I want to keep up with that.

Organization

I finally organized the larger pieces of my stash (comic book boards as mini-bolts for the win). I hope I can keep up with having my sewing room organized. I still need to deal with all of my scraps that are hidden in various bins and boxes.

I’m loathe to commit to much, because I think 2016 is going to turn out much like 2015 in terms of work and traveling. Looking forward to seeing how it goes!

December 31st, 2015

Halloween 2015: Mary Sanderson

Posted in News

  • Cosplay
  • Halloween
  • Mary Sanderson

Winifred: Don’t get your knickers in a twist! We’re just three kindly old spinster ladies.

Mary: Spending a quiet evening at home.

Sarah: Sucking the lives out of little children!

The big reveal (two months late): two of my teammates and I dressed as the Sanderson sisters from the movie Hocus Pocus, and won second place in our company costume contest! I was Mary.

Sanderson Sisters
Me, Sarah, and Bethany as Mary, Winifred, and Sarah Sanderson. Photo by John Sappo.

I ended up hacking the bodice, apron, wig and cape together without in-progress photos and never technically finished it (safety pin lacing holes for the win), so this post will just show photos of the ‘finished’ costume as I wore it for our office contest with a few notes on modifications. I showed you the various skirts and chemise in previous posts.

Rachael Arnold as Mary Sanderson
Photo by Bethany Robinson.

The bodice (from Simplicity 5582) ended up being very straight forward, except that I bag-lined it instead of using bias tape to finish the edges. I wore my (also not completely finished, despite being made in 2012) regency corset under everything, as the bodice is made of a fashion knit with interfacing and a cotton lining, thus had no shaping ability. I have yet to finish the lacing holes and used safety pins the day of. The fit is horrible. Despite matching my waist measurements, there was no way the bodice would close (partly because of the added bulk from the skirts). I added an extra inch to the front, but it still wasn’t enough.

Mary Sanderson details

The cape is attached at the shoulders (more safety pins), and was only hemmed at the top: the sides are unfinished (the knit doesn’t ravel), and the bottom is selvage. I had to seam it up the middle due having two pieces of the fabric, and not enough forethought. I chose to use the knit because it had a printed pattern that looked like a rough texture, while being simple to work with for a costume.

The apron is just a rectangle of fabric (actually three (felt and fashion tulle), layered, to get some texture). attached to a waistband, with patch pockets. I couldn’t find any multi-colored fabric with the right boucle texture.

Mary Sanderson wig details

The hair was fun—it’s a mix of my own and a structured wig piece. I made a base out of a styrofoam cone painted black with wire in the top, then hot-glued hair clips to the bottom. Then, I attached a hair extension piece that matches my already-dark-brown hair and clip-in purple pieces to create the structure for the shape. When wearing it, I twisted my own hair up onto the base and used a ton of pins, which held it all in place. Since I already have bright pink highlights, it was a little more jazzed up and multi-colored than Mary’s, but worked out surprisingly well.

ss-film-strip

If I wear this costume again in the future, I’ll finish up the lacing on the bodice, and add the accessories that really make something like this work (rings, earrings, proper shoes), but it was a lot of fun for an afternoon at work!

Sanderson Sisters second place

December 27th, 2015

More Halloween 2015 Costume Pieces

Posted in Historical

  • Chemise
  • Cosplay
  • Halloween
  • Mary Sanderson
  • Skirt

It’s time to show two more pieces for my halloween costume: a third (a final) skirt and a chemise.

hp-overskirt-front

The skirt is made in the same manner as the petticoat, although I used self-fabric ties for the front because I ran out of twill tape. This time the fabric was wide enough to use the selvedges along the side seam, and the skirt is supposed to be short, so two yards did the work. The plaid fabric wasn’t quite right, so I topstitched lace in a few places before constructing the skirt. It’s still not very close to the original fabric, but it’ll do for a costume.

hp-overskirt-back

The chemise was made using Simplicity 5582. Because there is an incredible amount of ease built into the pattern I didn’t bother with any sort of bust adjustment or other fitting since the ease would leave plenty of room. I did add an additional 7.5″ to the length, though, to change it from a blouse into a knee-length chemise. It’s very much costume construction with pinked seam allowances and elastic at the arms and necklines, but done is better than unfinished couture.

hp-chemise

One costume-specific detail is the attached necklace (made from a 30″ chain from the jewelry section at the big-box craft store). Although source photos show it is definitely attached, none are clear as to how. I decided to use hooks (of hook and eye fame) sewn to the neckline elastic casing to catch the links of the chain. Then, it’s easily removable if I want to repurpose the chemise, but will stay in place while I’m wearing the costume. The tension from the short length of the chain keeps it from falling below the neckline.

hp-chemise-detail

Stay tuned for later this week when I can reveal the final pieces.

October 25th, 2015

A Quilt Fit for a Knight

Posted in Quilting

  • Q015CE
  • T-shirt quilt

I’m not much the rah-rah “my alma mater was so amazing!” type, and high school is something I’m glad is over, not something I want to revisit. That said, I will be forever grateful for the three years I spent at this school, and particularly the education and opportunities it gave that have allowed me to go on to be the successful adult I now am. Perhaps that explains why I still had all these t-shirt scraps around. After carting around scraps of t-shirts, a baseball jersey, and a hoodie for over 10 years, it seemed time to either make a t-shirt quilt or clean out the clutter. Making a quilt won, of course.

"State Line Memories (Barstow School 2000-2004)", Rachael Arnold, September 2015, 56"x68"
“State Line Memories (Barstow School 2000-2004)”, Rachael Arnold, September 2015, 56″x68″

When I cut up the shirts in January, I knew the eight tees wouldn’t yield enough fabric for a decent-size quilt, even considering the printed backs. My baseball jersey added a bit more, but forced me to consider using block sizes other than 12″ square. After sacrificing the hoodie (my ultimate slum around the house attire, even 10+ years out), and chopping up the rest of the jersey for filler, I had enough pieces to play around with a fun layout based on a 4″ grid.

"State Line Memories (Barstow School 2000-2004)", Rachael Arnold, September 2015, 56"x68"
“State Line Memories (Barstow School 2000-2004)” (detail), Rachael Arnold, September 2015, 56″x68″

I rounded out the clothing pieces with black Kauffman flannel (pre-washed!)—the woven fabric gives stability to the knits, but still has a slightly different texture from plain cotton. It’s a surprisingly thick fabric and wonderful to work with. Because of the thickness of the flannel, I used my walking foot for all of the piecing.

"State Line Memories (Barstow School 2000-2004)", Rachael Arnold, September 2015, 56"x68"
“State Line Memories (Barstow School 2000-2004)” (detail), Rachael Arnold, September 2015, 56″x68″

Working with the hoodie, different tees, and baseball jersey was less difficult than I expected. With a layer of lightweight interfacing fused to each piece, it all came together simply. The only tricky part was dealing with the jersey—I had to secure the buttoned opening, and fill in the neckline. When I fused the interfacing onto the back, I slipped in a bit of black scrap knit from another tee to provide coverage under the v-neck opening. Then, I used Steam-a-seam fusible tape to keep everything stuck together before storing the blocks away for a few months. I used a blanket stitch around the open edges during quilting to secure it once-and-for-all, although I wish I’d done that during piecing instead of as part of quilting. Regardless, it’s very secure.

"State Line Memories (Barstow School 2000-2004)", Rachael Arnold, September 2015, 56"x68"
“State Line Memories (Barstow School 2000-2004)” (detail), Rachael Arnold, September 2015, 56″x68″

Unlike my college t-shirt quilt, I quilted this one, echoing the seams with Gutermann variegated green-white cotton thread from stash (and black cotton in the bobbin). It’s backed with black Minky Ziggy Cuddle, and has no batting (it’s heavy enough as-is). It’s self-bound with the backing (somewhat sloppily), and I slipped in a flange made from scraps of white knit to break up the black. I’m really happy with the effect of the flange, and to have put the knit scraps to use. I’m also happy that the Minky pile hides many, many sins with the binding finish.

"State Line Memories (Barstow School 2000-2004)", Rachael Arnold, September 2015, 56"x68"
“State Line Memories (Barstow School 2000-2004)” (detail), Rachael Arnold, September 2015, 56″x68″. A full photo of the back would be very boring.

This isn’t my most innovative or creative quilt, but it will be nice to curl up with this fall and winter. I’m so excited to have a Minky-backed quilt of my own—so much soft, so much petting!

"State Line Memories (Barstow School 2000-2004)", Rachael Arnold, September 2015, 56"x68"
“State Line Memories (Barstow School 2000-2004)” (detail), Rachael Arnold, September 2015, 56″x68″. Photo by Carl Pfranger.

October 4th, 2015

A Historical-ish Petticoat

Posted in Historical

  • Cosplay
  • Halloween
  • Mary Sanderson
  • Petticoat

I’m doing a group costume for Halloween with two of my coworkers. The who I’m portraying is a secret until then, but the how involves three different skirts for maximum authenticity. This is layer one.

The character is historical, but we’re not going for historical accuracy (nor did the original costume designer). This petticoat is almost-historical, albeit for about 100 years later than the character’s base time period.

hp-petticoat-front

It’s made from 3 yards of 44″-wide cotton, plus stash scraps and twill tape for the waistband. The hem is approximately 106″, so nicely full and swishy.

hp-petticoat-back

I used my rolled-hem foot to finish off the side slits, then sewed the rest of the side seam with a french seam. Those techniques are not historically accurate at all (well, maybe the narrow hem, a little).

hp-petticoat-1
A narrow hem makes a nice finish on the side openings

At 5’3″ with a short inseam, the 44″ width was the perfect height for me, so I used the selvage as a hem, which made the work very quick. A more historically accurate skirt would have put the selvages along the side seam, but the fabric width was too narrow for the fullness I wanted, and I didn’t want to sew any additional seams.

hp-petticoat-3
Selvage hem and french seams made construction quick with little chance of raveling.

Thanks to American Duchess for a great tutorial on this style of petticoat making.

hp-petticoat-2
My pleats were rather haphazard, but they work just fine, and the double waistband makes fitting adjustments a breeze.

I also finished the sewing part of layer two, although it needs to be thoroughly distressed before it’s technically complete. This layer is far more costume construction than historical, using a half yard of the fashion fabric, with tulle for the rest, which will be hidden by the overskirt. The same two-part waistband structure is there, but I sewed a channel for the ties and gathered the center by way of stringing the bias tape through, then tacking the ends so it doesn’t spread out again. It’d be a bit unwieldy for cotton, but works well for the light-weight net. The hem (or lack thereof) will be even more uneven by the time it’s fully distressed.

hp-second-skirt

I’ll try to post more progress posts before Halloween, if I can do so without plot spoilers. Otherwise, you’ll just have to wait until November!

October 1st, 2015

 Previous Posts
Newer Posts  

© 2008–2025 Raevenfea