Raevenfea

Maker of various fabric things

This is a static export of a blog I put on ice many years ago, that still has personally relevant content. No promises can be made around linkrot, styles, or working functionality.

Posts tagged: Cutting

What’s In a Roll (or, not all Jelly Rolls are equivalent)

Posted in Learning

  • Cutting
  • Fabric
  • Pre-cuts
How many strips come in a roll?

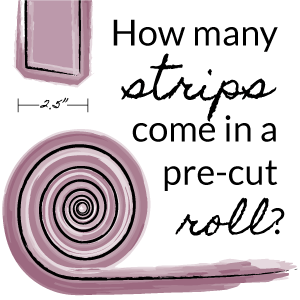
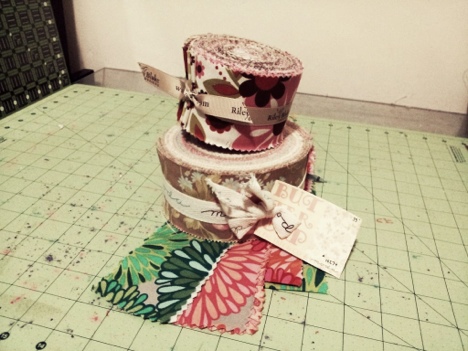
I’ve been using 2.5″ strips a bit lately—commonly called Jelly Roll strips. But, my recent purchases haven’t been fabrics by Moda, so I’ve quickly learned that not all rolls are equal. Here’s a breakdown of commonly available rolls and the number of strips included.

What is a Jelly Roll?

A Jelly Roll (which is a term specifically for Moda rolls, but is commonly used to describe all strip pre-cuts) is a pre-cut fabric assortment of strips measuring 2.5″×Width of Fabric (~40–44″). They typically contain at least one strip from every print and colorway in a fabric collection, and sometimes contain duplicate prints to reach a specific strip count.

How many strips are in a Jelly Roll?

The number of strips in a roll varies by manufacturer, and sometimes even within a manufacturer’s offerings.

Strip Count Manufacturer and Name
† count is dependent on number of prints in collection
* Riley Blake Designs has a few Rolie Polies made of blenders that come with as few as 11 strips, and at least one solids Rolie Polie with 45. Free Spirit sometimes has 36 strips in their Designer Rolls for larger collections (and possibly other numbers). Kauffman has Solid Roll Ups that often come with 40 or 41 strips and batik sets with as few as 28.
11–28† Connecting Threads Sample Strips
20 Joann Fabrics Fabric Palette/Central Jellie
20 Moda Junior Jelly Roll
21–28*† Riley Blake Designs Rolie Polie
28-45* Robert Kauffman Roll Up
30* Free Spirit/Westminster Designer Roll
40 Hoffman Fabrics Bali Pop
40 Moda Jelly Roll
40 Northcott Stone Strips
40 Timeless Treasures Tonga Treat

Strip count in a roll sometimes varies, even in the ones I didn’t mark with an asterisk, so always check the description of what you buy online or look for a number in store (or count, if you have to).

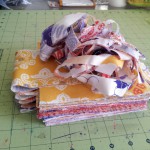
There’s also the rare occasion that a strip is cut incorrectly and not caught by quality control (I have had this happen multiple times with Moda charm packs, less often with rolls), so when picking patterns to make with your precuts or planning out your own, try to build in a small margin of unused strips. And, make sure to count your strips before starting the project!

Where To Buy

You can find these all in various online fabric shops and it seems like more and more local shops also carry them. Depending on what fabric brands a shop carries, you may not be able to find every type in a single location.

Prices also vary. You’re typically going to pay slightly more per equivalent yard (40 strips is just over 2.75 yards), and while the price generally relates to number of strips, that’s not always true. And, of course, manufacturers charge different amounts per yard (and have differing qualities of fabric), so the different roll prices will reflect that.

20120910-221029.jpg

Watch out for store-made rolls!

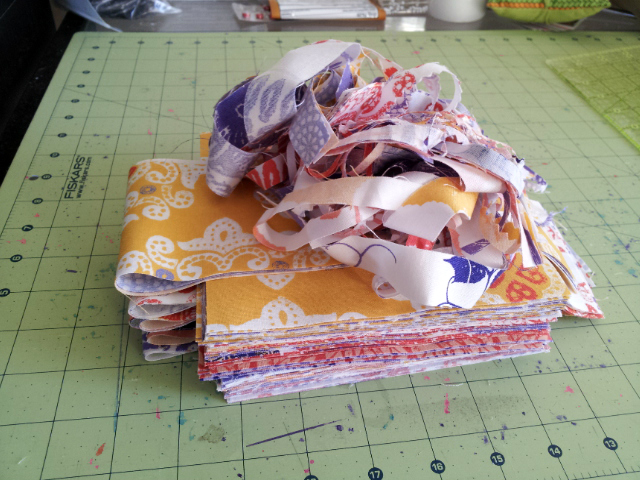
Not that they are inherently bad, but be on the look out for store-made rolls as opposed to official releases by the fabric companies. These rolls may have a different amount of strips, fewer prints or more duplicates, be cut in half the width of fabric instead of full, have strips larger or smaller than 2.5″ tall, or any number of other variations (yes, I’ve purchased one with all of those attributes).

Official rolls typically have printed tags and are bound by ribbon printed with the manufacturer’s name or come shrink wrapped.

Know what you’re buying, ask questions if things aren’t clear, and be happy sewing!

If you think I’ve missed any strip collections, please let me know in the comments.

September 11th, 2012

Foto Friday

Posted in Quilting

  • Cutting
  • Impressions Baby Quilt

Twelve fat quarters, all chopped up into pieces and binding strips. The only waste on this 41″×46″ quilt will be that tangle of strips from squaring up the FQs.

August 31st, 2012

How to Cut Half-Square Triangles

Posted in Learning

  • Cutting
  • Piecing

Half-square triangles: 
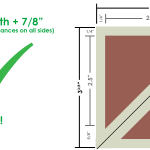
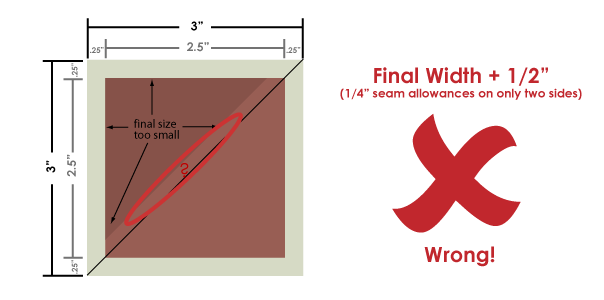
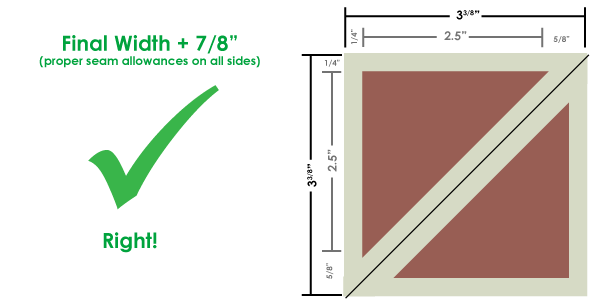
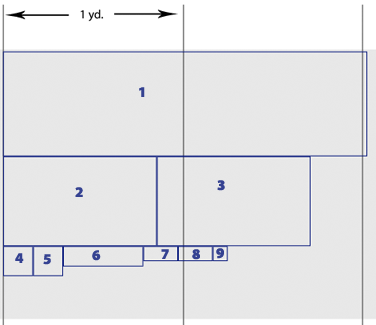
Math’s no fun, at least in my opinion. So, as I get into this whole quilting thing, I’ve been doing more math than I like, and doing it poorly. I have found that Adobe Illustrator is great to play around and piece my quilt blocks together in a digital sense, but unlike quilt-specific software (like Electric Quilt), it doesn’t magically add my seam allowances for cutting out the bits and pieces. My most annoying mistake: sizing half-square triangles.
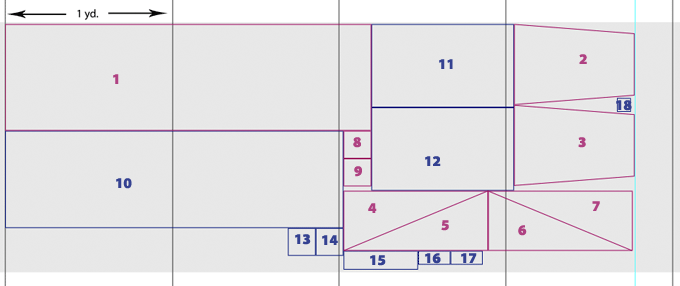
First, in case you’re asking: a half-square triangle is the triangle created by cutting a square in half diagonally (usually used to create another square of two triangles), like in the image above.

The wrong way

When I went to add seam allowances and cut out my triangles, I made a totally rookie mistake (hey, I am one!): I forgot about the seam allowances needed for the hypotenuse of the triangle. I simply added a half inch to the width and height of my square (a Âź” allowance on each side), and cut down the middle.

In a graphic sense, I did it like this:

Don’t forget your hypotenuse seam allowance.
Final width/height + ½” does not the proper-sized triangle make.

But as you can see, that doesn’t give me the right size.

The right way

To get the proper size, you need to consider the hypotenuse seam allowance as well, but as is the nature of triangles, simply adding another half inch doesn’t quite work how you want it to.

For perfect half-square triangle measurements cut from squares, cut out a square that is 7⁄8″ larger than your intended finished size, then cut that in half diagonally.

Graphically:

See, we have hypotenuse seam allowances too!
Final width/height + 7⁄8″ does the proper-sized triangle make, regardless of the measurements for final width/height.

Some people will add a full inch to the final size (Âź” on the outside edges and they think two Âź” allowances in the center), cut that and then sew the center seam and trim off the small excess when they realize it’s not quite the right size, but why put yourself through that much extra work? Start with the right size and end with the right size, no extra cutting involved. Just make sure to sew that perfect Âź” seam.

But, what if I’m not doing a 2.5″ square?

The 7⁄8″ measurement doesn’t change. It is based on the Âź” seam allowances, not the size of the square/triangles. My choice to use 2.5″ in the example was mostly arbitrary.

Does this technique work for you? Do you have another way of cutting out half-square triangles?

July 13th, 2010

Modifying Layouts for Maximum Yardage Savings

Posted in Learning

  • Cutting
  • Fabric

Vintage shot of woman at the cutting table. For the novice sewer, the cutting layouts supplied by most pattern manufacturers are a boon. Not only do they help approximate the most economical way to cut pieces out, they ensure that your pieces are being cut in the right direction—either on the grain or properly on the bias, on the right or wrong side of the fabric—to ensure correct draping and fit. But there are trade-offs involved: those layouts generally take into account the different gradings of the multi-sized patterns, so smaller sizes will have many more scraps of odd sizes than will the larger. As you gain experience, it might be time to start developing your own cutting layouts.

When to modify the cutting layout?

The smart aleck in me wants to say “always,” (because I have yet to see a layout that can’t be tweaked a little) but that would be doing you a disservice. If you’re not comfortable with understanding why a piece needs to follow the grain or be cut on the bias, you’re best off following the given guides. But eventually, you’ll find that you understand everything well enough to mix things up a bit.

I really can’t reiterate enough. Don’t rotate pieces or alter their placement away from the grain or bias lines until you understand how that affects how the piece gives and lays.

When I talk about modifying the layout, I generally mean moving the different pieces around to other spots, but in the same orientation as originally noted. Pieces are cut on the bias or grain line for reasons dealing with fit, as well as strength and wear. A piece that should be cut on the grain but is cut on the bias will end up stretching in strange ways that it isn’t meant to. Likewise, a piece that should be cut on the bias will not fall correctly or stretch when needed if it is cut on the grain. Even lengthwise-grain (down the yardage) vs cross-grain (selvage-to-selvage) are important: many fabrics stretch in different ways across the two weaving directions, which will also cause issues (and mess up patterns and such).

That said, I live by the idea that once you know the rules, sometimes you can bend or even break them, so if you’re willing to possibly screw up (and need more fabric), the sky’s the limit.

When you can modify the layout for size

When it comes to multi-size patterns, it’s generally in the printer’s best interest to have all sizes graded to a single piece, rather than having to print four different versions of a pattern piece—one in each size (taking up more space on paper). Likewise, when it comes time to plan a cutting layout, it’s most economical for the drafter to create a layout that will accommodate all sizes provided in the pattern. If you need a smaller size, try adjusting the layout by moving the cutting lines as close to each other as possible. You may find that you can rearrange the pattern pieces to be more economical when you’re not having to worry about the extra inches for larger sizes.

When you can use folds to make less work

Most pattern cutting layouts try to keep the layout as simple as possible; in other words, they will usually only require a single fold, maybe two. But if you play around with the layout, you may find that you’re able to use more folds to save yourself cutting work, and fabric. Make sure to pay special attention to resulting pieces being on the correct side of the fabric, especially if they are asymmetrical.

When you are using stripes, plaids, or obvious patterns

When working with stripes, plaids and obvious patterns, you generally need to match up the patterns along seam lines or risk looking totally amateur. In fact, most patterns will advise you that you’ll need more fabric to match stripes, plaids, etc. This is almost always true. My general rule of thumb is to either purchase the 54″/60″ yardage amount if I’m using 45″ fabric, or add 20% to the yardage amount.

But a caveat, of course: it’s really a pretty loose rule. I almost always study the given pattern and cutting layout before buying my material. If we’re talking expensive patterned (striped/plaid/etc) fabric, I’ll find out the pattern repeat (where the pattern repeats itself on both the horizontal and vertical axes), measure the pattern pieces, and play around in a graphics program (and do more math than I would like) to really get a good idea of an alternative layout, and then make my purchase. You could do the same with graph paper and a pencil and ruler as well.

Another reason to alter the cutting layout is to capture a particular motif in a section of a pattern piece. For instance, you may want to cut your back pieces so that a particularly interesting part of the fabric design is centered on the back. This is sometimes called fussy-cutting in the quilting world.

When you’ve extensively modified an existing pattern or draped your own

When you’ve made many changes to a pattern, the recommended cutting pattern probably needs to go right out the window. You may be able to base a new layout off of the original, but sometimes you might need to start from scratch. The latter is also true, of course, when you drape your own pattern. I usually spend a lot of time moving all of my muslin/draping pieces around on the empty floor before I even consider pulling out the fashion fabric.

When you’re planning multiple projects from the same fabric

If you can plan in advance and cut out multiple projects at the same time, you may find that you can squeeze pieces into the excess of the first layout, or even completely rearrange everything and end up needing less fabric than you would have used when cutting the patterns separately.

A case study: two Elizabethan shirts, or cutting multiple projects at once

When working on the smock and shirt for Faire-going this summer, I had the goal of being as economical as possible with my material to better emulate what an Elizabethan seamstress would have done. I may have taken it to the extreme, spending far too much time in my graphics program playing around with potential layouts. The result, however, was an extremely economical layout that used less yardage together than they would have separately.

The rule: when planning multiple projects from the same material, rearrange the curring layout so that you cut all projects at the same time. You will likely find that you can use less yardage by creating a more compact cutting layout.

My cutting layouts went from this:

Cutting layout for smock alone
Cutting layout for shirt alone
These layouts are more or less the most effective way to cut the fabric for each individual project.

To this:

Cutting layout for smock and shirt together
The main concept here is to have the second longest piece’s length “eaten” by the first, so you’re not adding any additional length. The same with the third and fourth longest, etc.

I was able to save over a half yard of fabric by cutting at once, leaving very few—but very useful for straps and ruffles—scraps.

Do you have any fabric-saving tips to share? Do these methods help you in your projects?

June 29th, 2010


© 2008–2025 Raevenfea