Raevenfea

Maker of various fabric things

This is a static export of a blog I put on ice many years ago, that still has personally relevant content. No promises can be made around linkrot, styles, or working functionality.

When Planning Fails

Posted in Quilting

  • Impressions Baby Quilt
  • Sewing fail

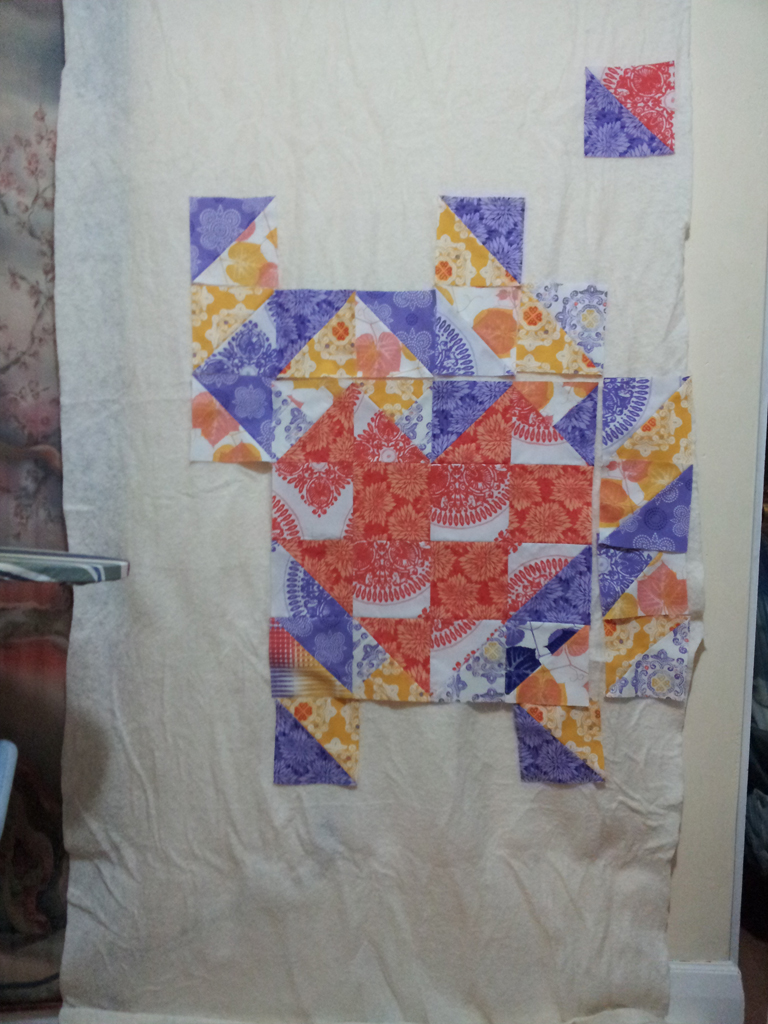
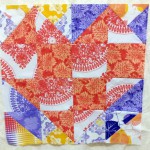
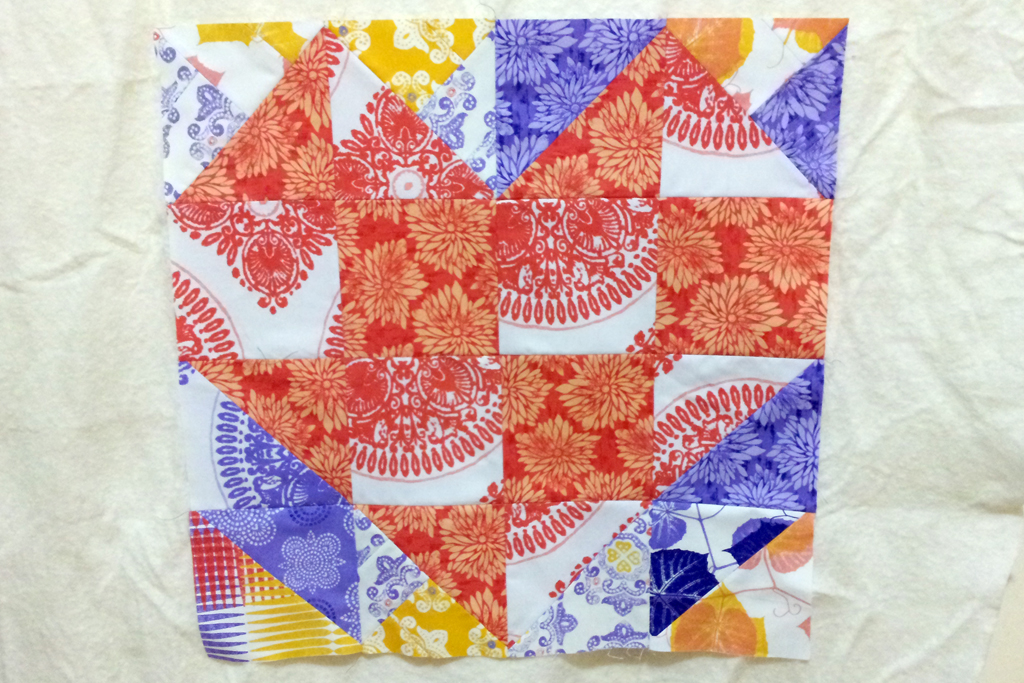
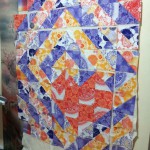
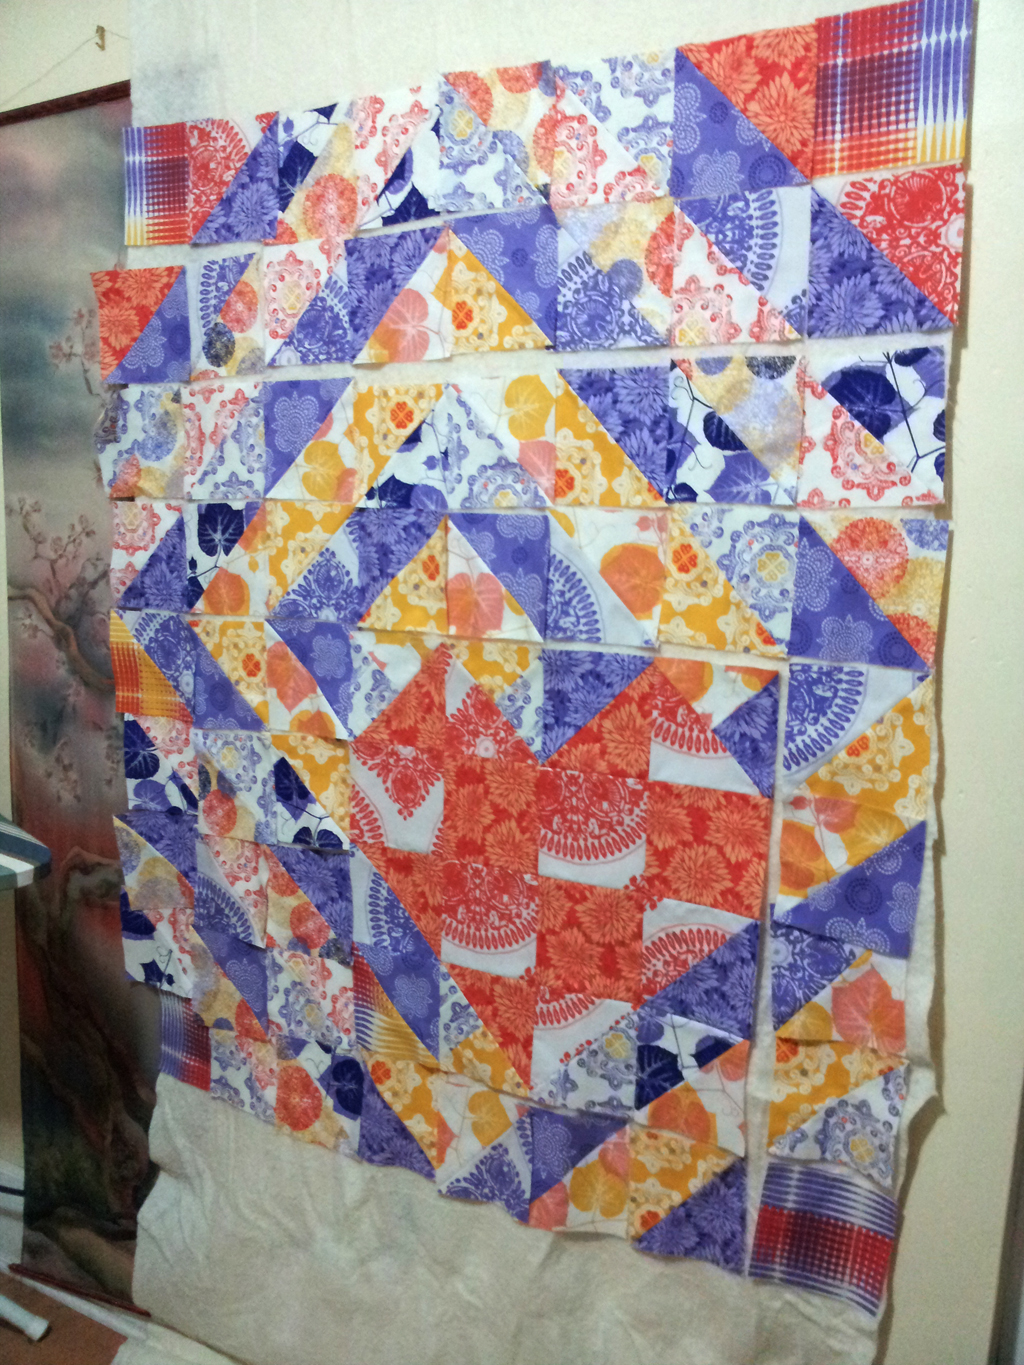
My original intent was to show you this project again only after completely piecing the top together. But instead, I’m going to point out my major math/planning fail. Last night, I finished piecing the HSTs for the Impressions Baby Quilt. Don’t they look nice on my design wall the piece of batting I hung on the wall?

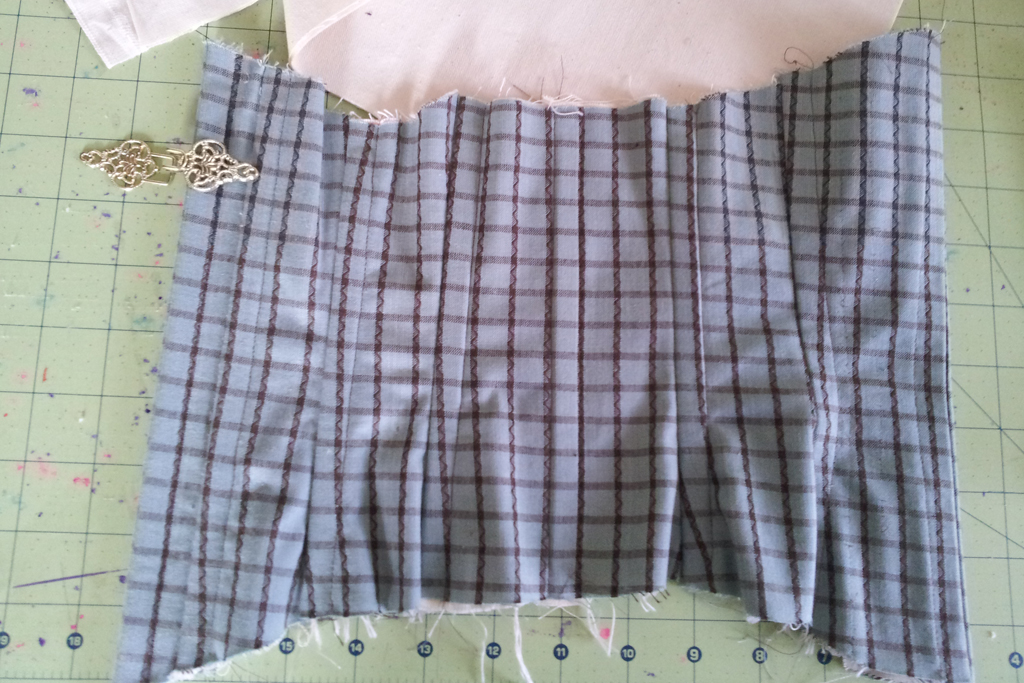
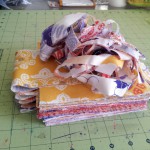
But looking at my desk, I still have all of these:

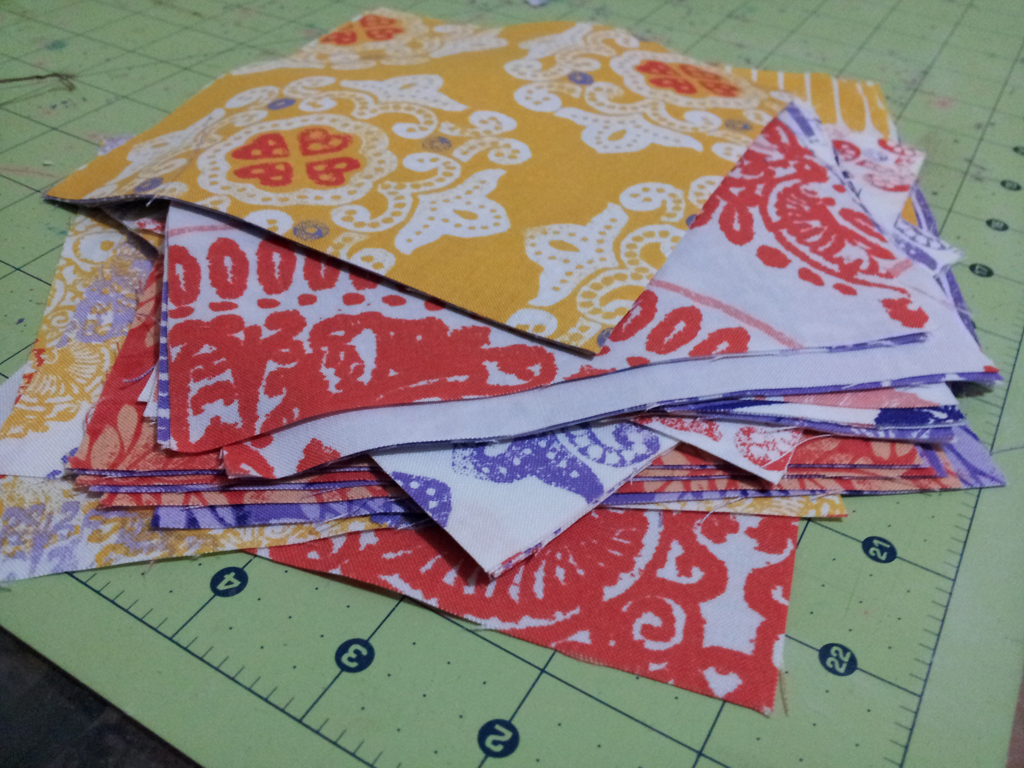
Which is many more pieces than the four or so I expected to have after planning this all out extensively. (So, this could be worse—I could have been short; extra fabric’s not bad, right?)

How many 6″ squares can you get out of a fat quarter? The correct answer is nine. For some reason, my brain was dead set on believing it was only six. And so, when I planned this quilt out, I did so with the idea that I only had six squares of each fabric (or 12 triangles).

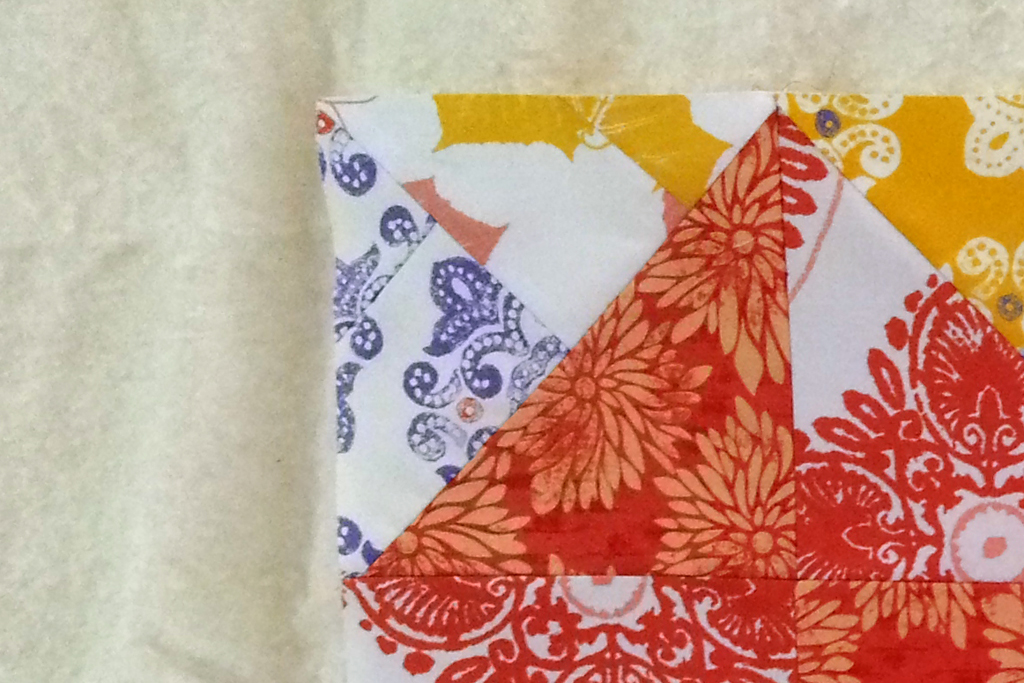
The result of that belief was that I had to get creative with my color scheming, since I didn’t have quite enough yellow to continue the diamond patern. I was going to eek out the quilt top and scrappy binding with naught but a few slivers leftover from the twelve fat quarters I started with. I even had to piece together the small triangles for the four blocks that have three pieces instead of two (the ones that comprise the points of the heart).

In reality, I have enough yellow to get much closer to my original plan and make at least one doll quilt to boot. I didn’t even need to piece those other triangles from the leftover strips.

I’ll be whipping up more HSTs with the leftovers now, and swapping out some of the squares on the design wall before piecing the top together.

At least there will be a doll quilt out of it all? (I do so like having that extra small quilt for the baby I gift the larger one to.)

Have you made serious mathematical errors before? Does your brain get stuck in an erroneous ā€œthis is the right answerā€ mode?

September 27th, 2012

I Have a Name!

Posted in Crafting

  • Guild projects
  • Impressions Baby Quilt

… tag that is.

It’s not so cool as the ones I’ve seen some of you making for Sewing Summit, but my quilt club switched from plain ones to having us each make one.

So, this is what I whipped up.

I couldn’t really think of what to do, but then I started looking at my stash and it all came together in my head.

Mostly, it’s all just fused, then topstitched. I threw my quilt label in, a bit of binary (I am a computer scientist [well, theoretically], after all), ā€œKansas Cityā€ (my hometown), ā€œCostumeā€ (that’s how I got started sewing to begin with), and a pen nib (’cause I blog, and write, etc.).

I FMQed my name. My penmanship is horrible. My first attempt was worse:

Once I was done with that, I whipped up a couple of additional new member tags. I bought new chalk, and am convinced that my chalk cloth woes were only partially due to the cloth, and largely due to the crappy Crayola chalk I had.

So, in the future, I think I’ll stick to buying Prang Hygieia Chalk (which is cheap—99¢ā€”at my local Staples).

We’ll see how they work out over the course of the year.

I’ve also made more progress on one of my WIPs, the Impressions Baby Quilt:

Which is good, because I don’t seem to be making much progress on WIPs in general, in favor of starting more projects.

So, here’s to the start of a new Club year, and perhaps some finished WIPs.

September 24th, 2012

Foto Freitag

Posted in Quilting

  • Impressions Baby Quilt

At least I made some progress on one of my projects this week. There’s a method to the madness of HSTs, you just can’t tell yet.

September 21st, 2012

Foto Freitag

Posted in Quilting

  • Applique
  • Home decor
  • Quick project

Sat and sewed this quick hanging from Fons and Porter Celebrations earlier this week with a group of other ladies. Nothing special, just some fusible applique and some very simple quilting. Trying to finish up the binding over lunch here at work.

Found out that my walking foot and tulle don’t play that well together, but it’s an otherwise fine project.

September 14th, 2012

A Pair of Pillows

Posted in Crafting

  • Gifts
  • Home decor
  • Pillow
  • Tutorials

Our friend just moved apartments and bought a new couch set (which I’m rather jealous of, although it wouldn’t fit properly in our house). When we were shopping with him, he really seemed to like this one set of pillows that unfortunately didn’t really match the new set very well.

So, Carl and I decided that I should make simliar ones in colors that will match. It’s a very simple design of upholstery fabric and fuzzy stuff on the back (for cuddle-ability):

Ignore the slightly puckered bottom—it’s from the pins, because I still have to whipstitch them closed over lunch before delivery tonight.

The brown floral (which reads more like scales in some of the rectangles) is the same fabric as two of the pillows that came with the set—a happy find in the fabric store that will also help these blend in with the other pillows.

Here’s a super quick tutorial for how to make your own matching pair.

Materials

  • 1⁄6 yard each of four different fabrics for the front (these were upholstery-weight)
  • ½ yard of backing fabric (these were a cuddle fabric, but upholstery works too)
  • 2 16″ pillow forms (or make your own. It’s better to have that extra layer of fabric than to just stuff the case you make)
  • Neutral thread

If you use quilt-weight fabrics, you probably want a yard of muslin to use as an interlining for the front and back, just to give it more body. Unless your 42″-wide quilt-weight fabric is also super square, you will need a bit more than 1⁄6 yard (you need a strip that is 6″×40″ for standard width, or 5″×48″ for wider fabric).

Cutting

Cut 16 3″×5″ rectangles from each of the four front fabrics.

Cut two 17″ squares from the backing fabric.

If you’re using lightweight fabric, cut 4 17″ squares from the muslin.

Construction

Because I recommend using heavy fabric, I’ve given all measurements assuming a seam allowance of ½″. Sewing a true ¼″ seam with upholstery fabric is annoying, fiddly, and begging for problems (not to mention it gives room to deal with the horrid fraying).

Front piecing

Pair up the two darker fabrics and the two lighter fabrics for the front (A and B, C and D).

Create blocks by sewing all of the A pieces to the B pieces along the long side. Do the same for the C and D pieces.

Construct the rows by alternating two AB blocks and two CD blocks. You’ll need four rows that start with AB and four that start with CD, with A and C always being at the top of the row.

Sew four rows together for each pillow, alternating the AB-starting rows and the CD-starting rows.

Making the pillow

One you’ve completed the fronts, place a front and back piece right-sides together. If you used light-weight fabric, baste a piece of muslin to the wrong side of each piece first.

Pin, then sew all the way around, leaving a 10″ opening on one side (or smaller, if you feel comfortable stuffing your pillow form in).

Turn out, clipping corners as needed.

Insert the pillow form through the opening, then sew the opening closed with a whipstitch or your preferred closing method.

Repeat for your second pillow.

VoilĆ ! A pair of pillows.

September 13th, 2012

What’s In a Roll (or, not all Jelly Rolls are equivalent)

Posted in Learning

  • Cutting
  • Fabric
  • Pre-cuts
How many strips come in a roll?

I’ve been using 2.5″ strips a bit lately—commonly called Jelly Roll strips. But, my recent purchases haven’t been fabrics by Moda, so I’ve quickly learned that not all rolls are equal. Here’s a breakdown of commonly available rolls and the number of strips included.

What is a Jelly Roll?

A Jelly Roll (which is a term specifically for Moda rolls, but is commonly used to describe all strip pre-cuts) is a pre-cut fabric assortment of strips measuring 2.5″×Width of Fabric (~40–44″). They typically contain at least one strip from every print and colorway in a fabric collection, and sometimes contain duplicate prints to reach a specific strip count.

How many strips are in a Jelly Roll?

The number of strips in a roll varies by manufacturer, and sometimes even within a manufacturer’s offerings.

Strip Count Manufacturer and Name
† count is dependent on number of prints in collection
* Riley Blake Designs has a few Rolie Polies made of blenders that come with as few as 11 strips, and at least one solids Rolie Polie with 45. Free Spirit sometimes has 36 strips in their Designer Rolls for larger collections (and possibly other numbers). Kauffman has Solid Roll Ups that often come with 40 or 41 strips and batik sets with as few as 28.
11–28† Connecting Threads Sample Strips
20 Joann Fabrics Fabric Palette/Central Jellie
20 Moda Junior Jelly Roll
21–28*† Riley Blake Designs Rolie Polie
28-45* Robert Kauffman Roll Up
30* Free Spirit/Westminster Designer Roll
40 Hoffman Fabrics Bali Pop
40 Moda Jelly Roll
40 Northcott Stone Strips
40 Timeless Treasures Tonga Treat

Strip count in a roll sometimes varies, even in the ones I didn’t mark with an asterisk, so always check the description of what you buy online or look for a number in store (or count, if you have to).

There’s also the rare occasion that a strip is cut incorrectly and not caught by quality control (I have had this happen multiple times with Moda charm packs, less often with rolls), so when picking patterns to make with your precuts or planning out your own, try to build in a small margin of unused strips. And, make sure to count your strips before starting the project!

Where To Buy

You can find these all in various online fabric shops and it seems like more and more local shops also carry them. Depending on what fabric brands a shop carries, you may not be able to find every type in a single location.

Prices also vary. You’re typically going to pay slightly more per equivalent yard (40 strips is just over 2.75 yards), and while the price generally relates to number of strips, that’s not always true. And, of course, manufacturers charge different amounts per yard (and have differing qualities of fabric), so the different roll prices will reflect that.

20120910-221029.jpg

Watch out for store-made rolls!

Not that they are inherently bad, but be on the look out for store-made rolls as opposed to official releases by the fabric companies. These rolls may have a different amount of strips, fewer prints or more duplicates, be cut in half the width of fabric instead of full, have strips larger or smaller than 2.5″ tall, or any number of other variations (yes, I’ve purchased one with all of those attributes).

Official rolls typically have printed tags and are bound by ribbon printed with the manufacturer’s name or come shrink wrapped.

Know what you’re buying, ask questions if things aren’t clear, and be happy sewing!

If you think I’ve missed any strip collections, please let me know in the comments.

September 11th, 2012

Foto Freitag

Posted in Crafting

  • Foto Freitag

Supplies for class in the morning. (Ignore the Fat Quarter Shop sticker, it was just a handy bag… but it is a good shop, nonetheless)

September 7th, 2012

Ever-changing Corset Creation

Posted in Historical

  • Plumleigh Augusta Babbage
  • Simplicity 2613

Despite the lack of updates, I haven’t entirely forgotten about that giant Steampunk outfit plan that I’m supposed to be working on. I finally took a stab at putting the corset together this weekend, in a form slightly modified from my original plans, but one that should still work.

In May, after having C&K try on the mockup, I knew I needed to modify it to an underbust.I drew out the new top while they were wearing it, and then ripped apart the mockup and modified my pattern pieces according to the drawn lines. The other major modification is that the budget got the best of me and I decided to forgo using a traditional separating busk in lieu of hooks and eyes. I found these great filigree ones on sale, so there will be four of them, and likely a few more hidden ones. This is not going to be used for tight lacing or everyday wear, so I think it should hold up.

I have the fashion fabric and drill interlining all pieced together for both sides (one shown here, with some bones in place). I’m now in the process of sewing in the boning casings. After that will just be the lining and grommets, and deciding on what to lace it with.

I’d completely forgotten that I had this homespun in my stash. When I uncovered it, the whole corset look clicked in my head—I like it much better than the other options I’d laid out (and C&K said that they had no preference at all).

It’s a bit annoying to match the lines, and it’s by no means perfect, but there aren’t any absolute glaring mismatches. Luckily I have plenty of fabric so that I needn’t be hampered by a restrictive cutting layout.

I hope to finish it this week so that I can get started on the other torso-covering pieces. It’s September already!

Also, here’s a look at the dog modification I made from Simplicity 2613 now that it’s been delivered:

The concept needs work, but I like it (and so did the recipient!).

September 4th, 2012

Foto Friday

Posted in Quilting

  • Cutting
  • Impressions Baby Quilt

Twelve fat quarters, all chopped up into pieces and binding strips. The only waste on this 41″×46″ quilt will be that tangle of strips from squaring up the FQs.

August 31st, 2012

Chalk Cloth Woes

Posted in Crafting

  • Sewing fail

I feel like I’m stuck in a cycle of ā€œmehā€ projects—ones that are sufficient, but not awesome. This is another one of those, and I think all the blame lies on the blackboard cloth element.

The quilt club is transitioning to having members make their own name tags this year. So, in order to give new members a bit of a grace period while still allowing them to have something with their name on it, I am making up a few new member name tags to lend out at meetings. At first, I was just going to make a window into which we could slip a bit of paper with their name on it, but then my imagination got away from me and I decided to try out Chalk Cloth.

Then, my wallet brought me back to my senses and I went for the off-brand blackboard cloth available from the local JoAnn, since I only needed an eighth of a yard or so and the LQS only carries the expensive stuff in one yard cuts. That might be my first problem?

But anyway, I put my embroidery functionality, some twill tape, and a few charm squares to work last night, and ended up with what could be a pretty cool project:

But notice all the yellow dust staining the edges of the fabric? Well, prior to sewing, I primed the cloth according to the directions (rub chalk on its side both vertically and horizontally, wipe, repeat, wipe (repeat again, for good measure), and you’re good to go), but somehow between priming it and finishing the sewing part, it became unprimed (with no heat or water involved).

So, I tried to reprime, but it just doesn’t work as well once it’s all put together.

So, I don’t know if I should continue in this vein or not. Perhaps I’ll try breaking the chalk so that it’s shorter, wash out the stains, and try to prime just the middle of the cloth.

But in theory, it is a pretty cool badge that can be worn around the neck, or have the strap tucked in and be pinned on instead.

I have another three weeks to play around with the idea. We’ll see what happens. (Also, I should probably get around to making my own…)

Update: I was too quick to blame the chalk cloth, I think. I bought a package of Prang Hygieia Chalk (it’s only 99¢ at Staples), and wow, is there a difference. I think the Crayola chalk I bought at the same time as the blackboard cloth is just worthless. Woes solved!

Do you have any experience with using Chalk Cloth or blackboard cloth?

August 30th, 2012

Ā Previous Posts
Newer PostsĀ Ā 

© 2008–2025 Raevenfea