Raevenfea

Maker of various fabric things

This is a static export of a blog I put on ice many years ago, that still has personally relevant content. No promises can be made around linkrot, styles, or working functionality.

Posts categorized: Crafting

A Yarn-Dyed Bionic Gear Bag

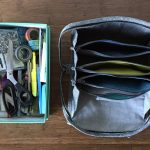
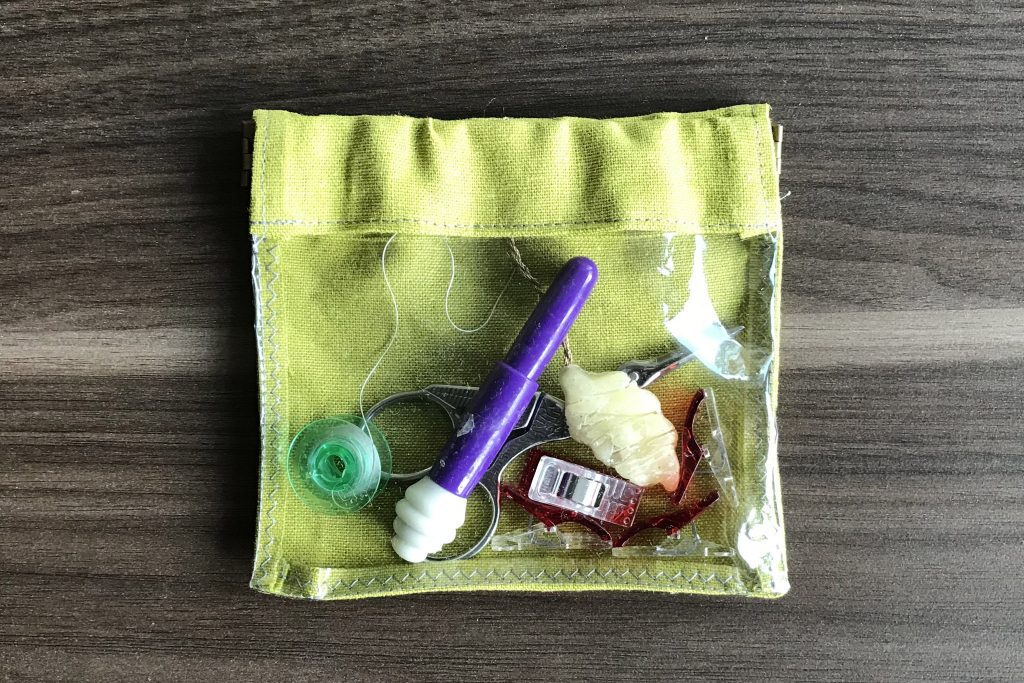
Bionic Gear Bag and what can fit in

Posted in Crafting

  • Bag
  • Fabric: Essex Linen
  • Fabric: Essex Yarn Dyed
  • From a published pattern
  • Notions

A few years ago, two sewing kit bag patterns were making the rounds online—the Bionic Gear Bag and the Sew Together Bag. While I wanted to make one (either one), I never managed to prioritize it amongst other projects. Events this year have sparked that desire again, and when I found myself tossing all of my tools and notions into a cardboard box to tote down to GA, making one quickly jumped toward the top of my project list.
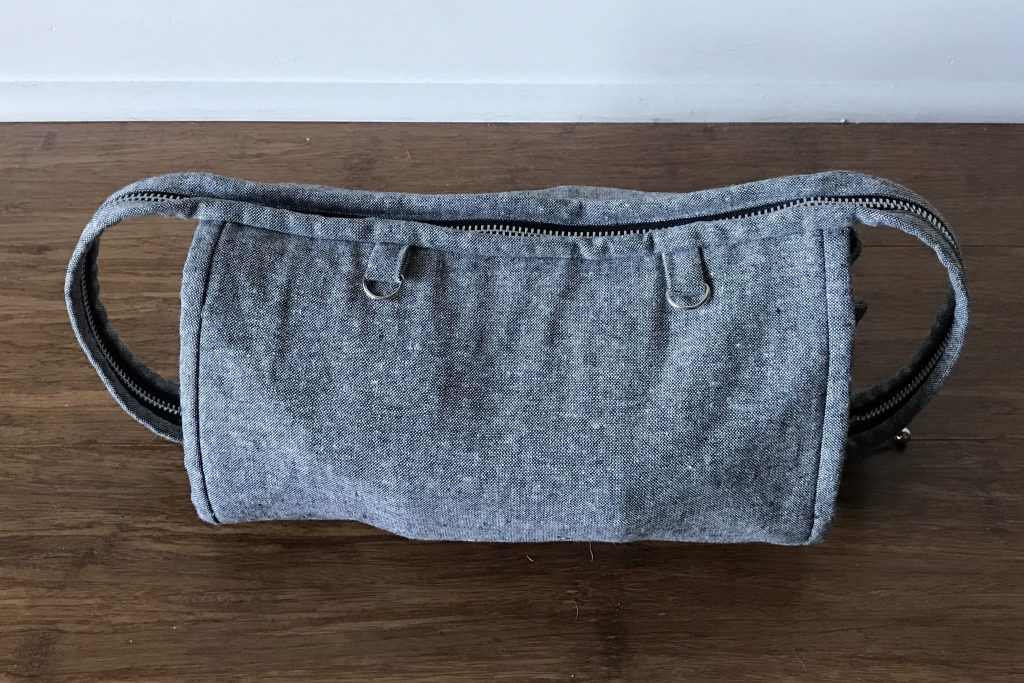
Bionic Gear Bag loaded and ready to travel

First, a confession: I hate buying patterns for quilts and bags. If I’m going to pay for something, I want to learn something, and so many patterns don’t introduce any new ideas or skills. In other words, I can do addition and geometry; teach me the out-of-the-box, or simpler, or more couture, or more resilient way of making the thing. If not for the fact that I’ve never made a bag with interior divider pocket/zips like this, I would never have used this pattern. It was so chatty, unpolished, poorly photographed, and needlessly long. So, caveat emptor if, like me, you’re a bit behind the bandwagon on this.
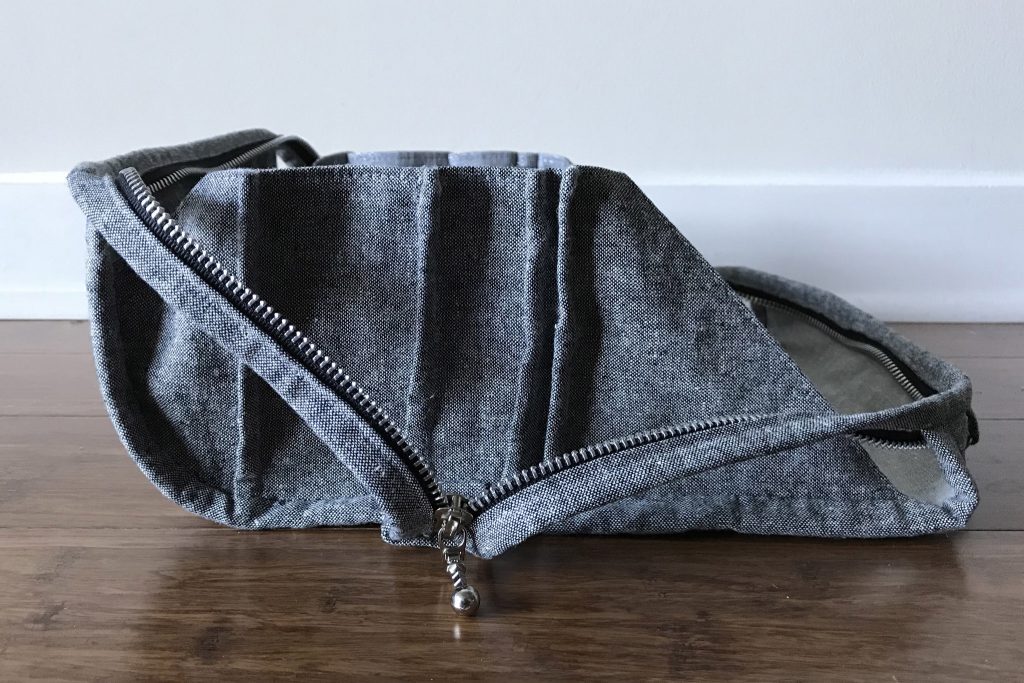
Bionic Gear Bag detail

I chose the Bionic Gear Bag over the other for two reasons. First, I was able to see the product in person; three fellow guild members brought theirs to our spring retreat. Second, I like that the front becomes a tray when open, which gave me a place to modify the pattern with d-rings to hook a thread catcher bag onto (another long-term non-prioritized want). I don’t have any criticisms of the final product the pattern produces, just the pattern itself.
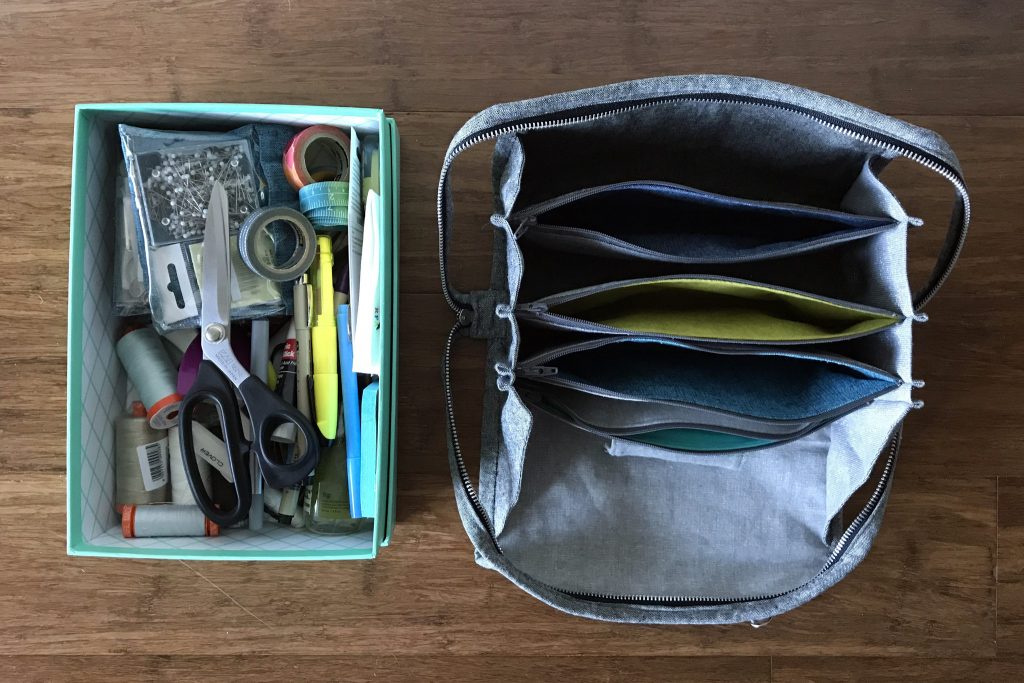
Bionic Gear Bag and what can fit in

I did very little in the way of modifications. I chose to leave off the snaps and not make the fabric dish (another 36 pages of instructions!). I added a needle minder to the front pocket (made from a couple of batting scraps and fabric). And I added the aforementioned d-rings to the binding that becomes the front of the tray, so that I can attach a small Open Wide Pouch (modified with swivel hooks attached and a cutting error that makes it deeper than it should be) that acts as a thread/scrap catcher.
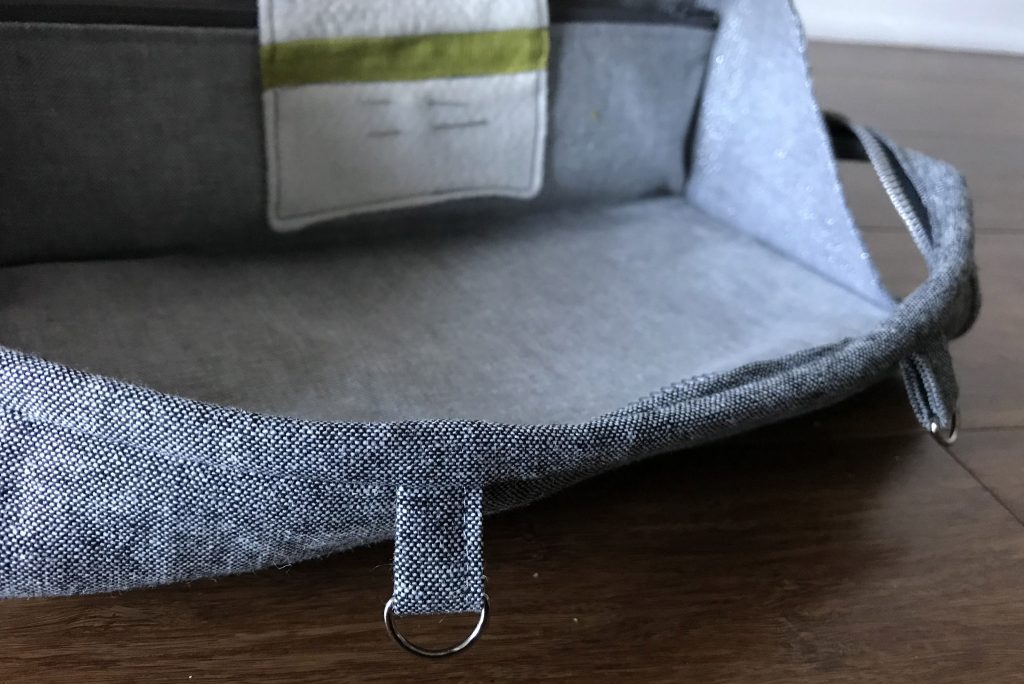
Bionic Gear Bag detail

I also went pretty basic with fabric on this; there is no fussy cutting, printed patterns, or decoration to be found. All of the fabrics are Essex Linen Blends, mostly yarn dyed. The interior is made of shades of gray; the zippered pouch interiors are the only pops of (solid) color. I did order a slightly fancy metal zipper for the exterior with an interesting zipper pull. I love the overall minimalism of the bag and am looking forward to making a machine cover in the same fabrics.
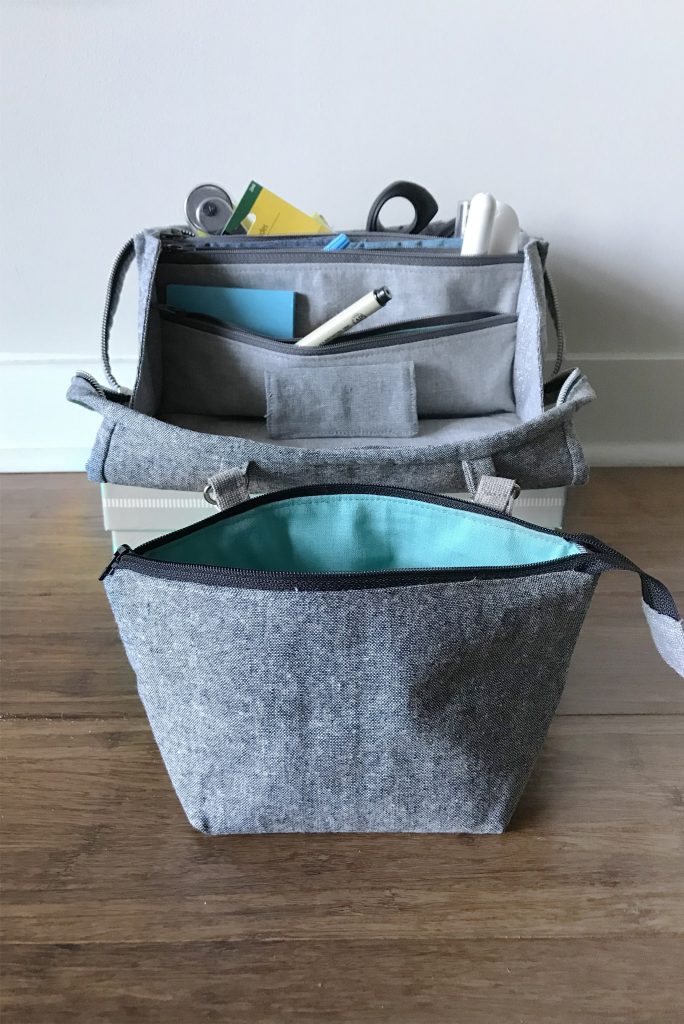
Bionic Gear Bag loaded and ready to work

I can’t wait to travel with this. I’m signed up for a couple of classes locally and am heading back to VT for a few days later this month, conveniently at the same time as one of my guilds’ fall retreats, so I have ample occasions to use it. And it certainly fits a ton of stuff. Almost everything I stuffed into this box when traveling to GA fit into the bag (or, in the case of zippers, became part of the bag)!
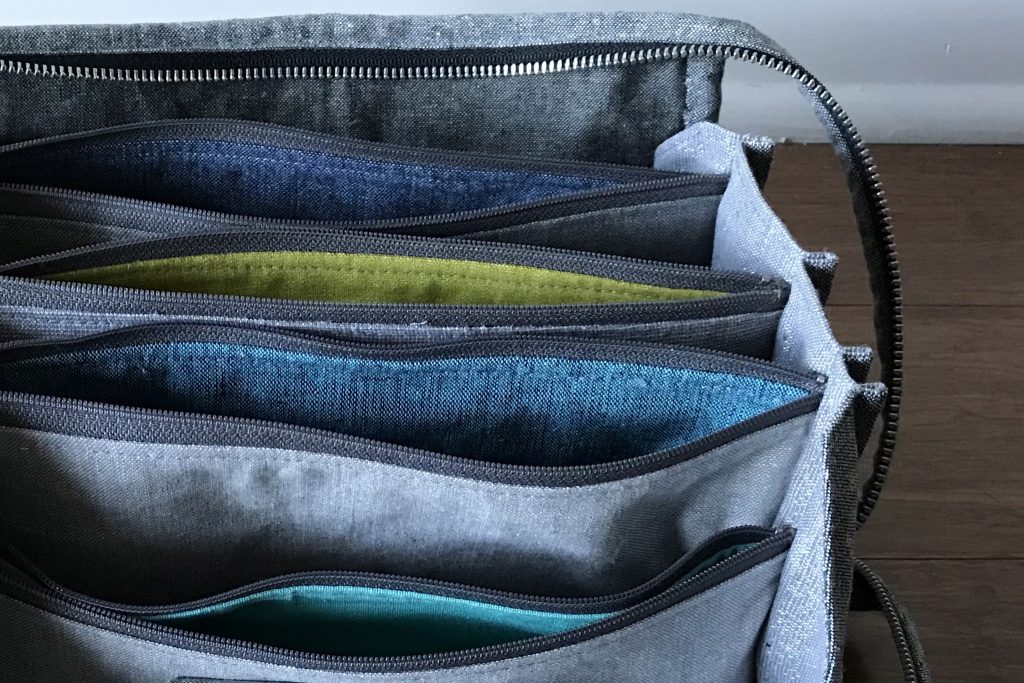
Bionic Gear Bag detail

September 15th, 2018

Half-vinyl Flex-frame Pouches

Posted in Crafting

  • Fabric: Essex Yarn Dyed
  • Hardware
  • Quick project

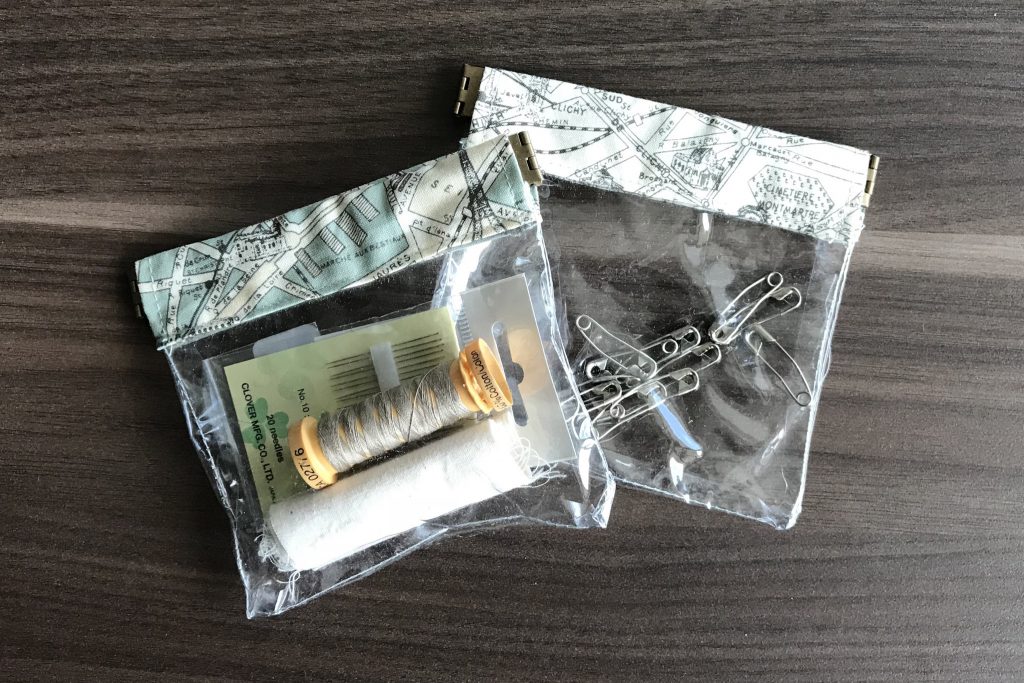
At each of the VTMQG’s retreats, we have optional “Sip and Stitch” projects in the evenings. They’re meant to be quick-ish projects that people can do as a break from what they brought to the retreat, preferably while chatting and sipping on their beverage of choice. They often involve learning how to use a new notion or component that many haven’t seen before. Last spring, one of the projects was making vinyl flex-frame pouches, an experience new to most of us.

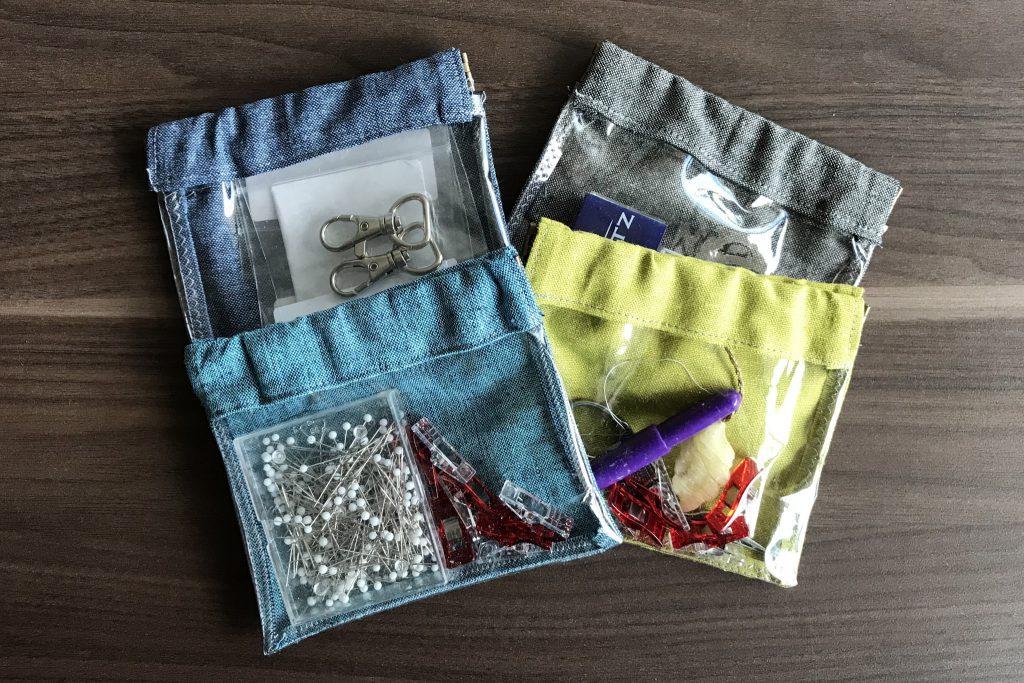
I purchased a few extra flex frames at the retreat, so after finishing a Bionic Gear Bag, I decided to make more pouches that match the bag, as they’re the perfect size to slip into the bag for even more organized storage. Due to having a limited amount of vinyl on hand, I decided to construct these new ones with only one vinyl side. While I could have used the same instructions as before, I thought I’d try something new and cut the back flex frame channel as one with the back fabric piece. In case you’re interested in the same, here’s how I modified Bonjour Quilt’s tutorial.

Supplies

  • 1 4.75ā€ (12 cm) flex frame (source)
  • 1 5.75×4″* piece vinyl
  • 1 5.75×6″* piece fabric
  • 1 5.75×2.5″ piece fabric

* if you want to make your pouches deeper, cut your vinyl longer than 4″ and add the same amount of extra length to the 5.75×6″ fabric piece.

Steps

Tip for sewing with vinyl: sew with the vinyl side facing up (have the fabric touching your machine); use a teflon foot if you have one, or a walking foot. If things are getting sticky, use foundation paper or copy paper over the vinyl to keep your foot from sticking. You may also want to increase your stitch length slightly to keep from perforating the vinyl too much.

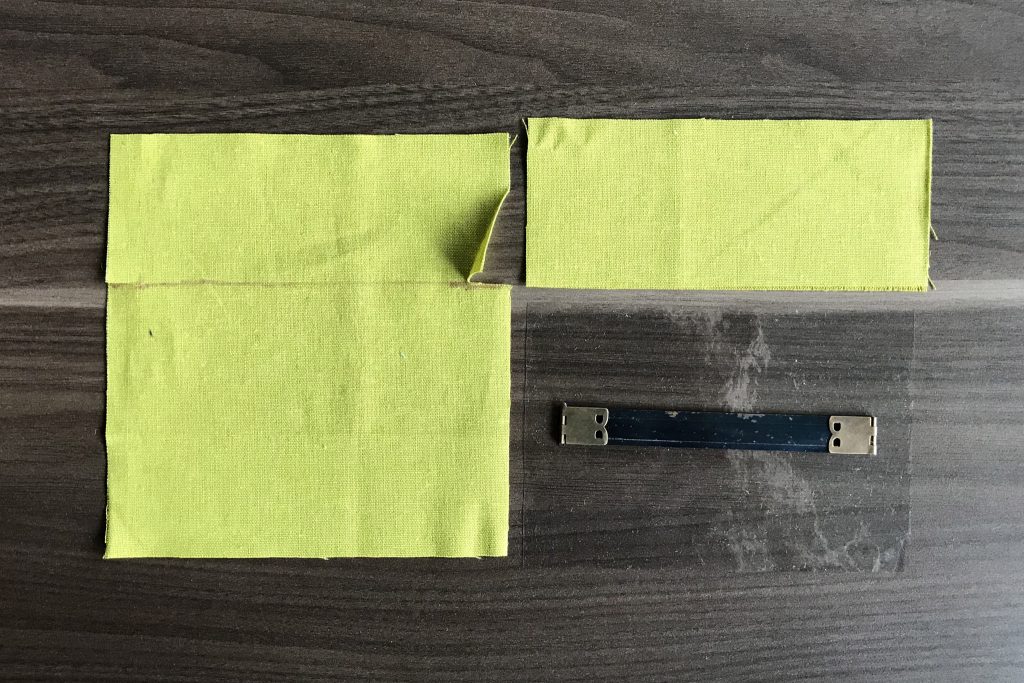
First, you’ll need to make two cuts in your back piece in order to prep it for a flex frame channel. Measure 2.25″ down from the top and mark a line all the way across on the wrong side of the fabric. Then, measure in 1/2″ from each side and place a dot on the line. Cut from the edge in to each dot—this will give you two little flaps to fold in on either side.

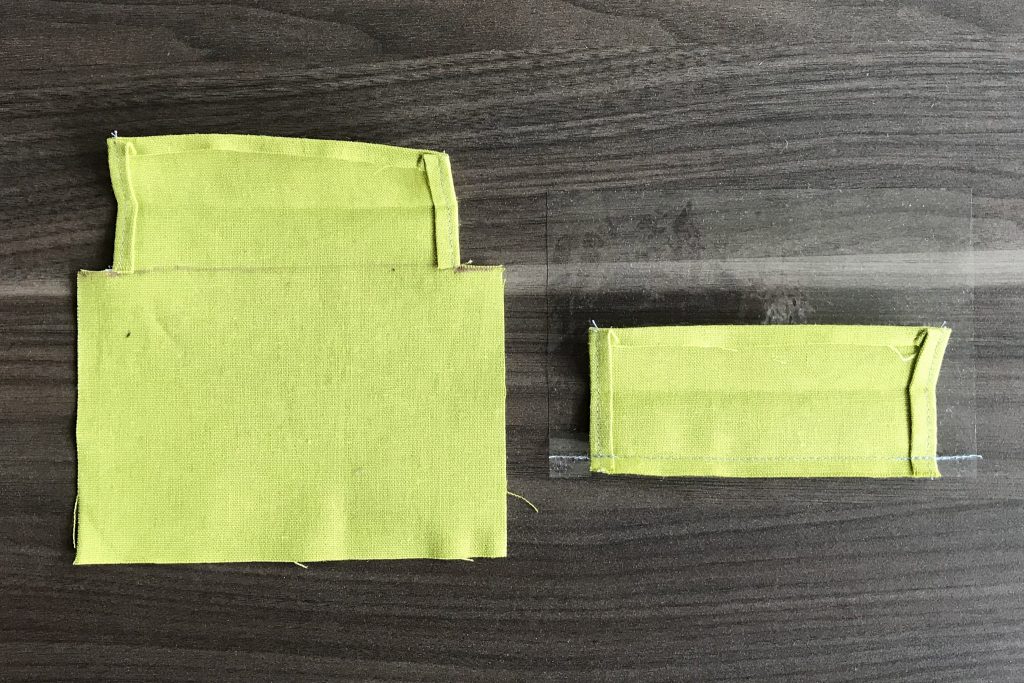
Fold each short flap in by 1/4″ and press. Fold down the top of your piece by 1/4″ and press. Then, fold the flap sides in another 1/4″ and topstitch on each side to hold, backstitching on either end for security.

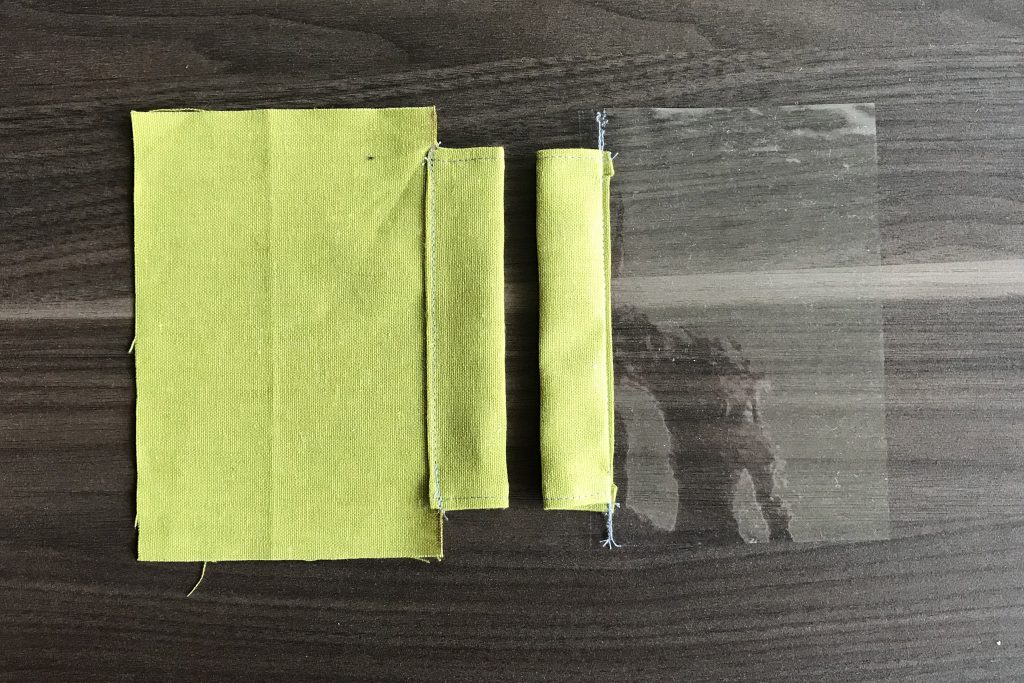
Prep your front channel piece by folding and pressing the short ends in by 1/4″, doing the same for one long end, then folding and pressing the short ends in one more time. Topstitch the short ends. Sew the unfolded long edge to your vinyl with a 1/4ā€ seam allowance, then fold over to the right side and topstitch the other long end down just below the seam. The Bonjour Quilt tutorial shows a different method that is arguably stronger due to sewing only a single line of stitching through the vinyl, but I’m not too worried about mine, and I prefer the finish.

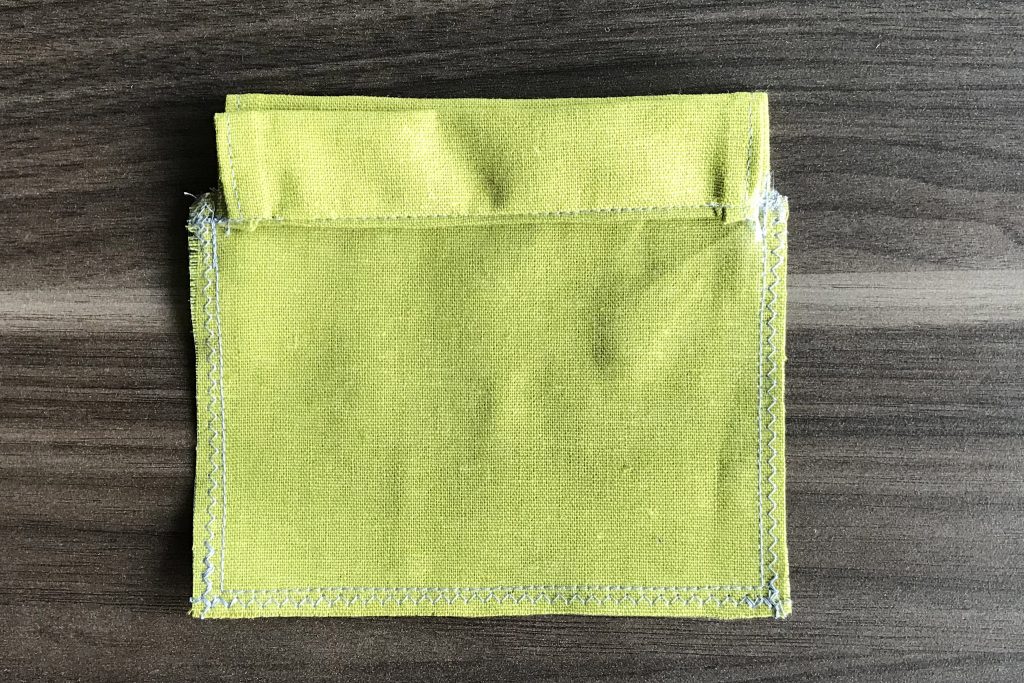
Using a hera maker, mark a stitching line down each side of the pouch where the channel pieces end. Sew down the sides and across the bottom (1/4″ seam allowance), backstitching to secure your stitches at the top side of the pouch.

Trim the seam allowance down to 1/4″ on all sides of the pouch body, then finish the edges by sewing an overcast stitch or zigzag within the seam allowance to keep your fabric from raveling. You could also use pinking shears instead (alas, mine are in VT).

Turn your pouch right-side out, and finger press the edges.

Insert your flex-frame hardware into the channels, add the closing pin, and admire your work!
For more detailed instructions with photos for the later steps, check out the tutorial from Bonjour Quilts.

Good luck with your organizing!

September 8th, 2018

My Favorite Dinosaur

Posted in Crafting

  • For the kitchen
  • Gifts
  • Machine embroidery
  • Quick project

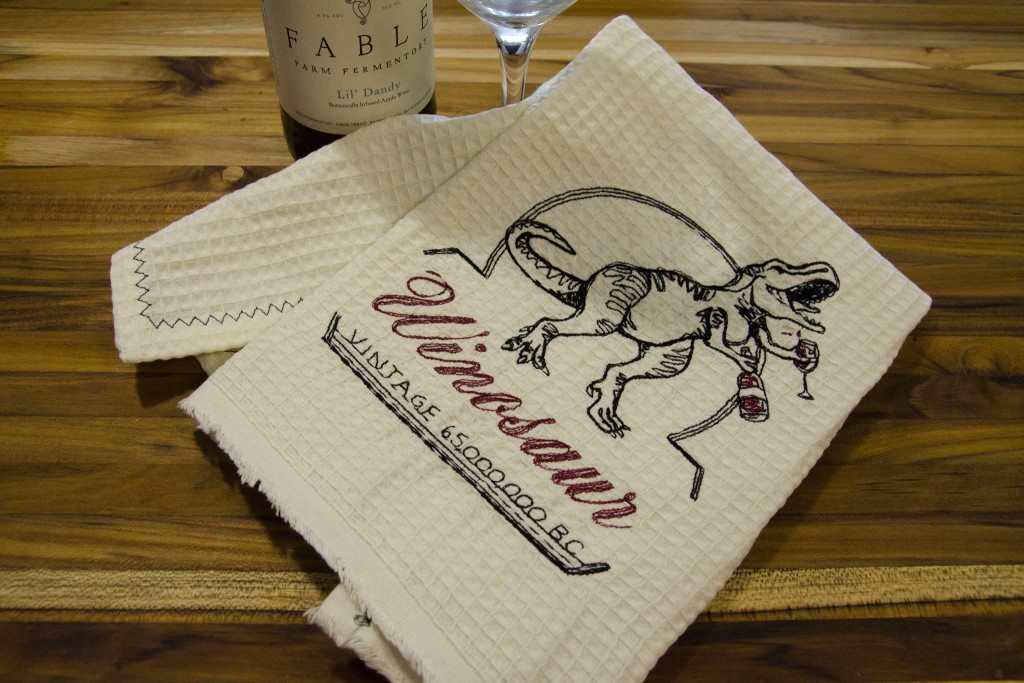
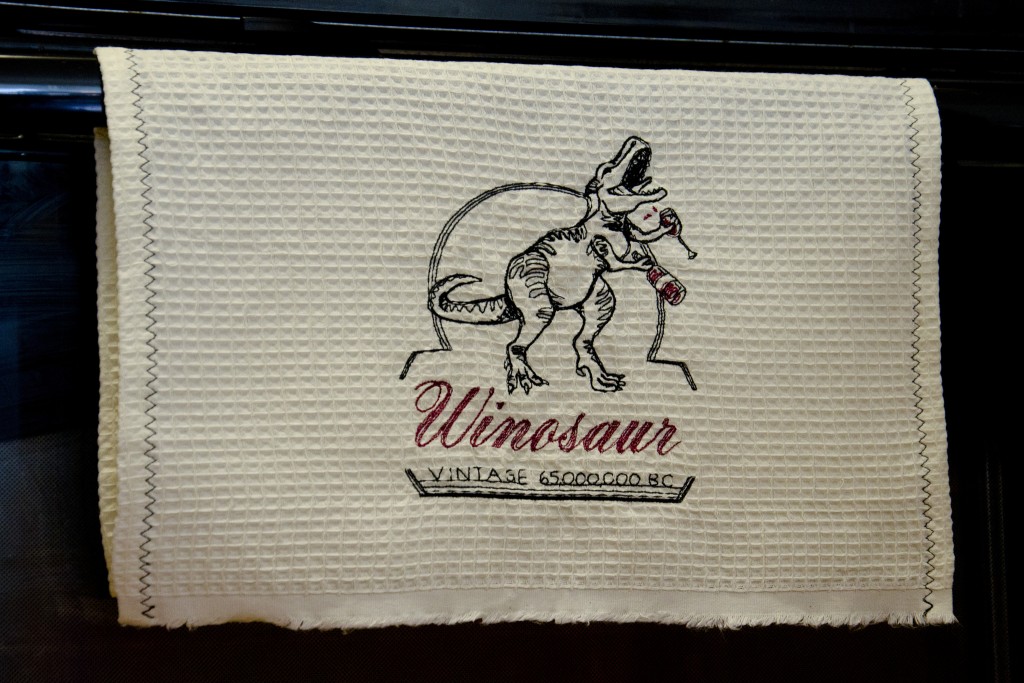
The curriculum for one of the coding classes I teach used to have a meet and greet question that everyone would answer: “what’s your favorite dinosaur”? Without fail, I’d forget to plan for it, and have to wrack my brain for one from Land Before Time or Jurassic Park (those movies being the extent of my familiarity with dinos). I’ve found my new favorite (a bit too late, c’est la vie): the inimitable Winosaur!

Winosaur towel

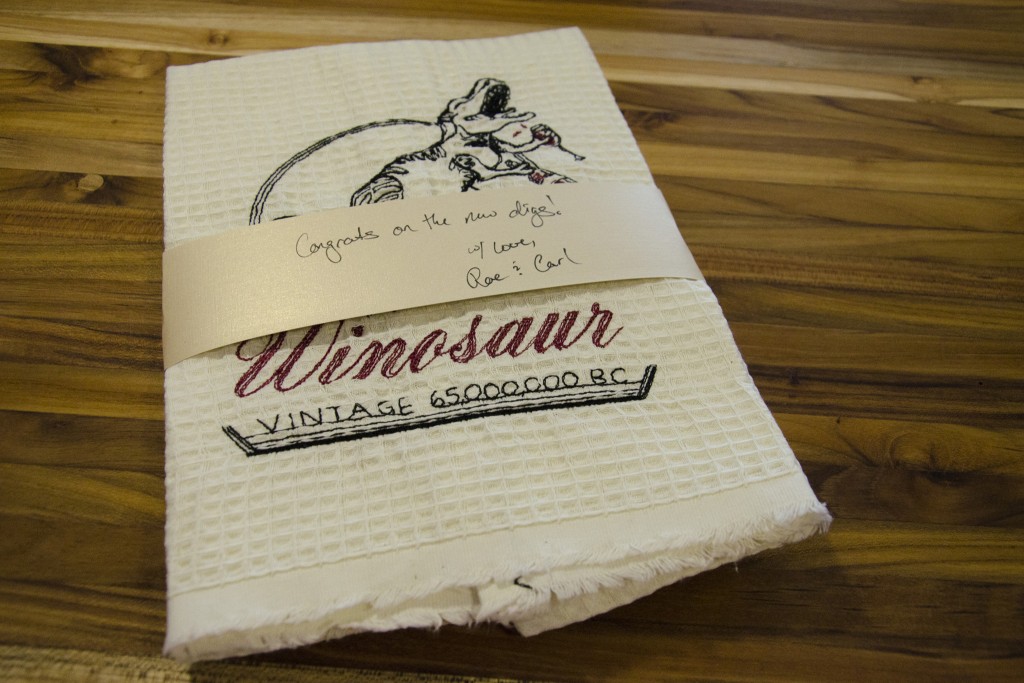
I picked this embroidery up from Urban Threads a while ago, when it was featured as a freebie. It was perfect for a set of tea towels (wine towels?) to give as a hostess/housewarming gift to friends who recently moved and threw a BBQ.

Winosaur towels

Rwaar. Glug glug.

Learn from my mistakes

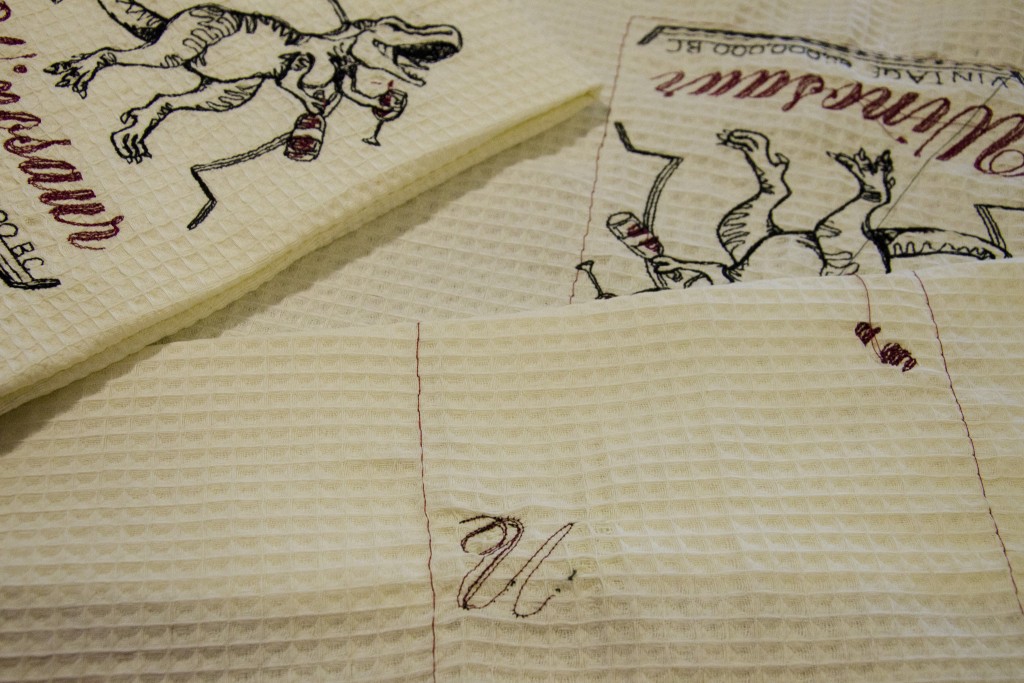
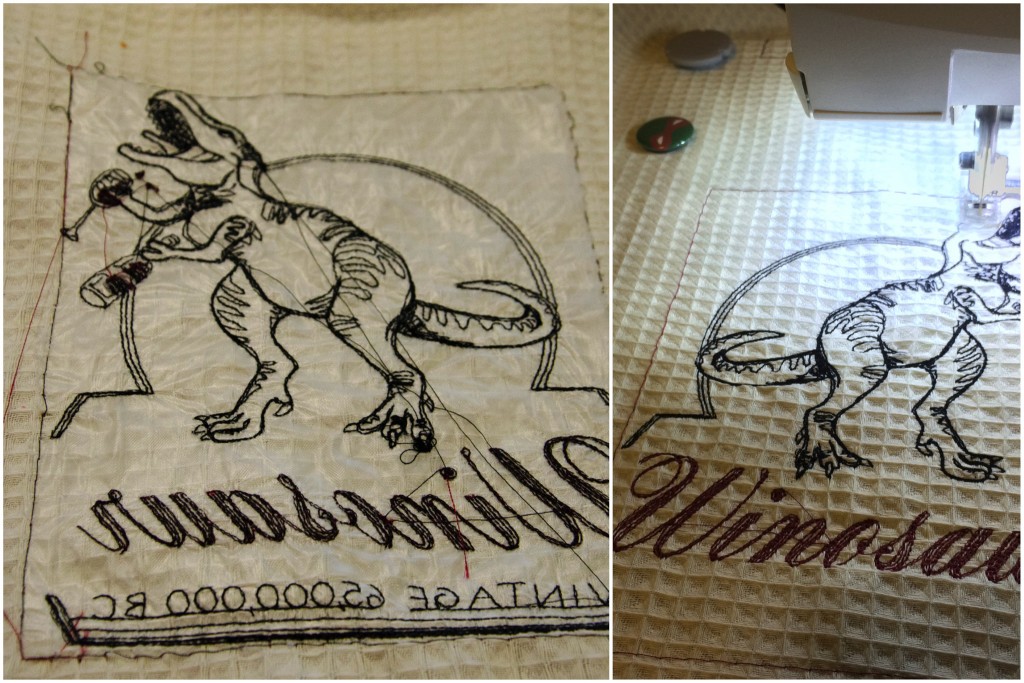
I’m glad that I bought a full yard of the waffle weave fabric I used to make these towels out of, as my first attempt and a half at stitching out the embroidery went awry. Most of this is Machine Embroidery 101-level stuff, but I thought I’d share everything I learned. I tried to cut corners and it bit me, of course.

Winosaur towel stitchout issues
  • Use a fresh needle. An embroidery one. In the right size. No, that one you just finished using to quilt something is not okay.
  • Buy the right-sized stabilizer. Yes, you may have the right type stashed, but if it’s sized for a smaller hoop, just go buy the right size.
  • Double (or triple) up your water-soluble stabilizer according to their directions, particularly with an unstable fabric and heavy line stitching.
  • Use spray baste to attach the stabilizer to your fabric.
  • Have your machine baste the design outline before stitching.
  • The Large Metal Hoop, while awesome, doesn’t ship with enough magnets to secure unstable weaves. Steal more from your fridge (TMNT to the rescue! Cowabunga, dudes!).
Winosaur towel stitchout back

The towels

The towels themselves are simple. They’re a fat quarter of waffle weave fabric, hemmed with mitered corners on one short edge, and the fringed selvage left bare for that towel-like look on the other. I used a contrast thread with a zigzag for aesthetics. I couldn’t help making a spare set for myself in the name of ‘testing’ the final product! And by that, I mean I kept the awkward learning curve versions for myself.

Winosaur towel

July 16th, 2016

Tea in the Park

Posted in Crafting

  • Bags
  • Fabric Designer: Elizabeth Olwen
  • Fabric: Essex Linen
  • Fabric: Kaffe Fasset Collective Shot Cotton
  • Fabric: Park Life
  • Gifts
  • Home decor
  • Machine embroidery

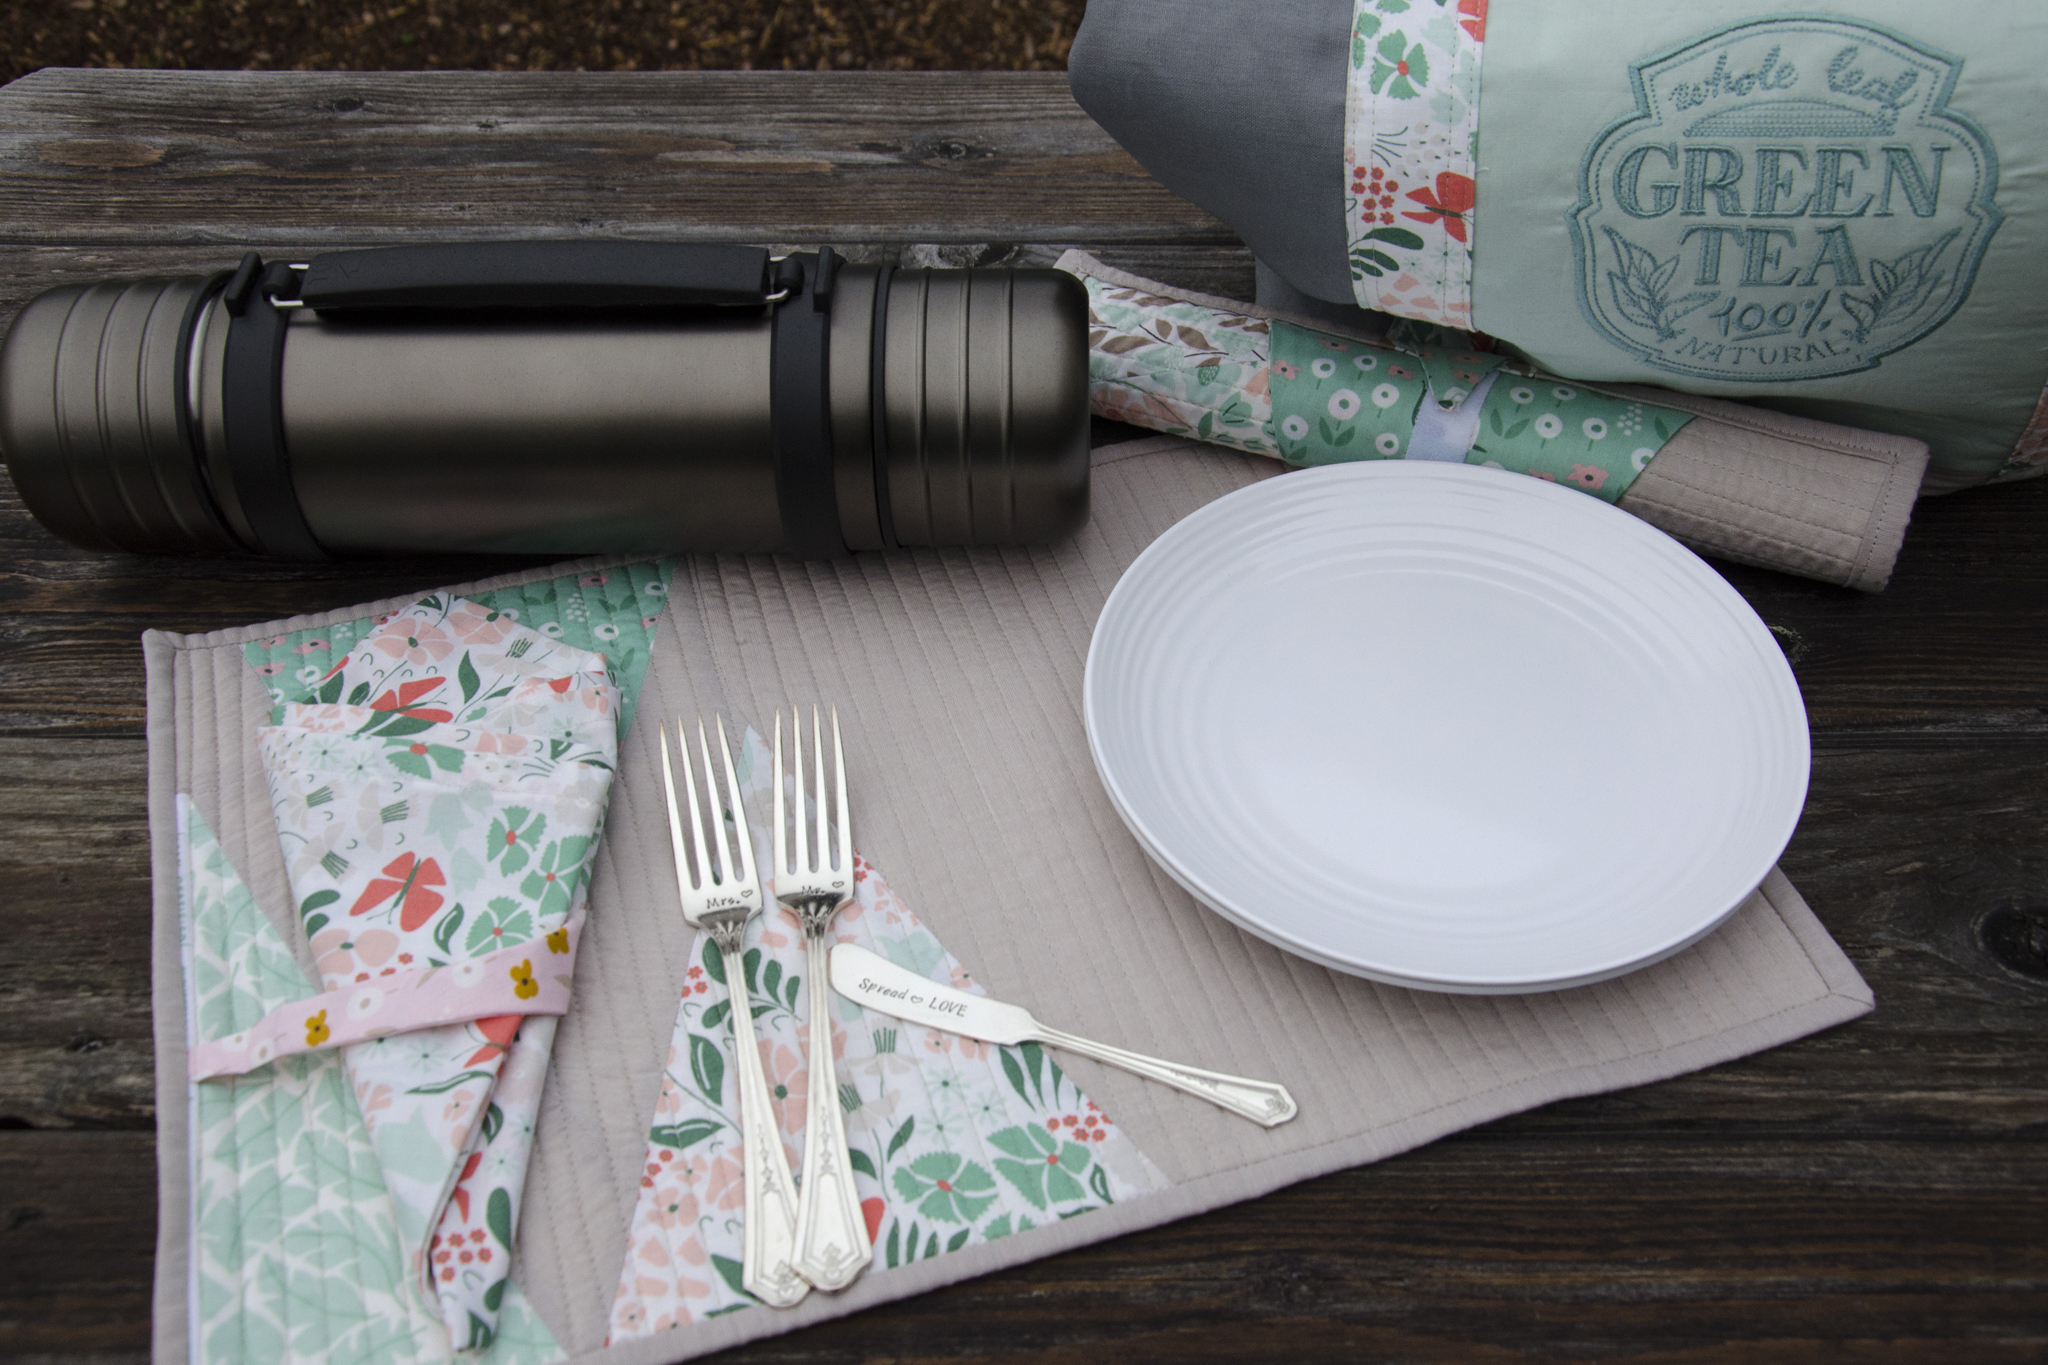
I bought far more fabric than I needed to make the bridal shower tea party bunting (half yard cuts of six prints, a yard of another), so the obvious thing to do was to use some as part of a shower gift for the bride and groom. I ended up with a suite of gifts perfect for a picnic at the park.

Tea in the Park Gift Set

Napkins

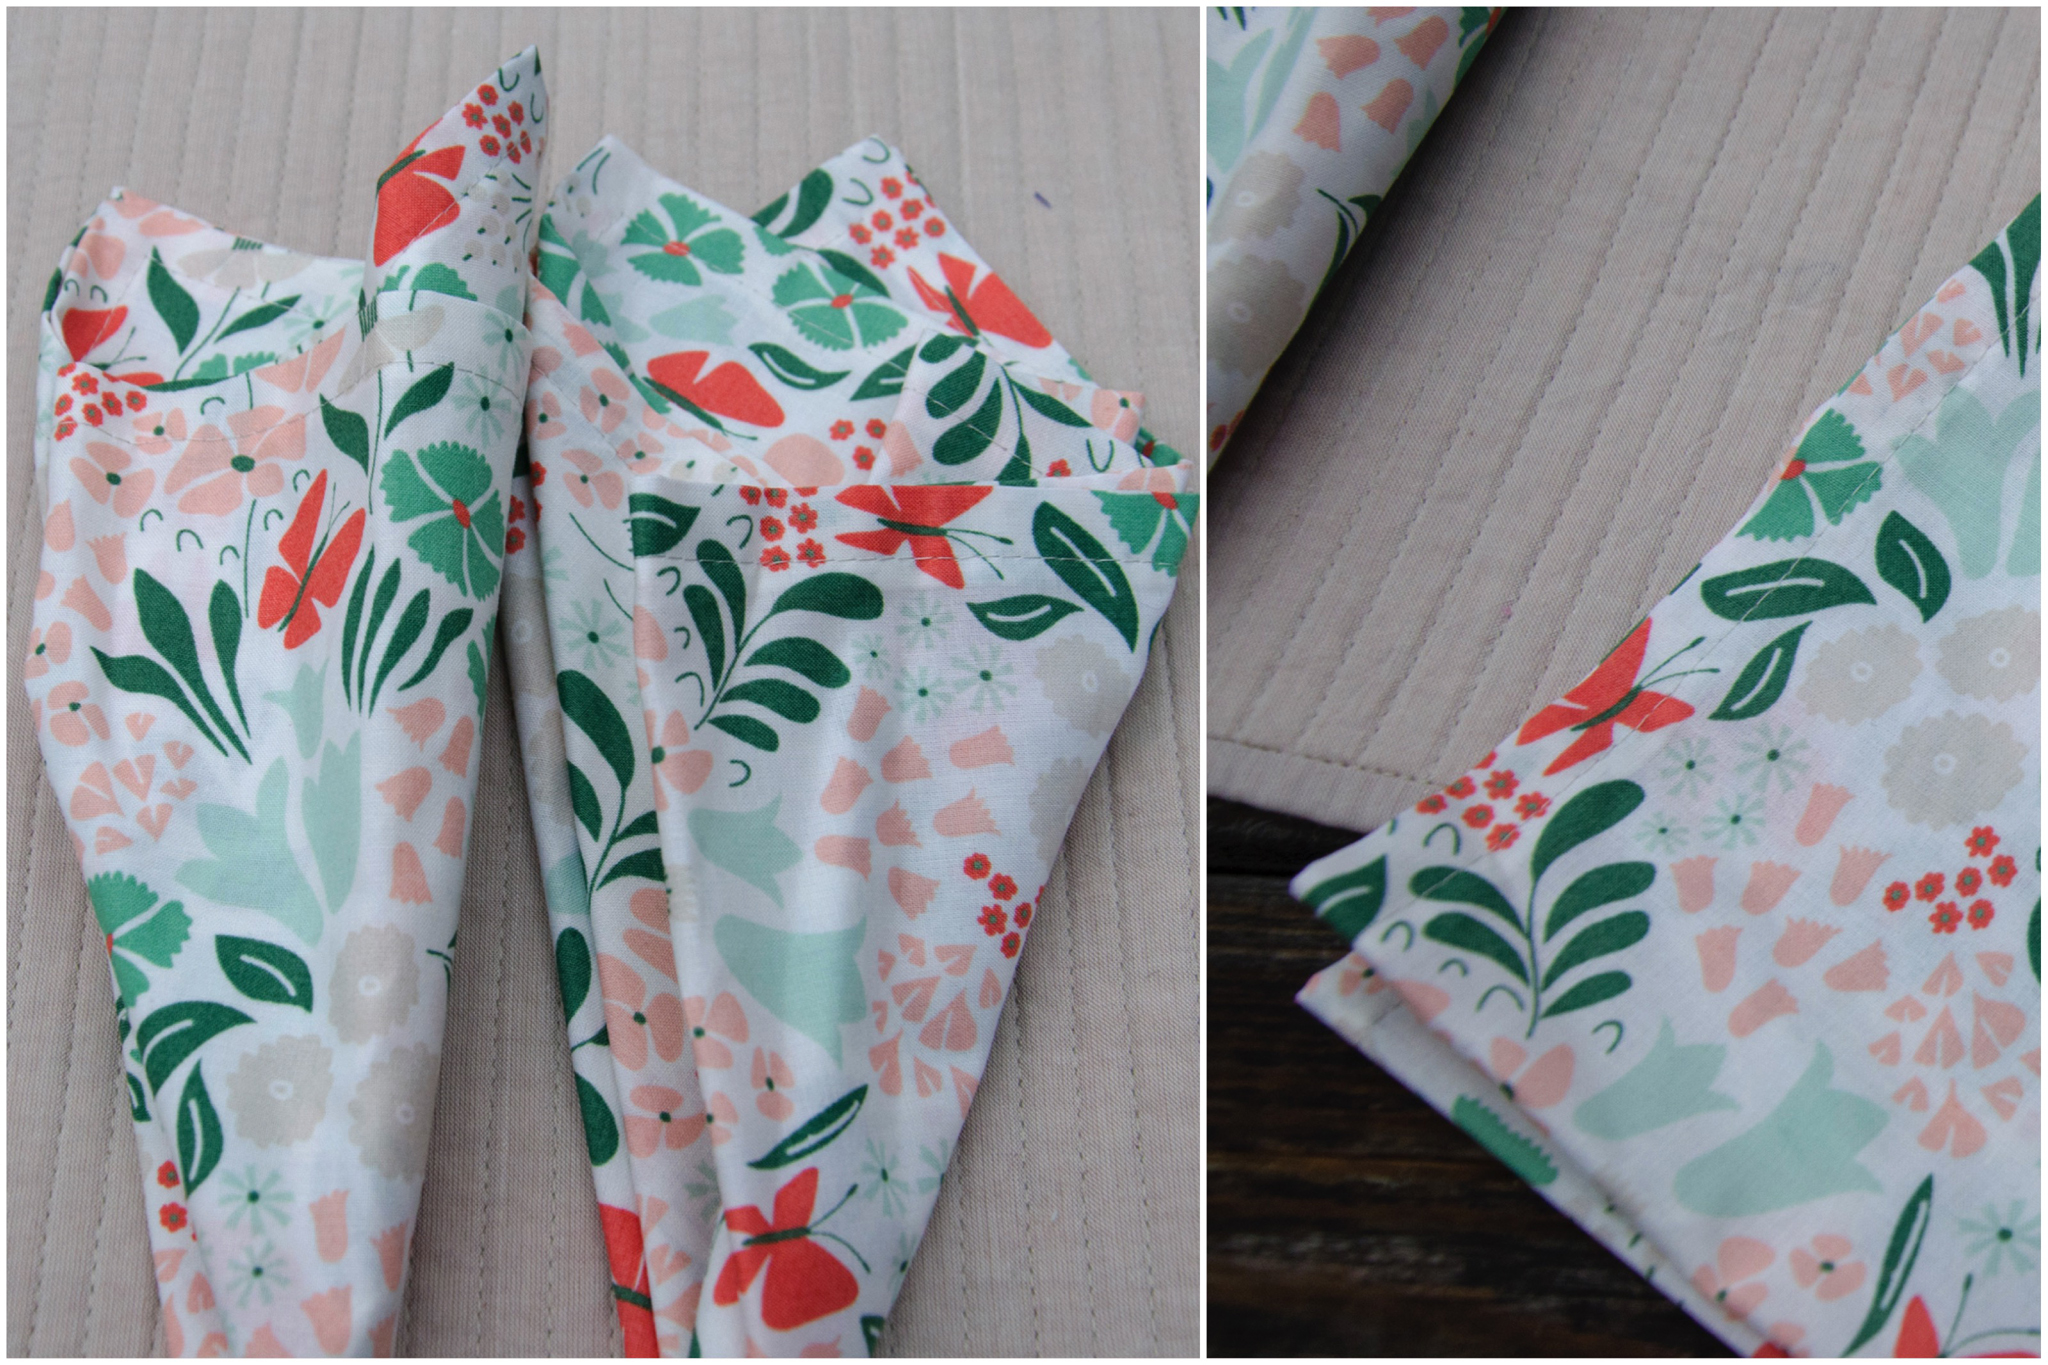
I made a pair of basic mitered-corner napkins using a half yard of fabric. They finished at 17″ square. There are many good mitered corner napkin tutorials online if you need one. I used this one from Purl Soho as a refresher for the corners because I can never recall how to do it properly. Here’s another one from Craftsy if you don’t want to be sold hard on buying more fabric.

Tea in the Park Gift Set

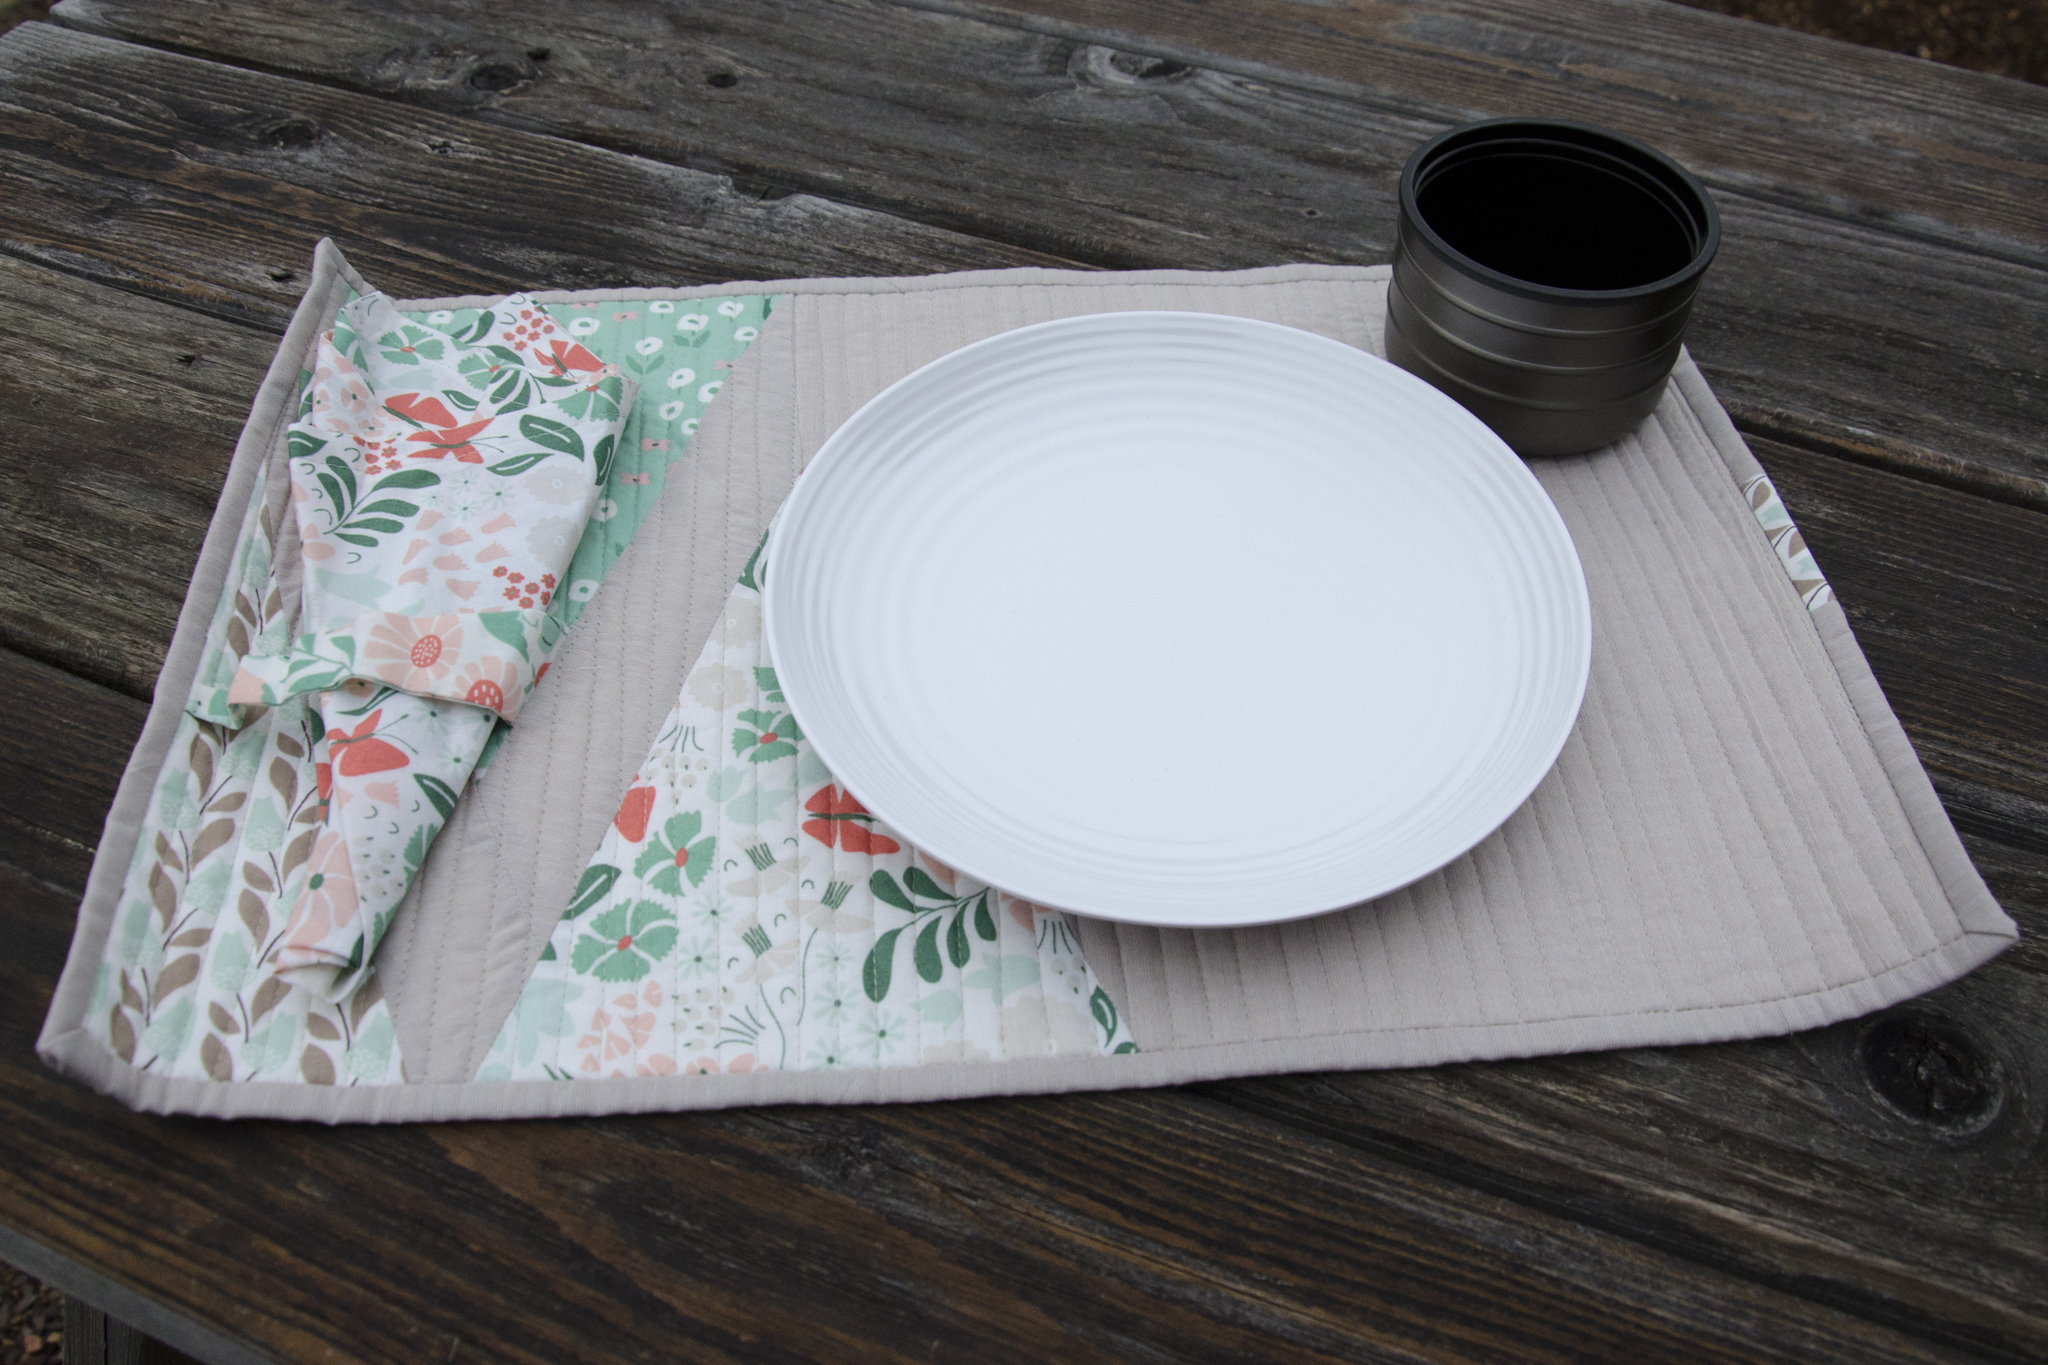
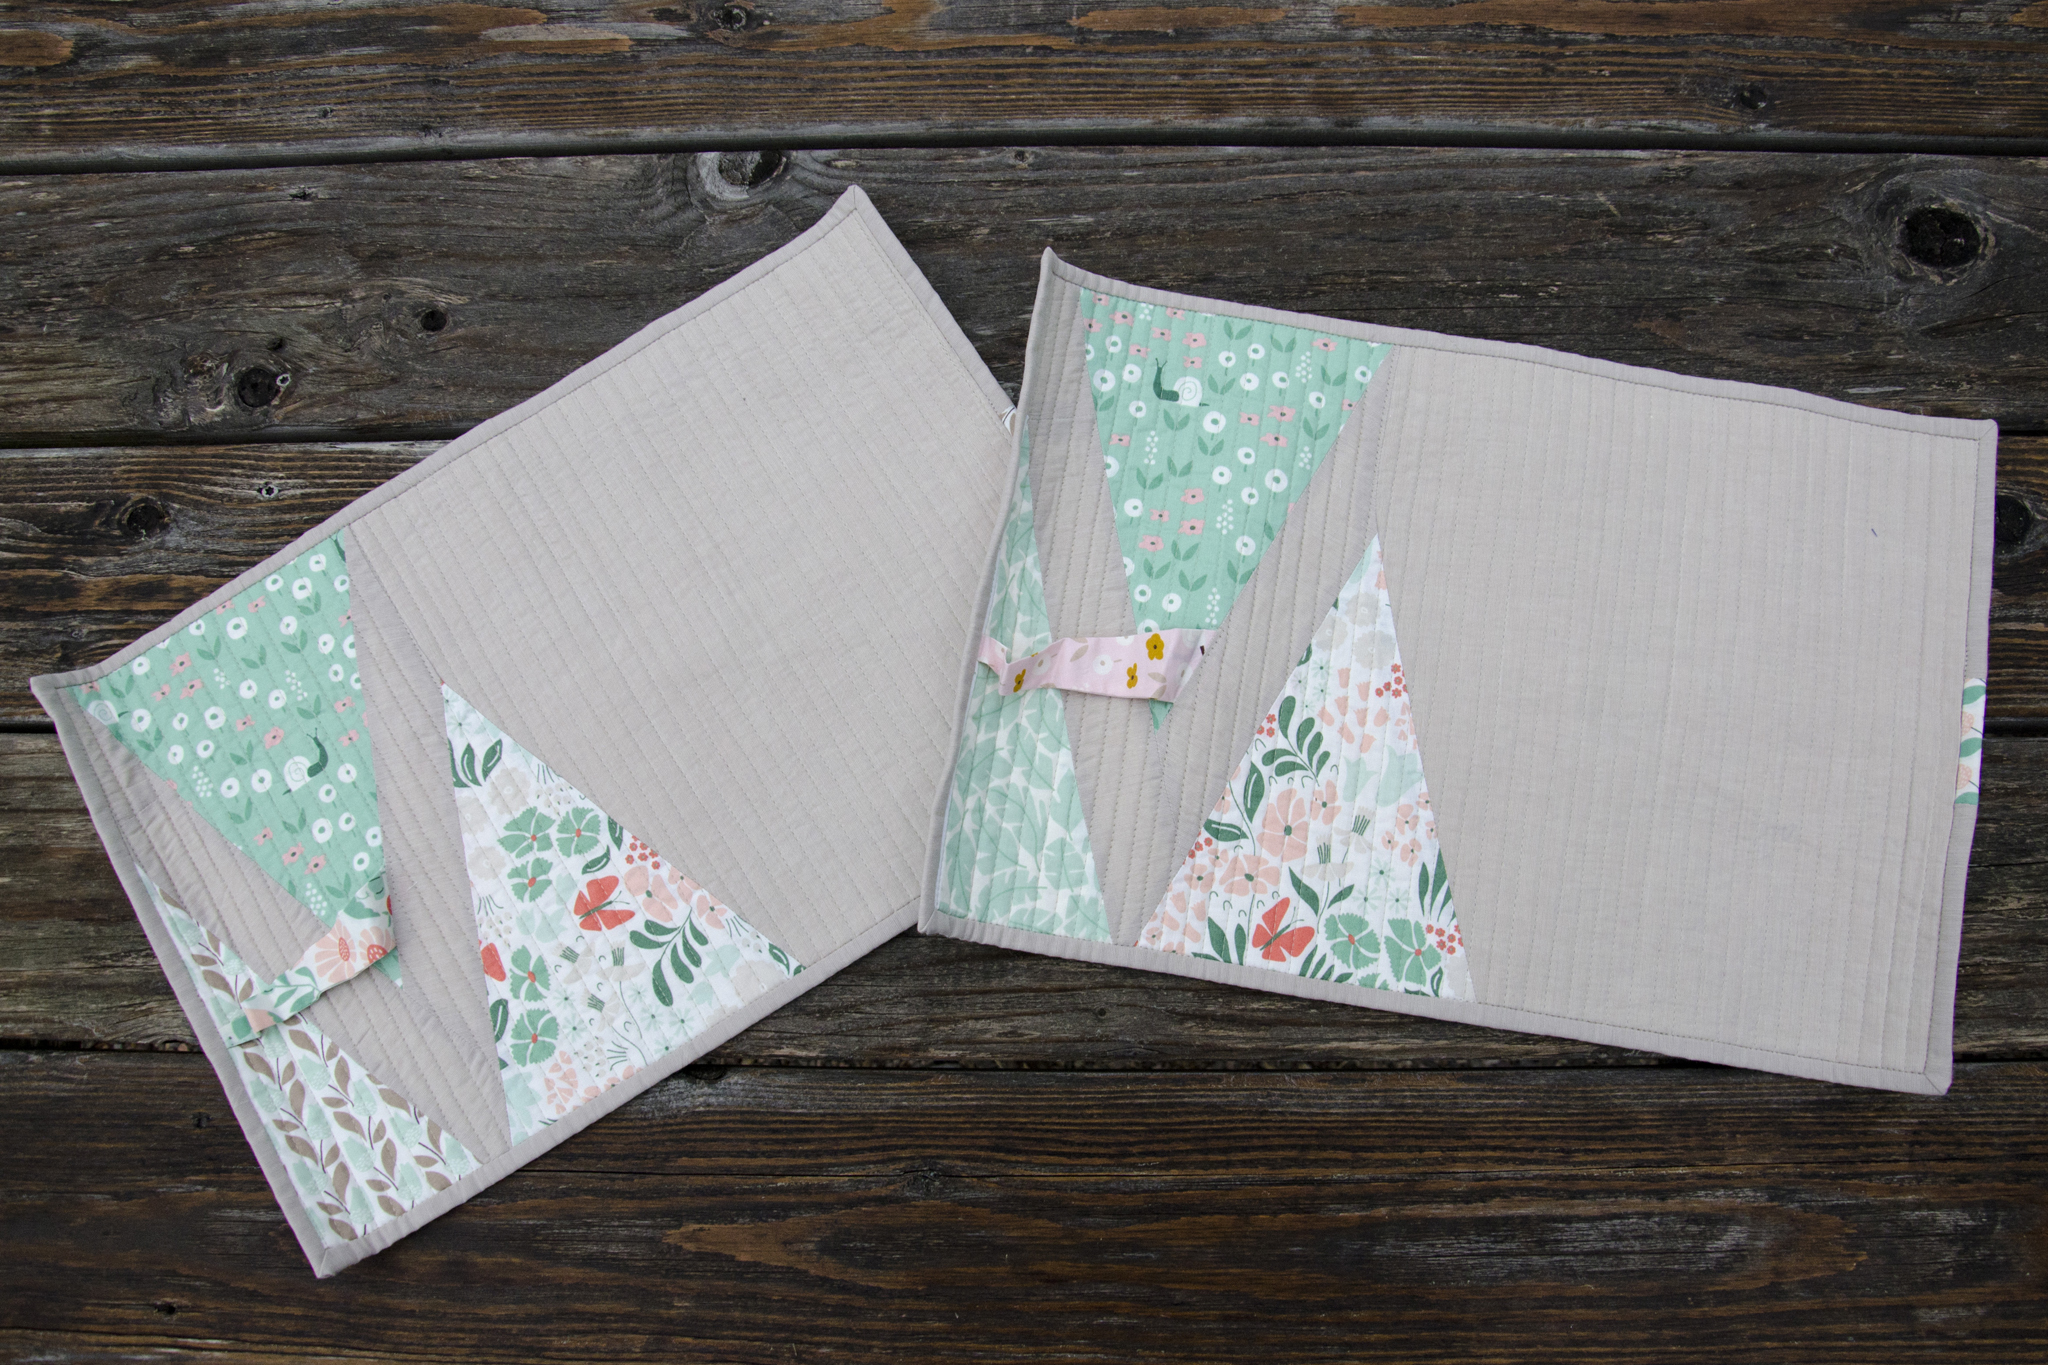
Roll-up Placemats

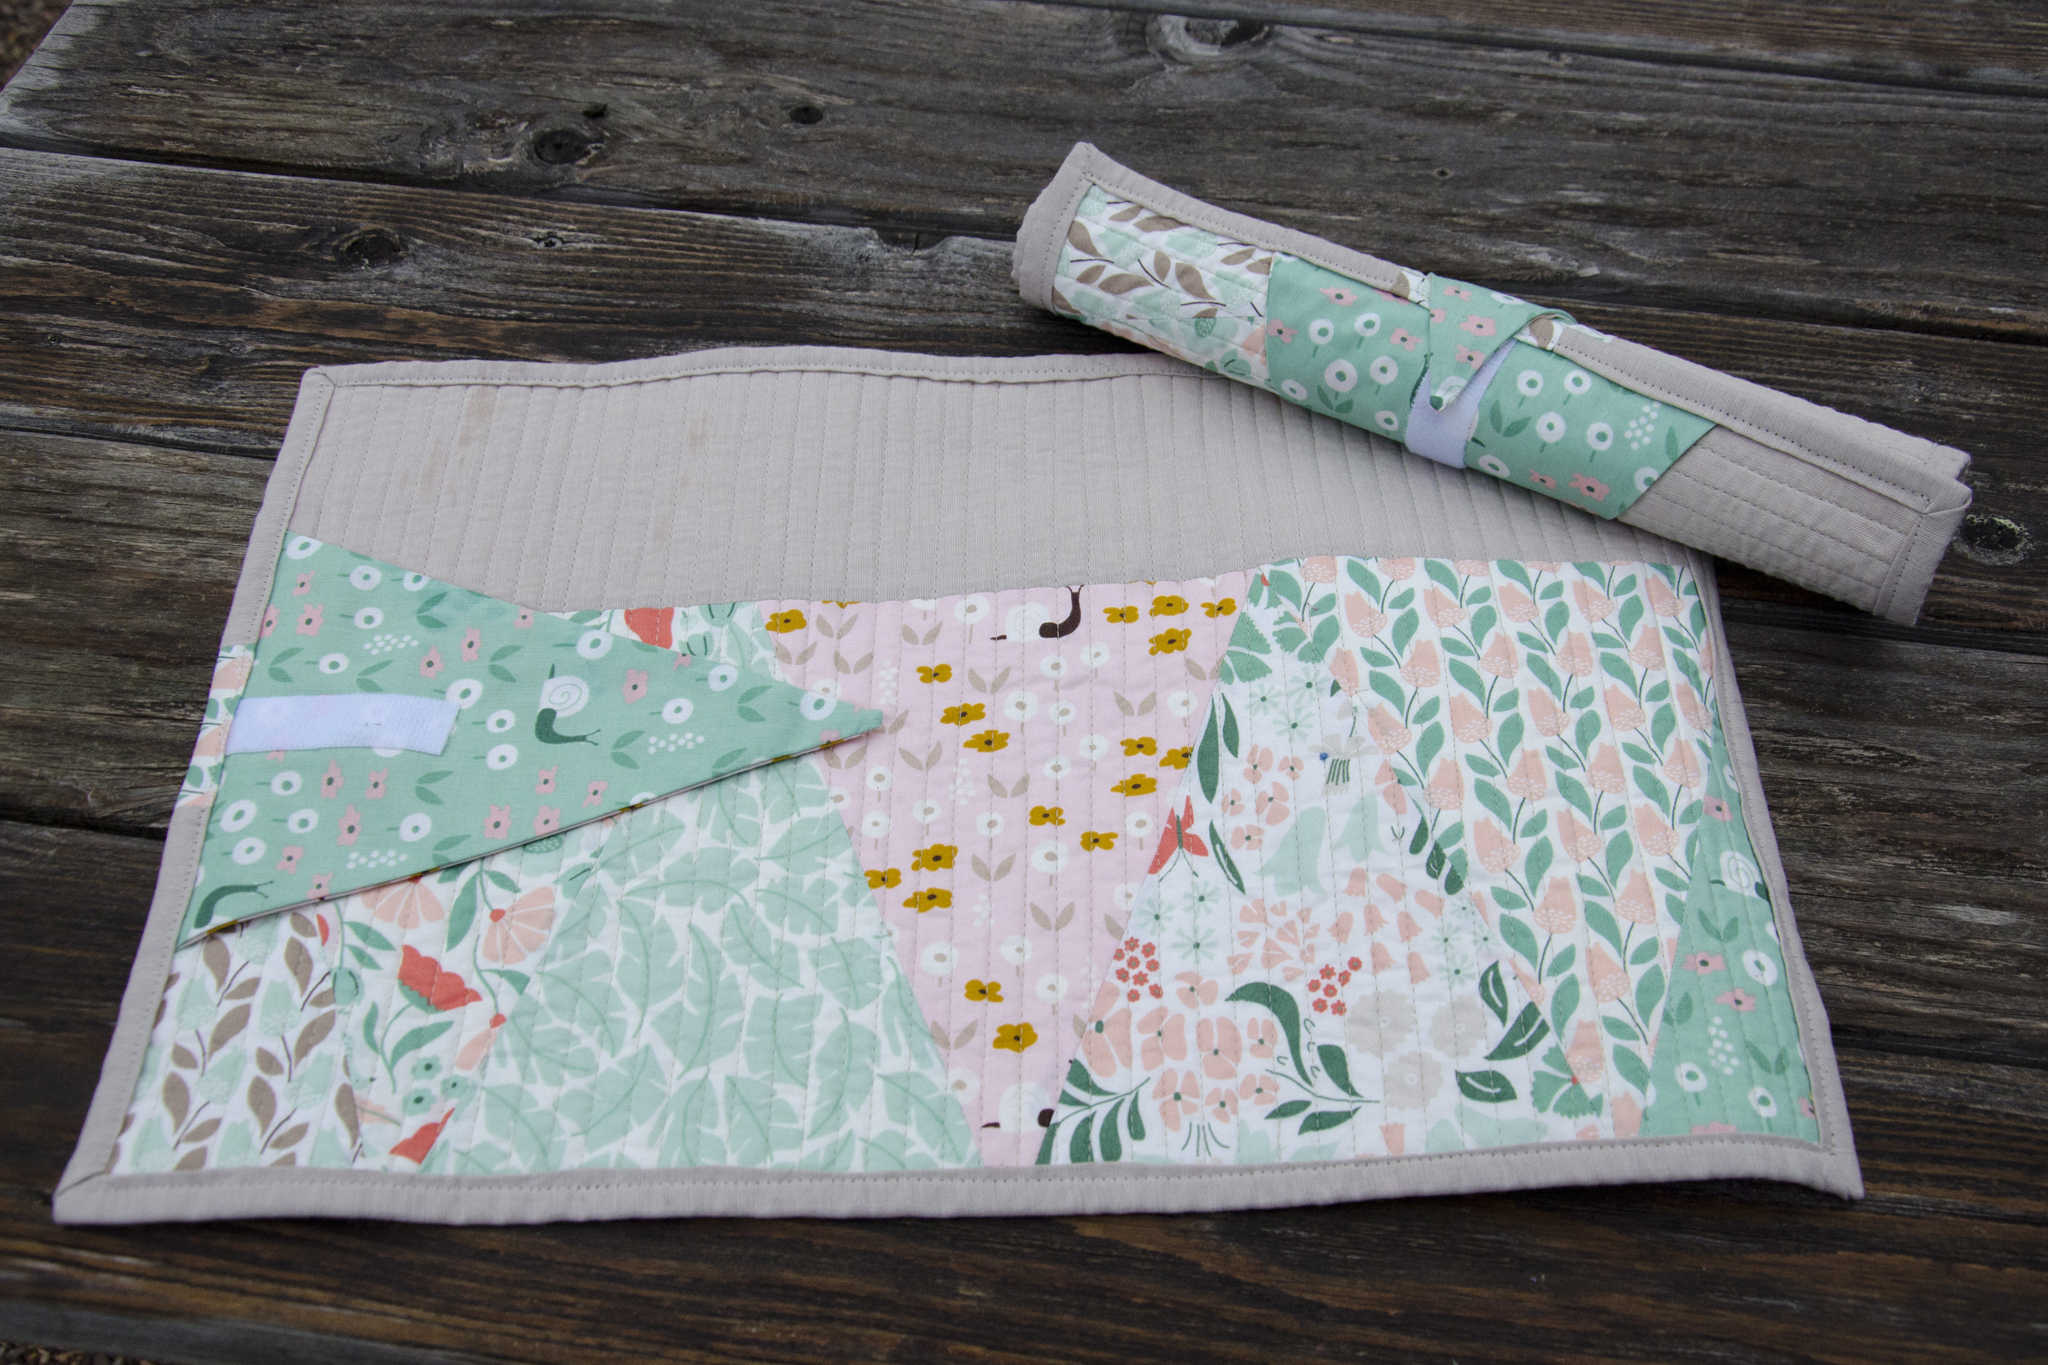
When I cut out bunting pieces, I ended up with extra triangles and end pieces since I simply sliced up a 9″ strip of each fabric. I wanted to use up those pieces in any piecing, so started putting together the placemat design with improvisational piecing taking cues from the triangles. I paired the Park Life prints with Kaffe Fasset Shot Cotton in Latte from my stash—slightly different than the solid gray I used in the bunting, but a better match for the colors in Park Life—it’s a slightly taupe-ish gray.

Tea in the Park Gift Set

The back is pieced from more triangles and a strip of the gray. After piecing, I inserted a strip between one piecing seam and the binding that acts as a napkin ring on the front. I quilted them in 1/4″ lines with a gray-taupe Aurifil, then bound them in the gray with one small scrap of print to give a bit of visual weight to the right side.

Tea in the Park Gift Set

Because the intent was that these are portable for a picnic, I tried to figure out a way to secure them while rolled up for easy transportation. Going back to the pile of leftover triangles, I made a pennant, slid it into the binding, and used a bit of Velcro to allow it to fasten flat to the back, or to itself if you roll up the placemat. It turned out to be my favorite feature.

Tea in the Park Bag

Tote Bag

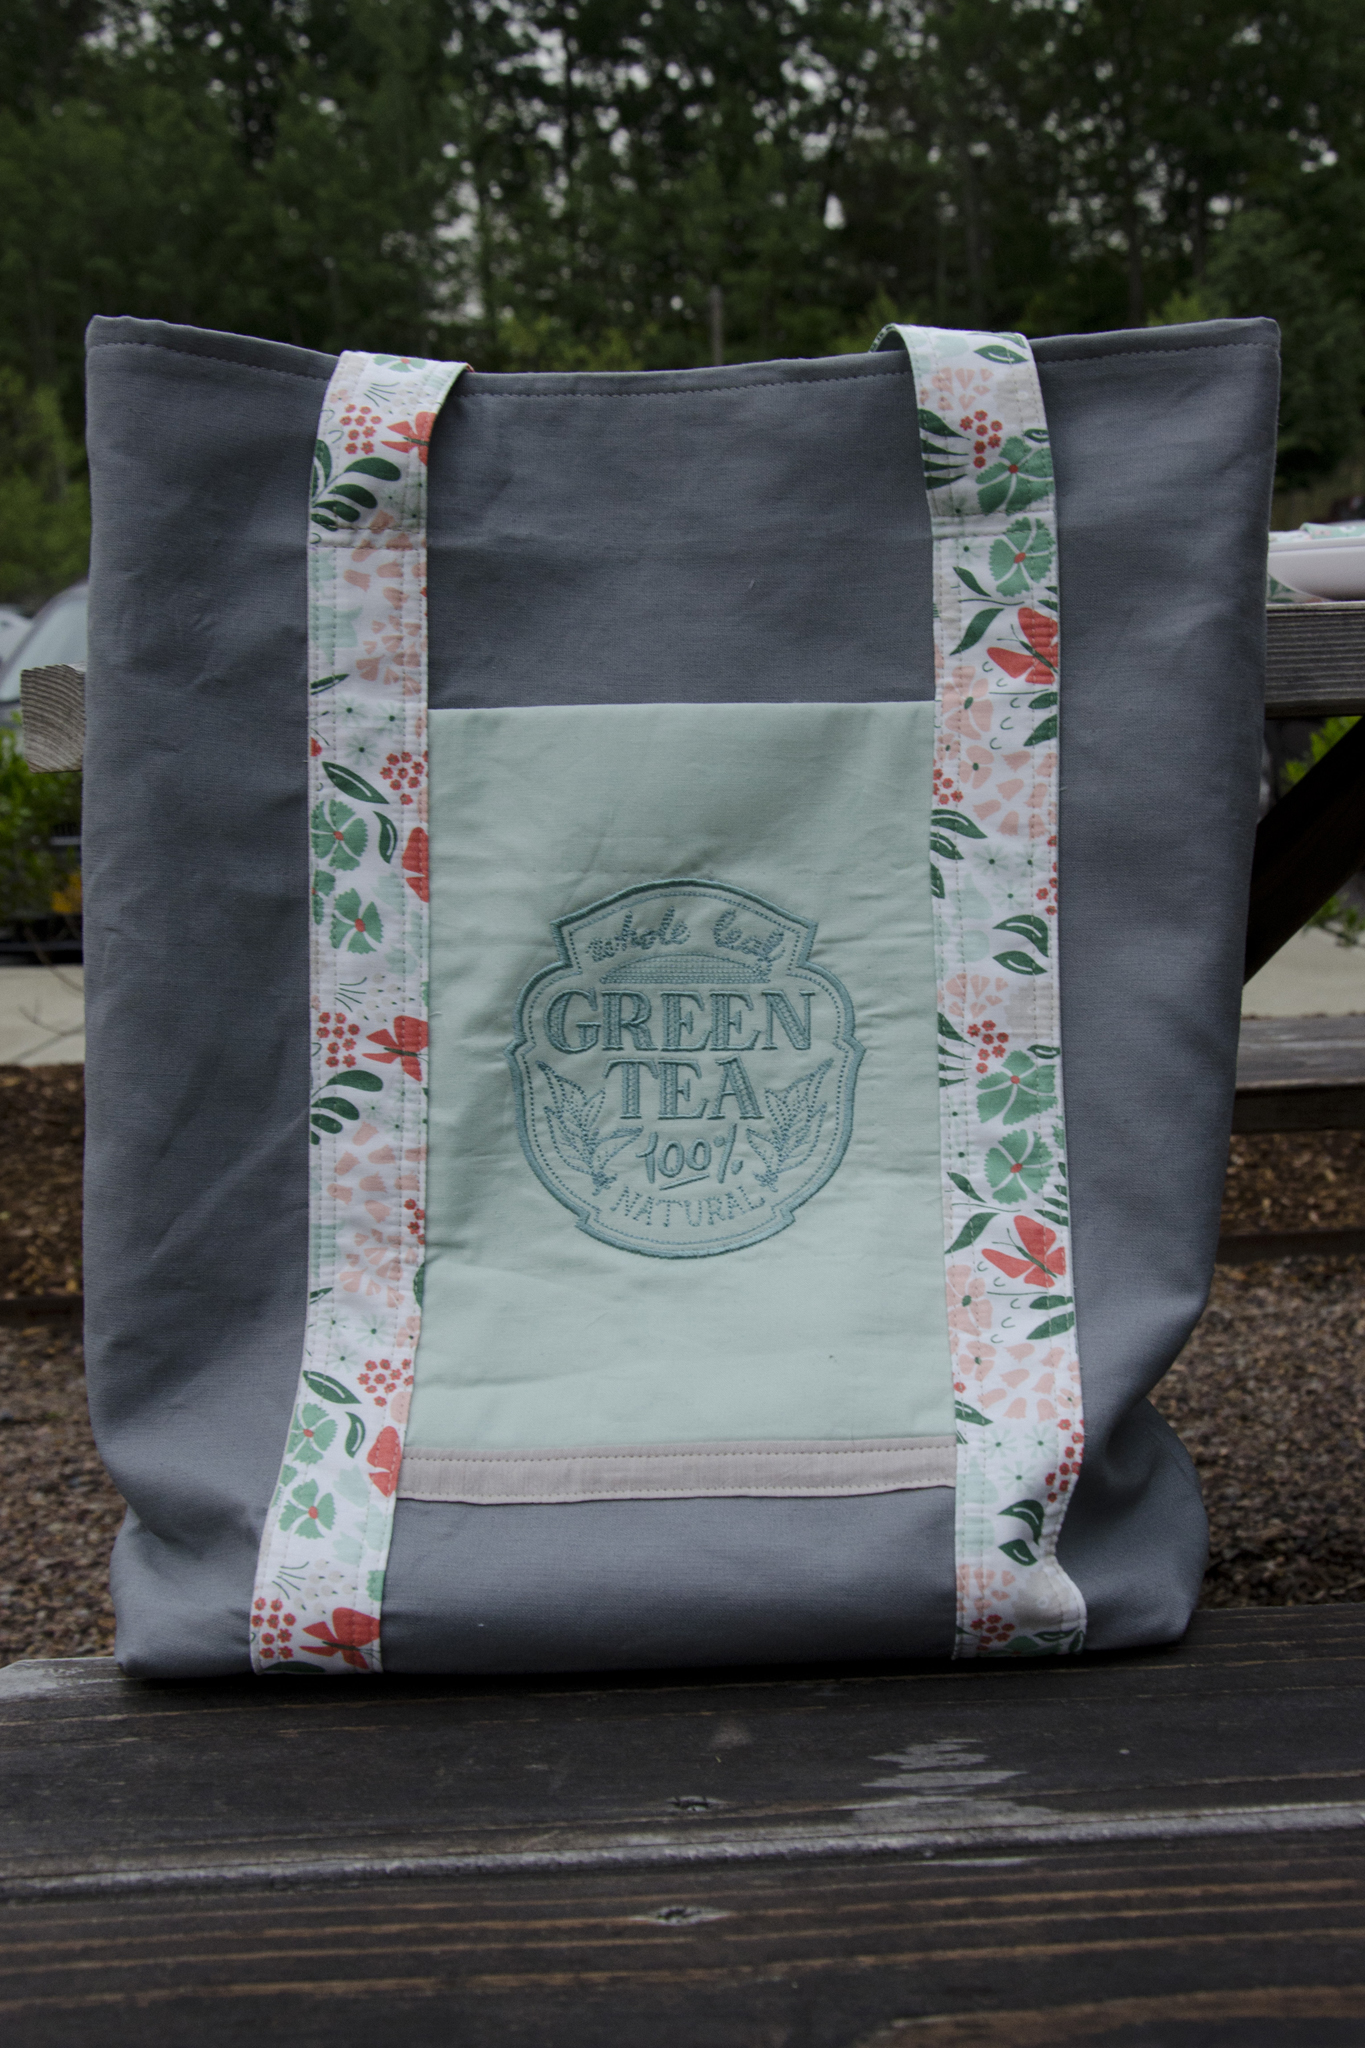
What good are traveling placemats and napkins if you’ve nothing to carry them in? Using the Art Student Tote as a general design guide, I pulled together a bag made of dark gray Essex Linen, straps in a Park Life print, and a machine embroidered pocket using a coordinating solid from my stash and one of the tea embroideries from the bunting.

Tea in the Park Bag detail

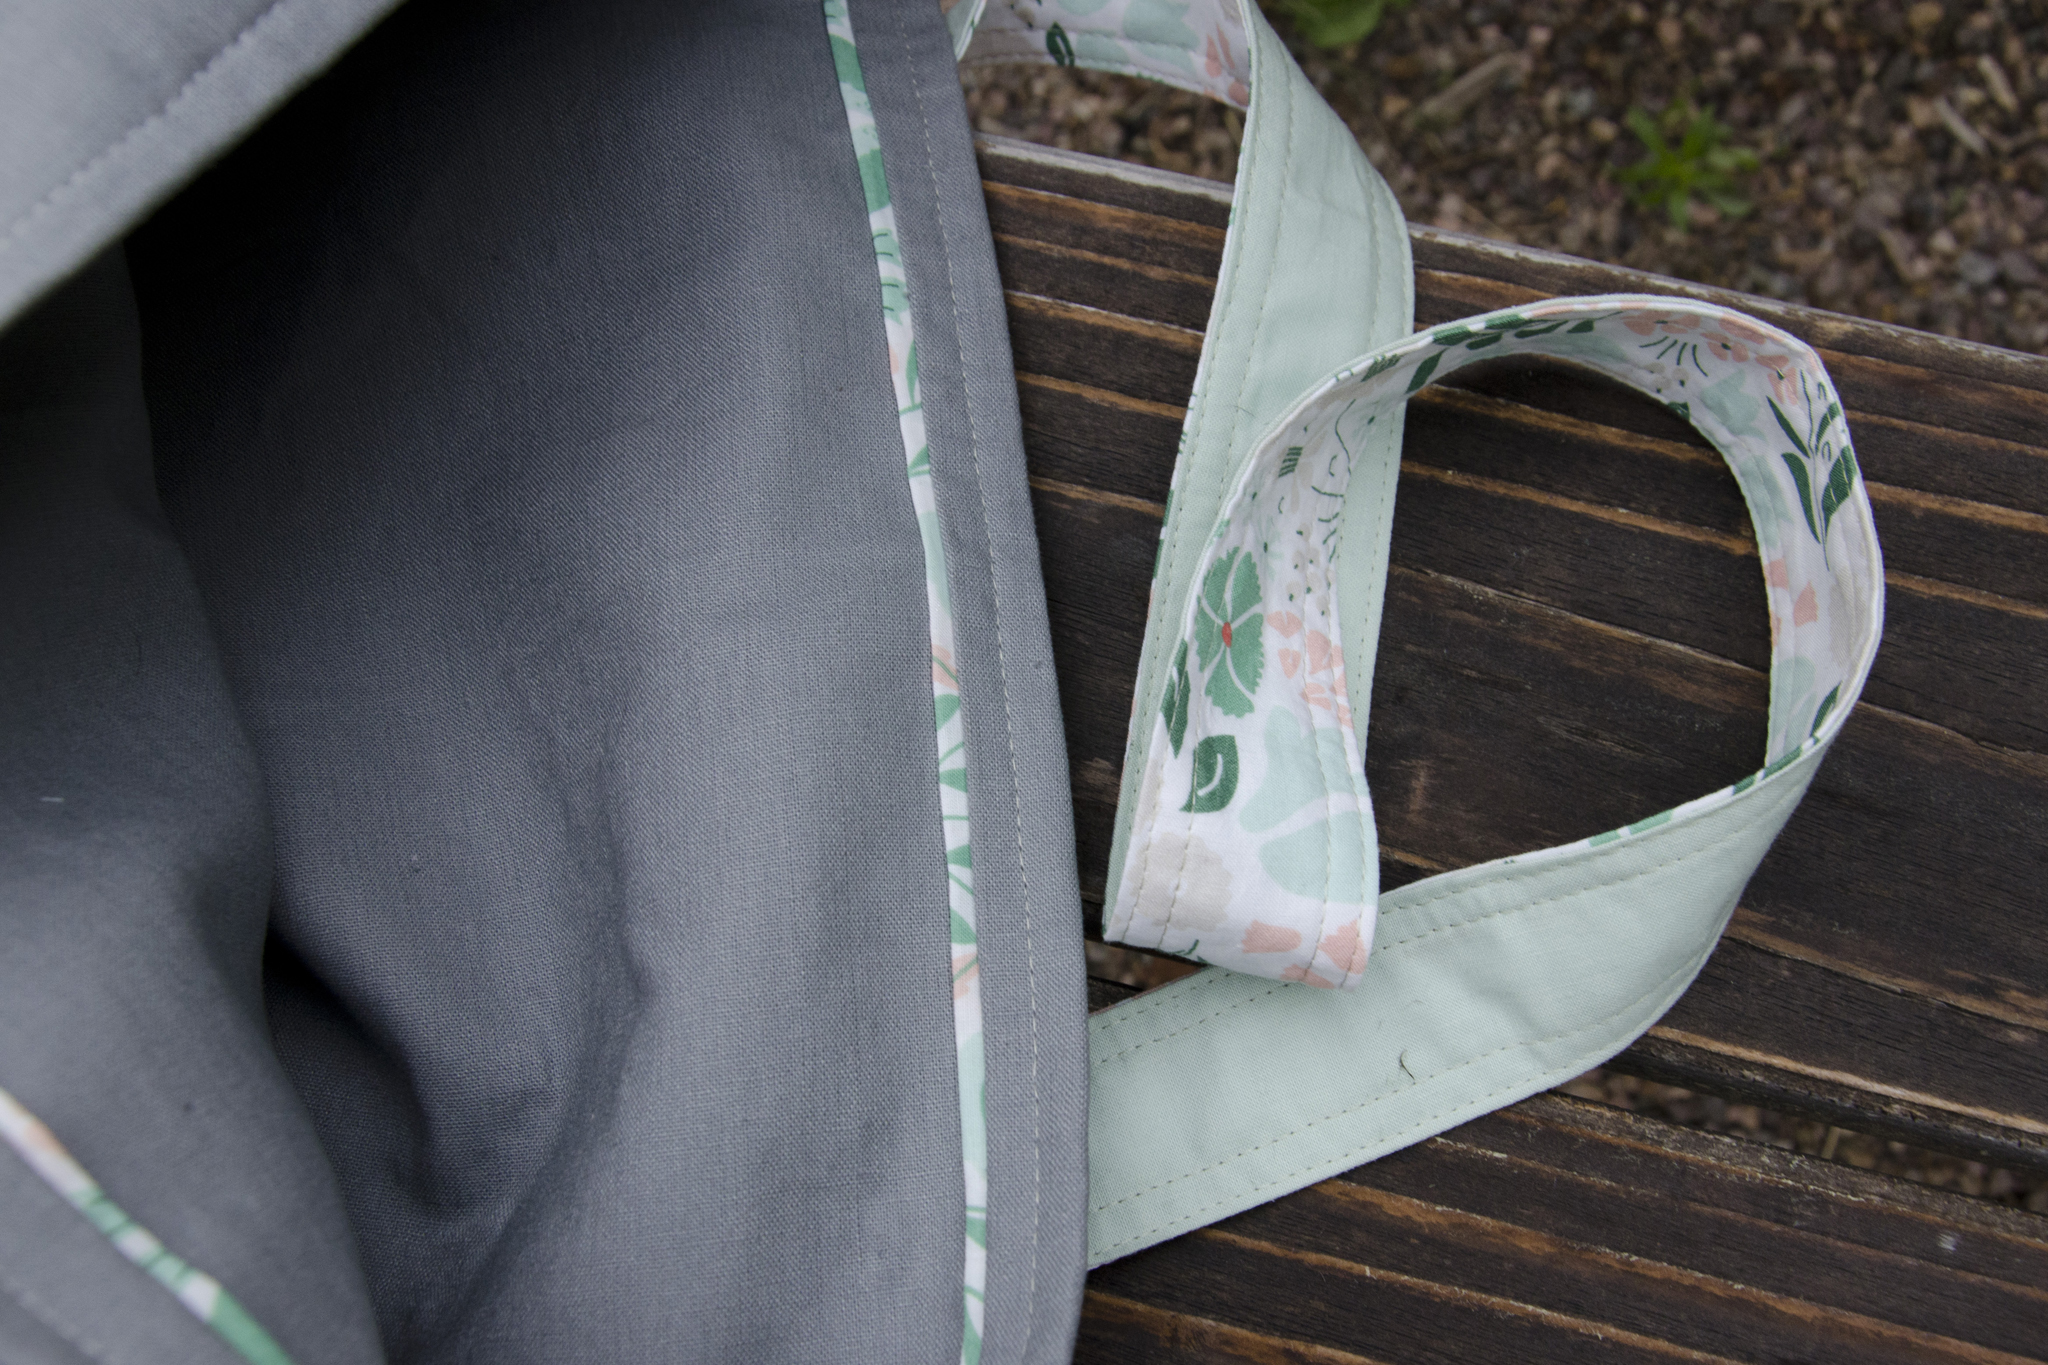
The bag is 13″x18″x4″—a hybrid of the two Art Student Tote sizes. I only added one pocket to the front, no closures, and no interior dividers/pockets. Since I lined it in the exterior linen, I modified the construction a little bit and added a flange for a pop of color around the top of the interior. Having learned from using my own Art Student Tote, I made sure to use a woven interfacing for the straps—mine are starting to stretch out and warp due to the medium-weight non-woven—and cut an extra strip to get the full suggested 128″ instead of the approximate three widths of fabric—mine are a smidgen short when the bag is loaded up. I also modified the strap construction to use two different fabrics (one on each side), as I didn’t have enough of any one fabric.

The Whole Package

To round out the picnic theme, I added a few store-bought gifts as well.

Tea in the Park Gift Set

It was a dreary, rainy day when I tried to take photos before shipping it off. I hope the couple has many sunny days in their future.

Even with this whole package, I still have a quarter yard of five of the prints—and a few more triangles—but for now I’ll retire that to the depths of my stash and move on to some other things!

June 30th, 2016

Bunting Tips and Tricks

Posted in Crafting

  • Fabric Designer: Elizabeth Olwen
  • Fabric: Park Life
  • Home decor
  • Machine embroidery
  • Quick project
  • Tips and tricks

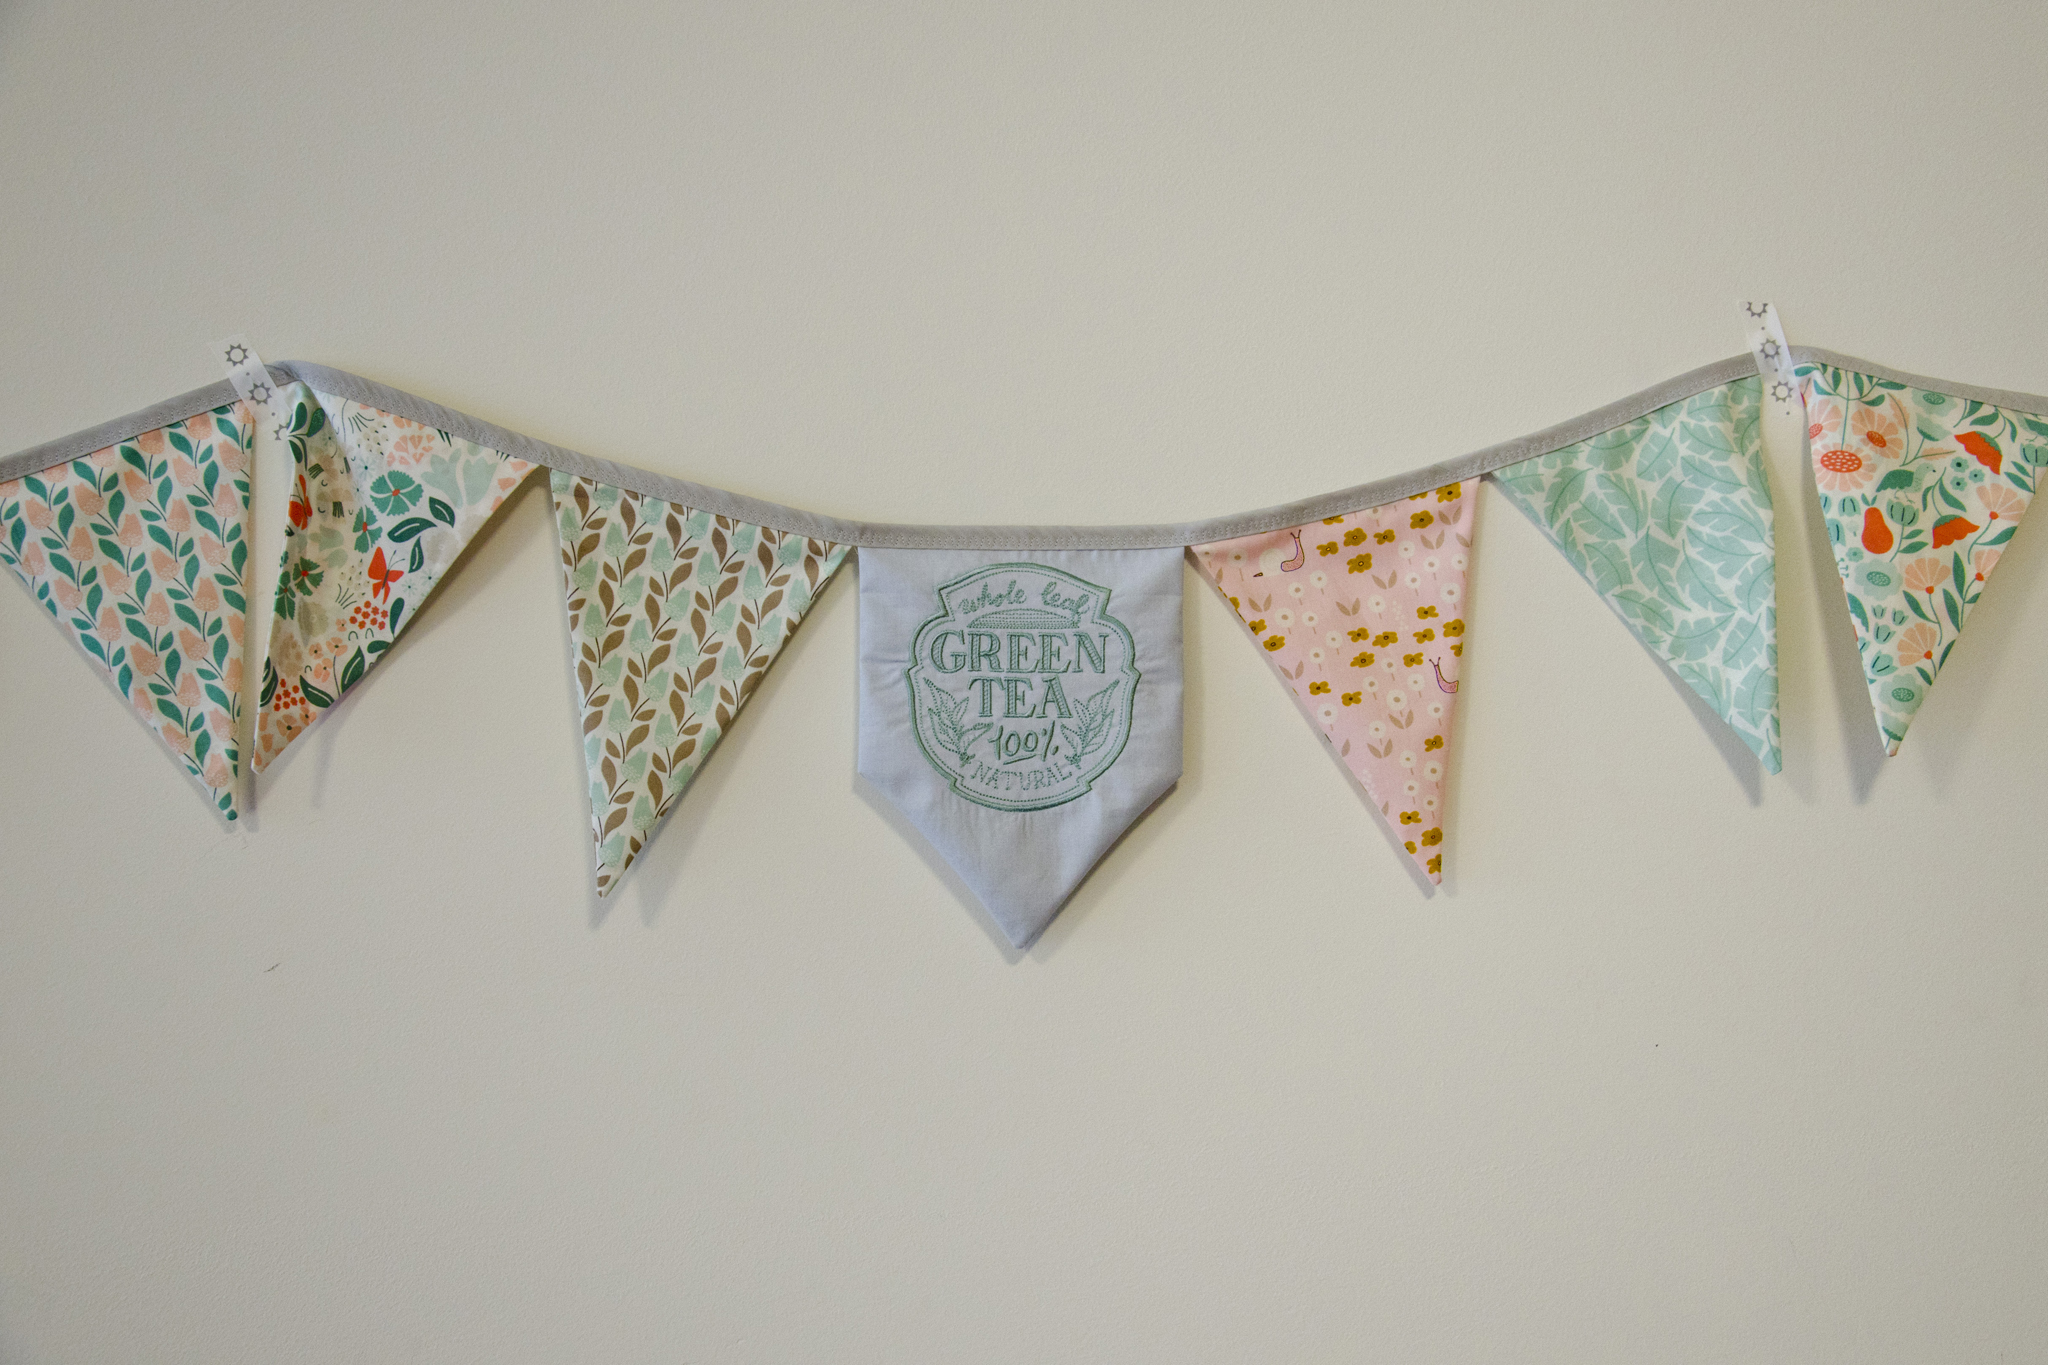
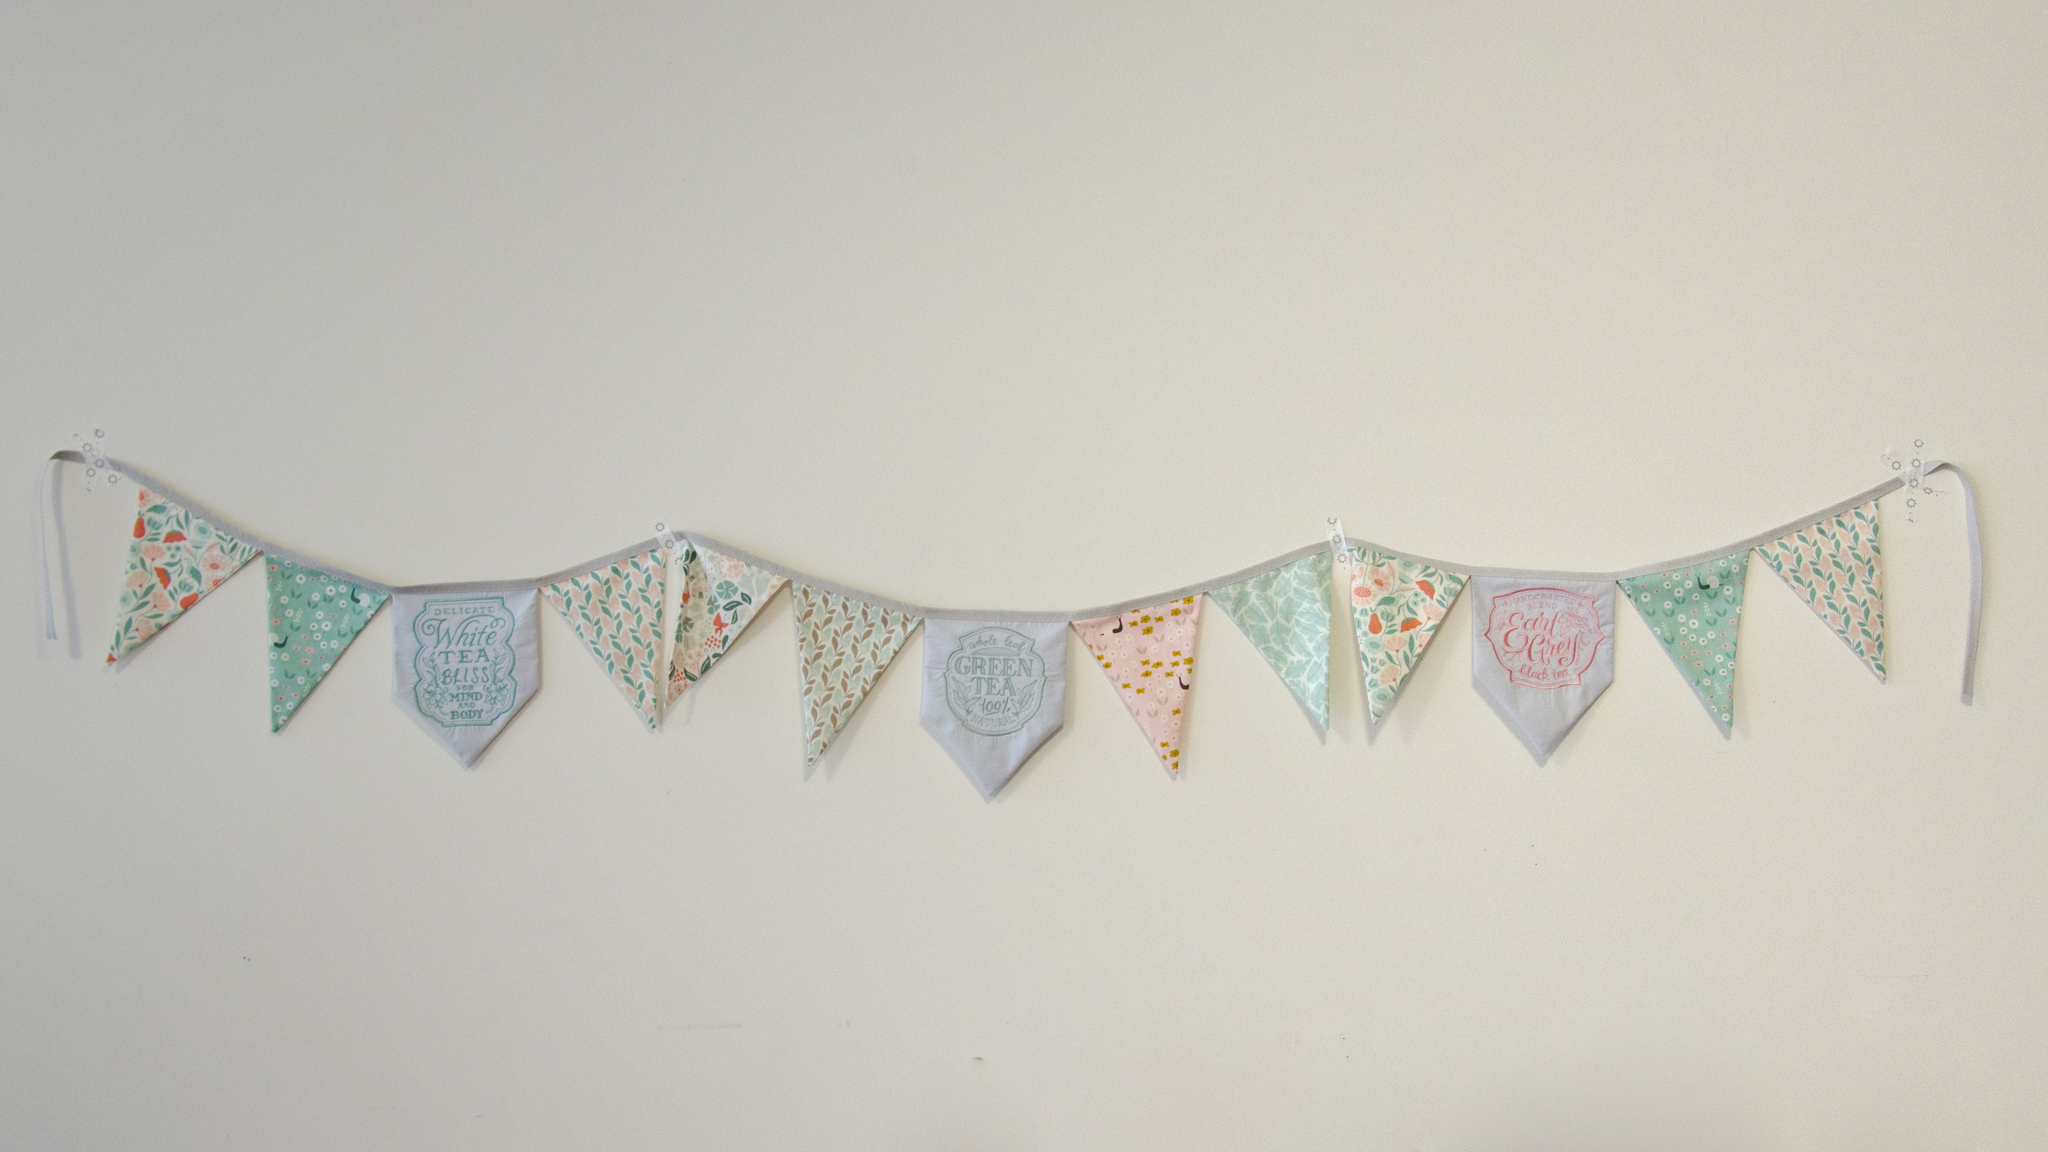
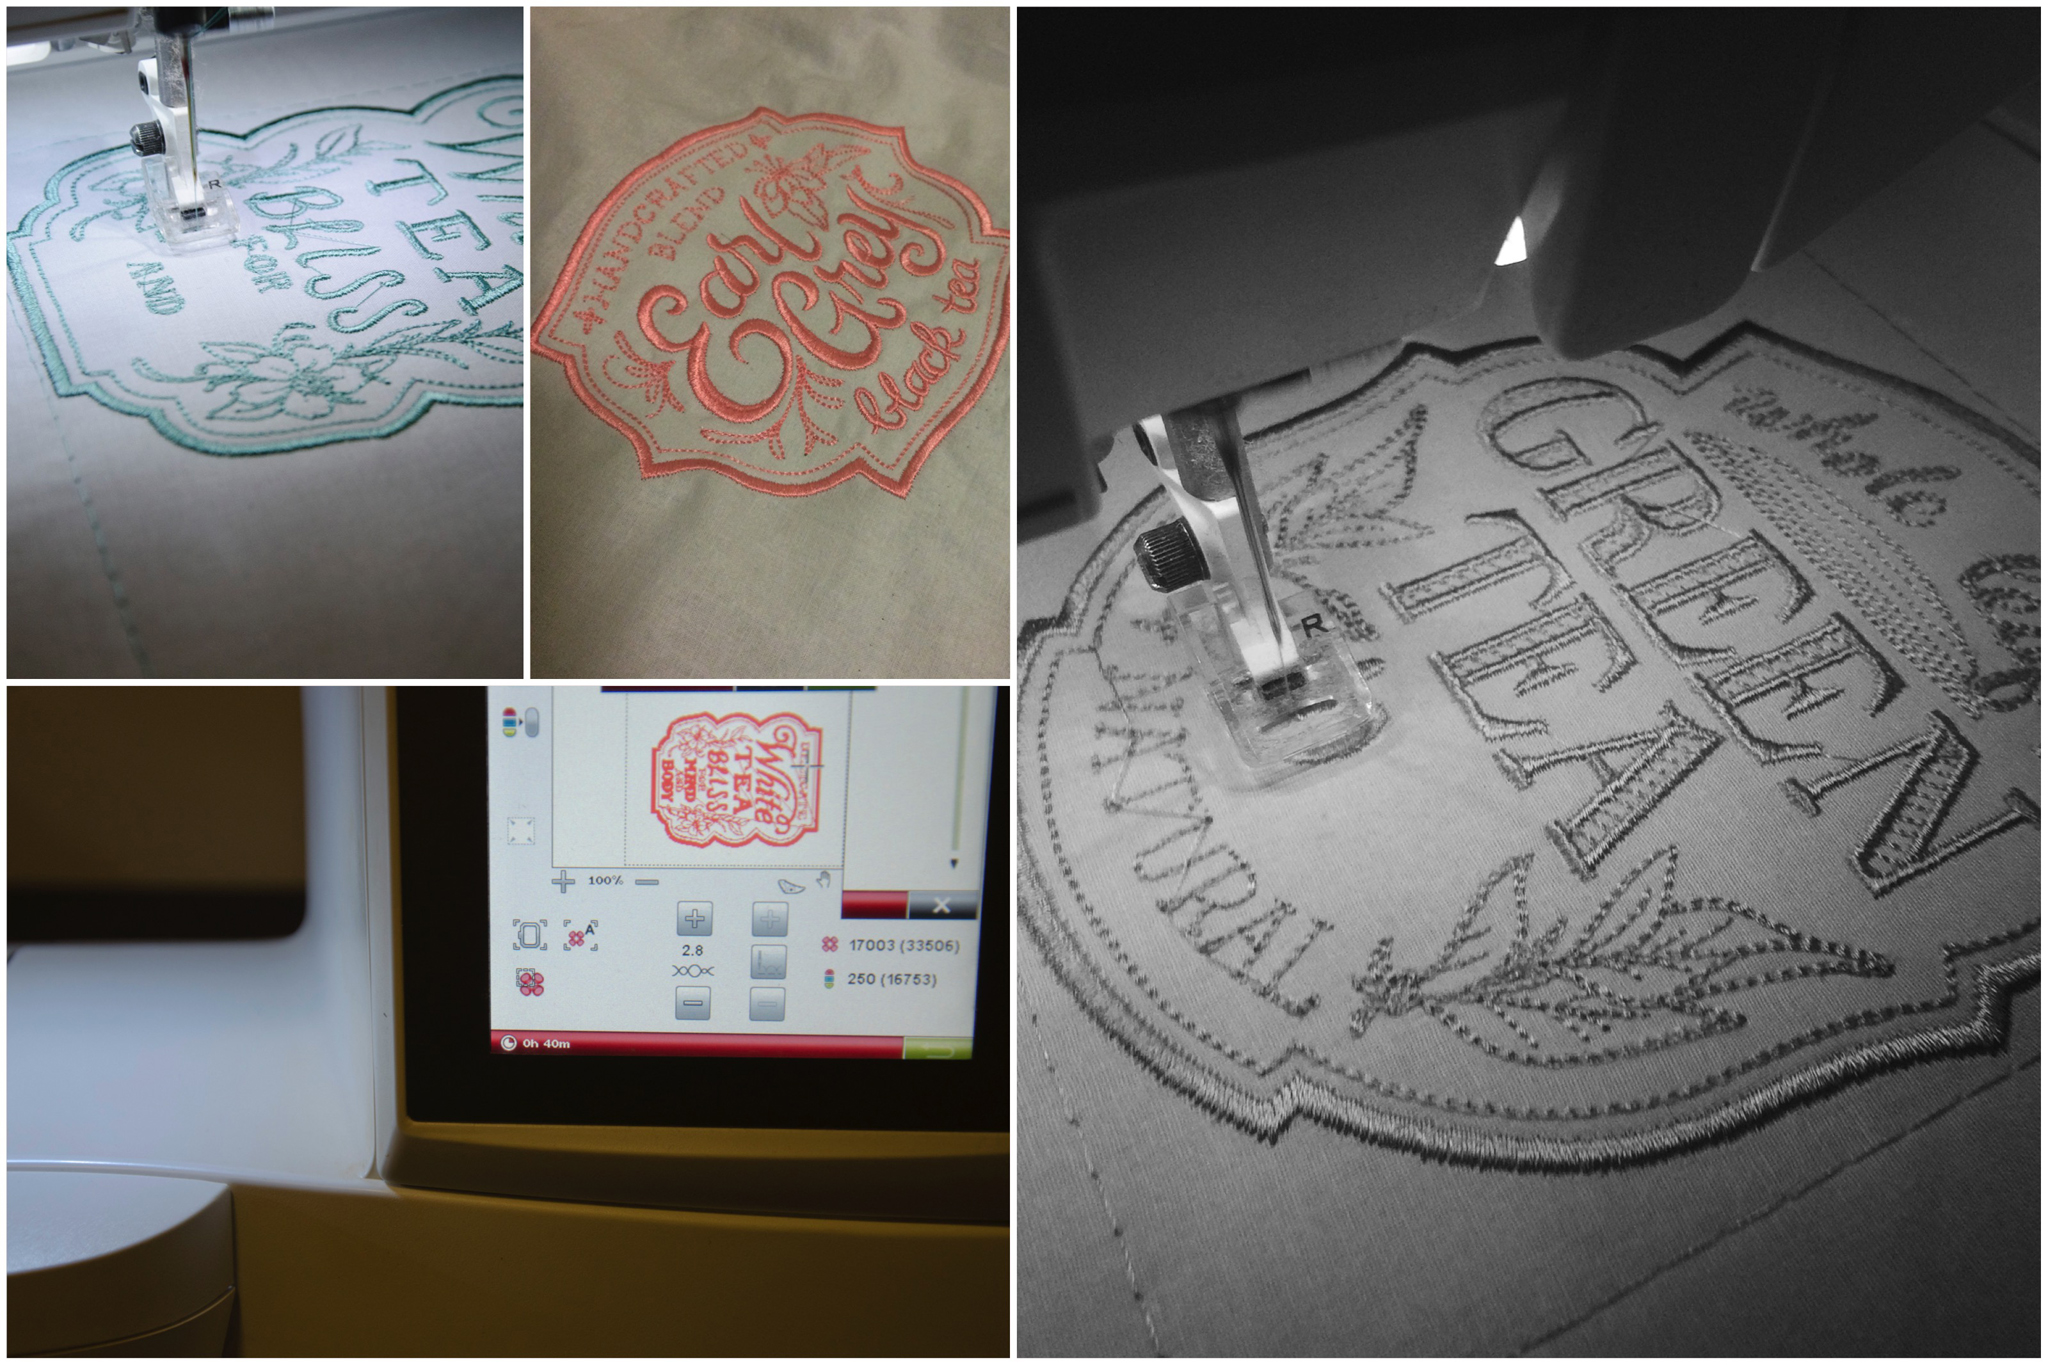
My sister’s bridal shower is fast approaching, and we’re planning it with a tea party theme. (The whole concept of what one does at a bridal shower is a bit of a mystery to me, having not been given one when I married, nor having attended any for others.) Seeing as I’m 1,300 miles away, my ā€˜hosting’ status is mostly honorary, but I am able to lend a hand with the decorations. Armed with a few embroidery files from Urban Threads and some half-yard cuts of Park Life by Elizabeth Olwen for Cloud9 Fabrics, I whipped up bunting for the party. Where by whipped, I mean I spent a lot of time at my machine over the course of a week or so, considering the 40 minute stitch out time of each of the embroideries.

I dare say the final result is pretty sweet. I made two of these strands, each 9’ long.

Tea Party Bunting

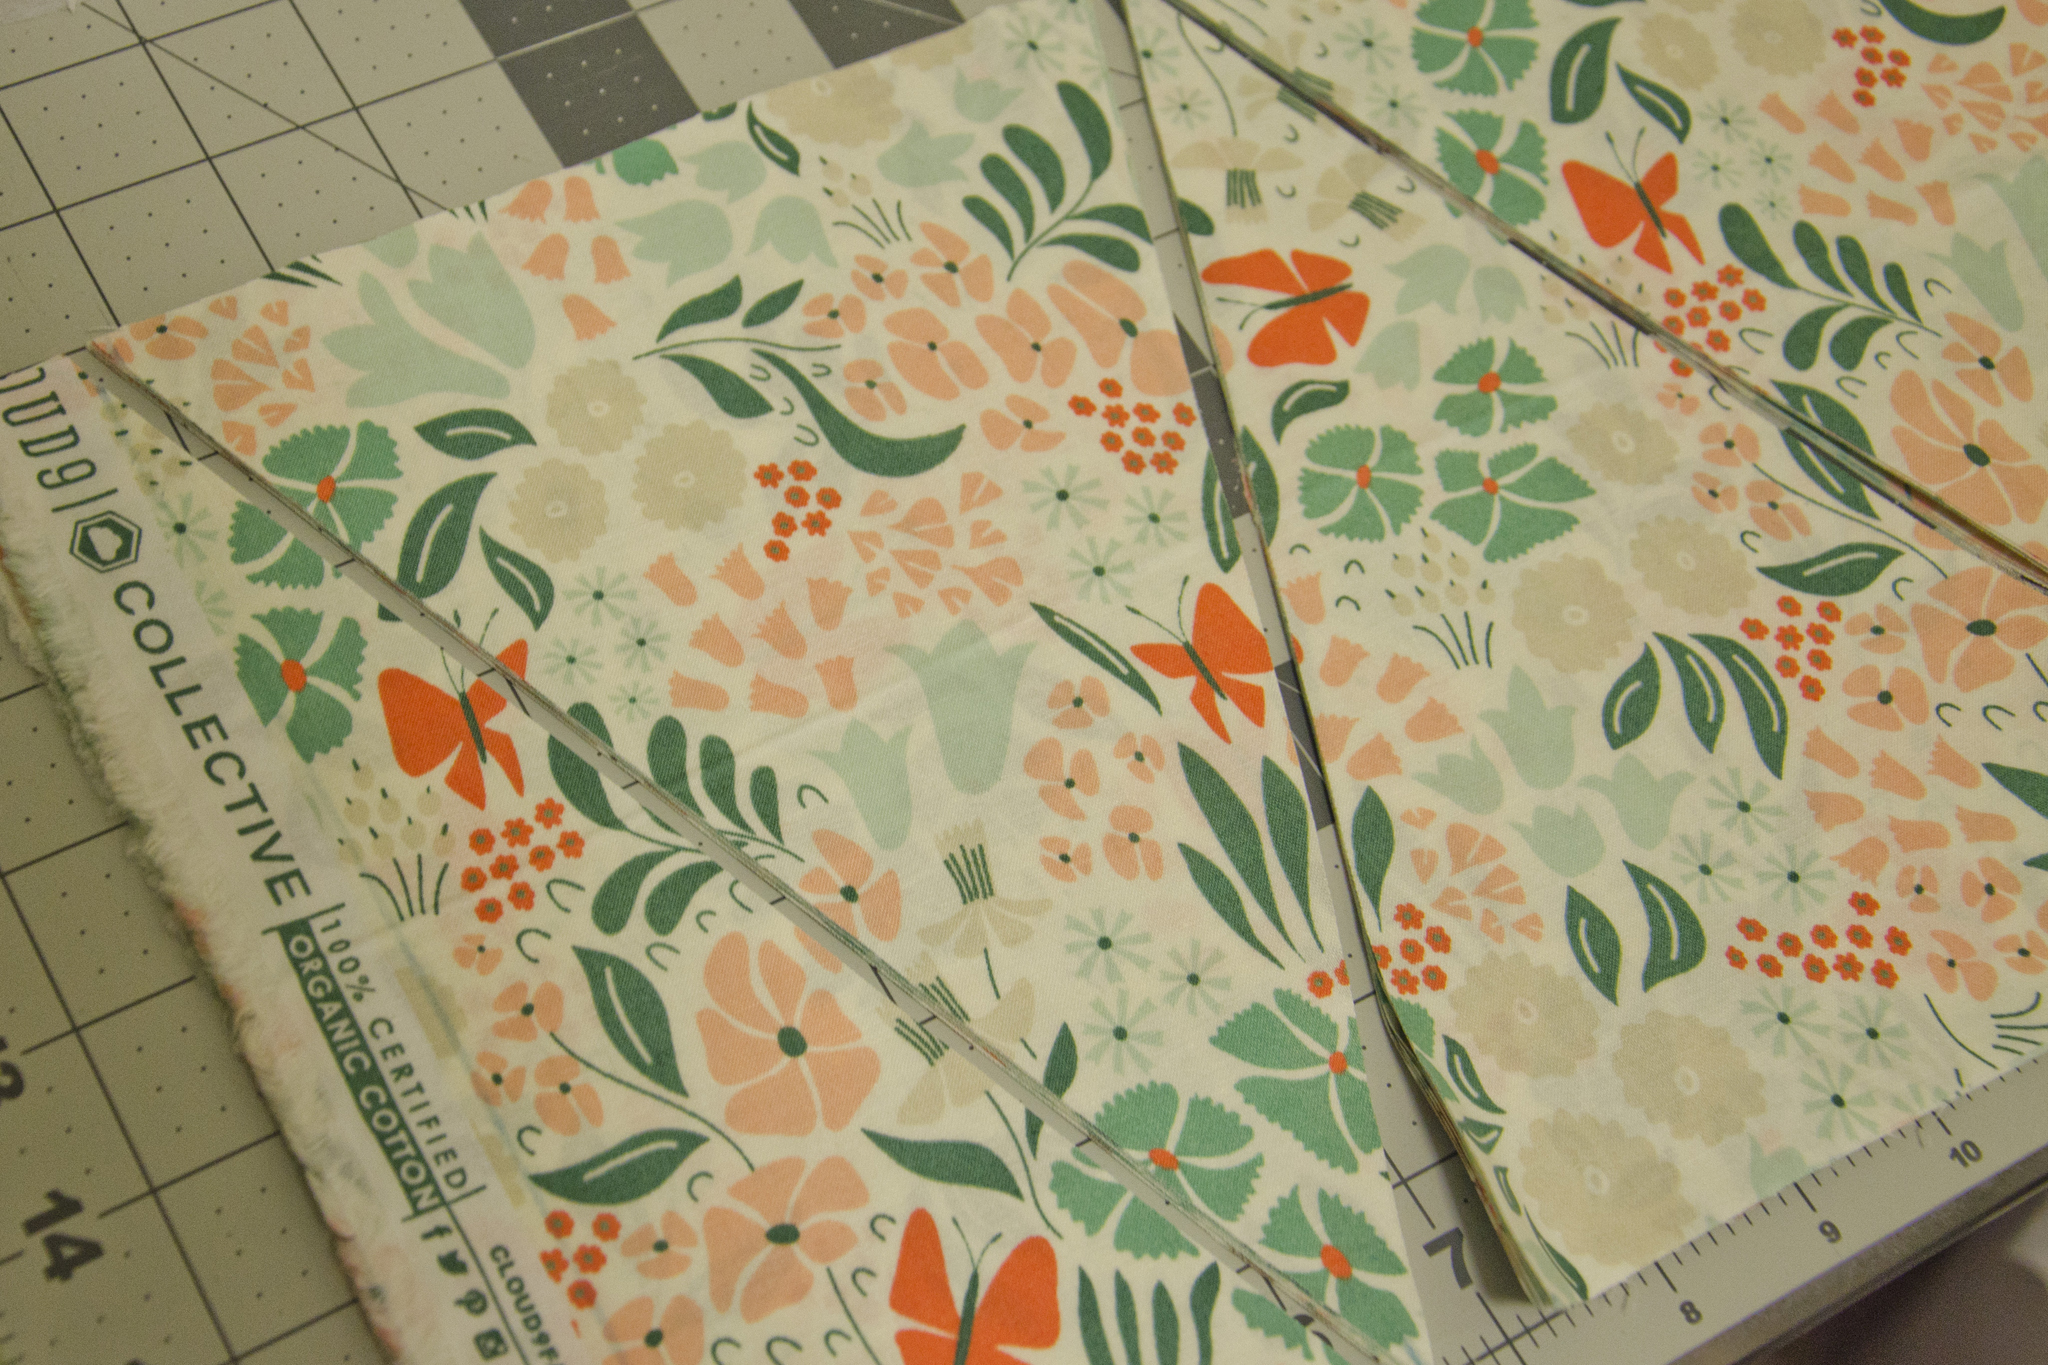
Here are a few tricks I found helped with creating it. When making your own, you can actually get a lot more bunting out of just a quarter yard of each fabric than I ended up making—my cut triangles had 7ā€ bases and were 9ā€ tall. I have so much fabric left over—stay tuned for future projects with it.

Tea Party Bunting

Tip 1

Cut strips of fabric, then rotate your template (or cutting marks) for easy cutting. If your fabric is directional, you can use the upside-down cuts on the back of your pennants.

Tea Party Bunting

Tip 2

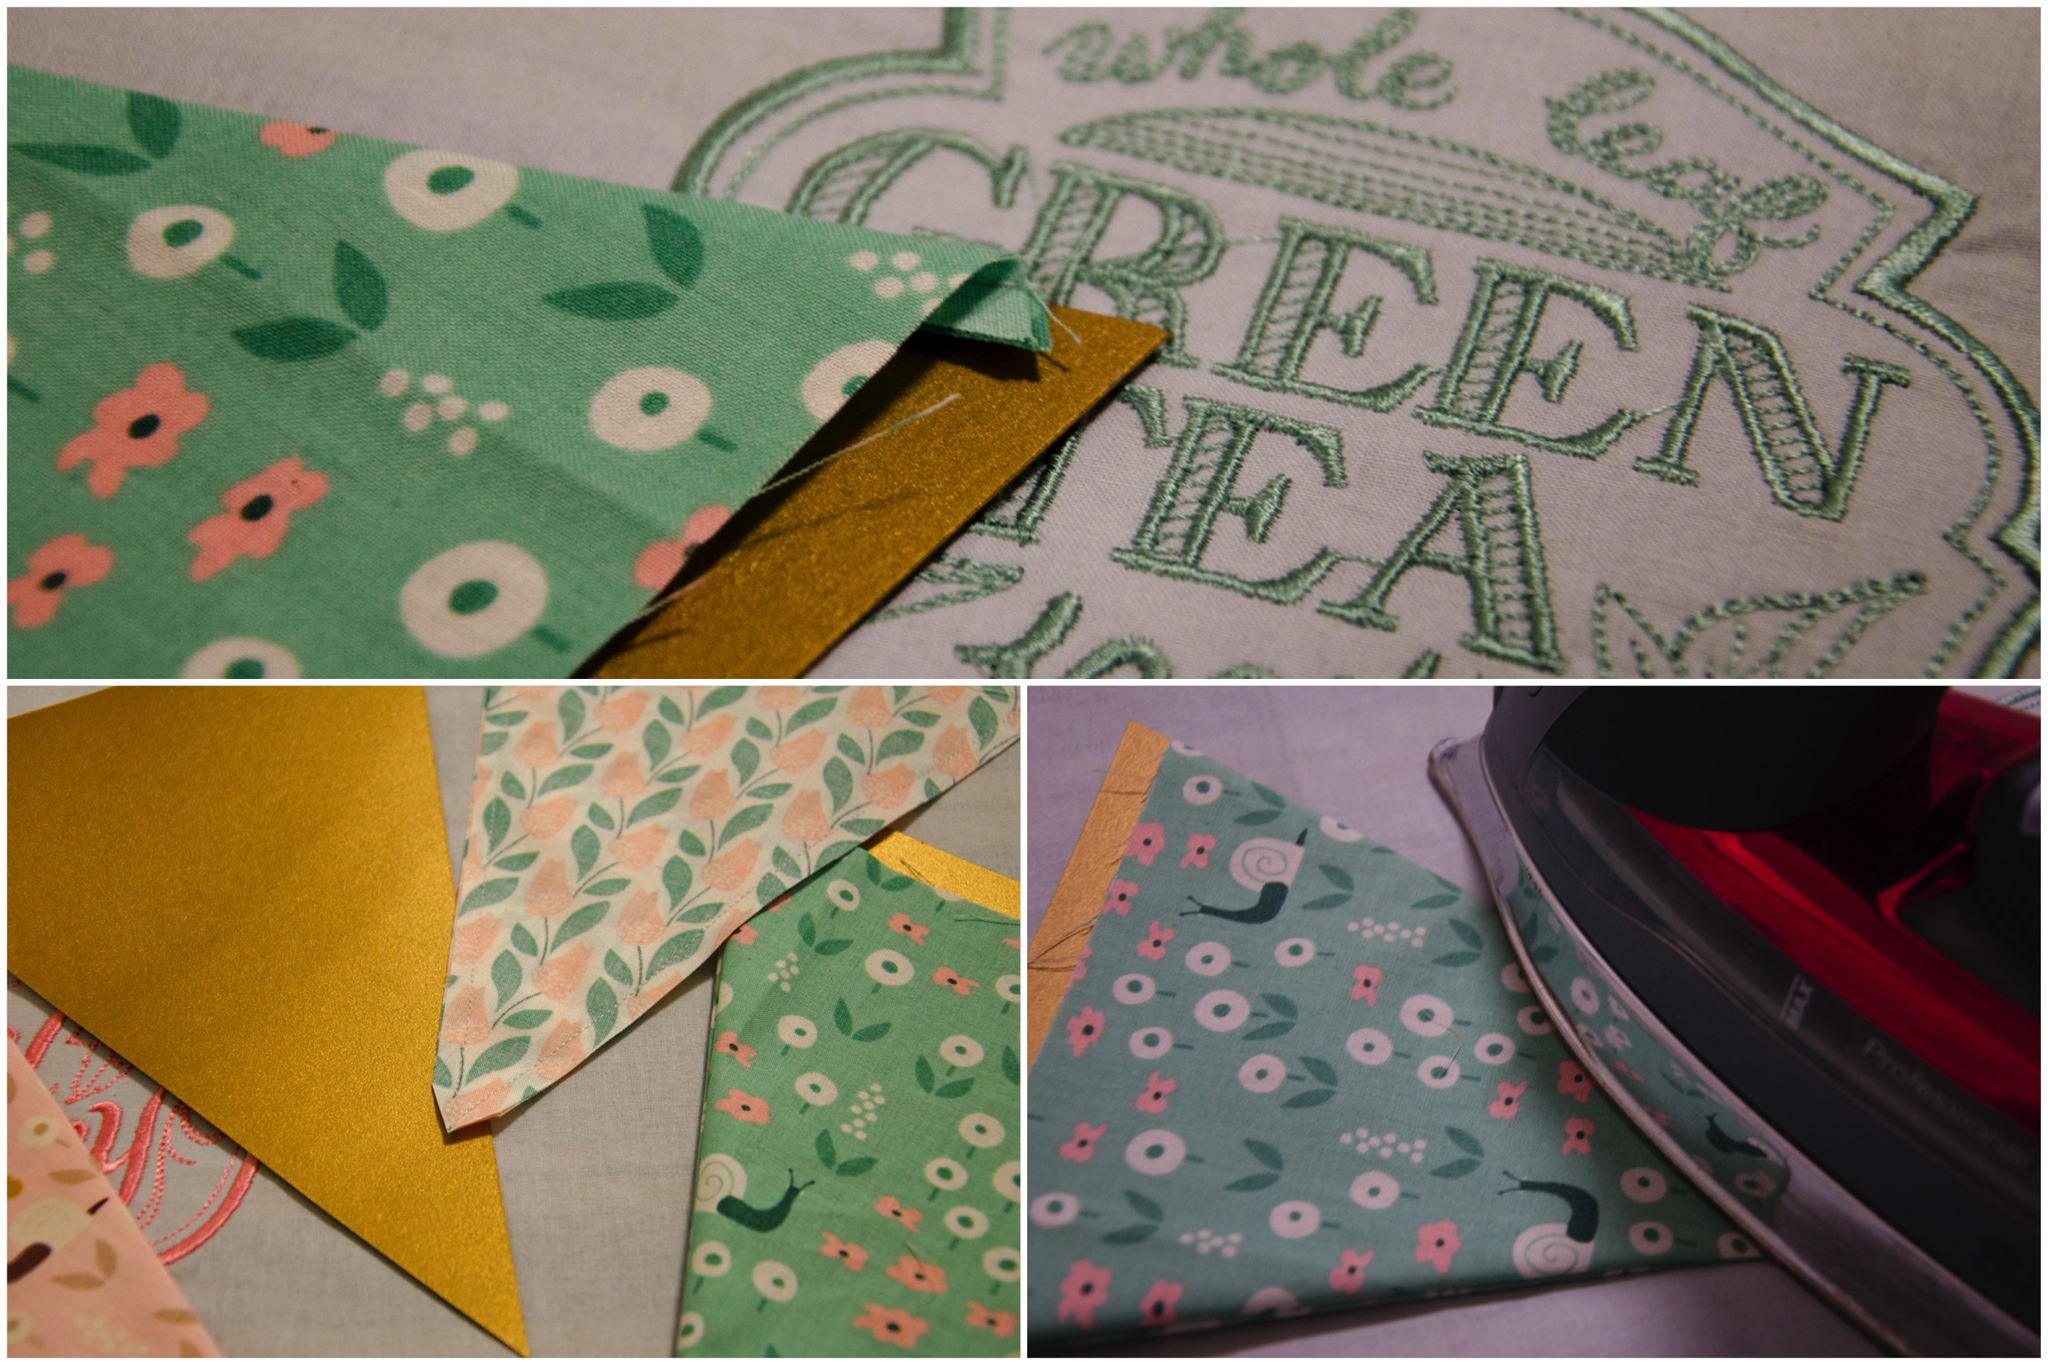
Trim the seam allowances and use a chopstick to turn the point. I’m not great at sharp points, regardless of how I trim the seam allowances, but the chopstick is awesome.

Tea Party Bunting

Tip 3

Cut a template out of card stock to help with pressing. If you cut the template to the finished size, then slide it in with the seam allowances behind it, you get a nice sharp edge to your pressed pennants.

Tea Party Bunting

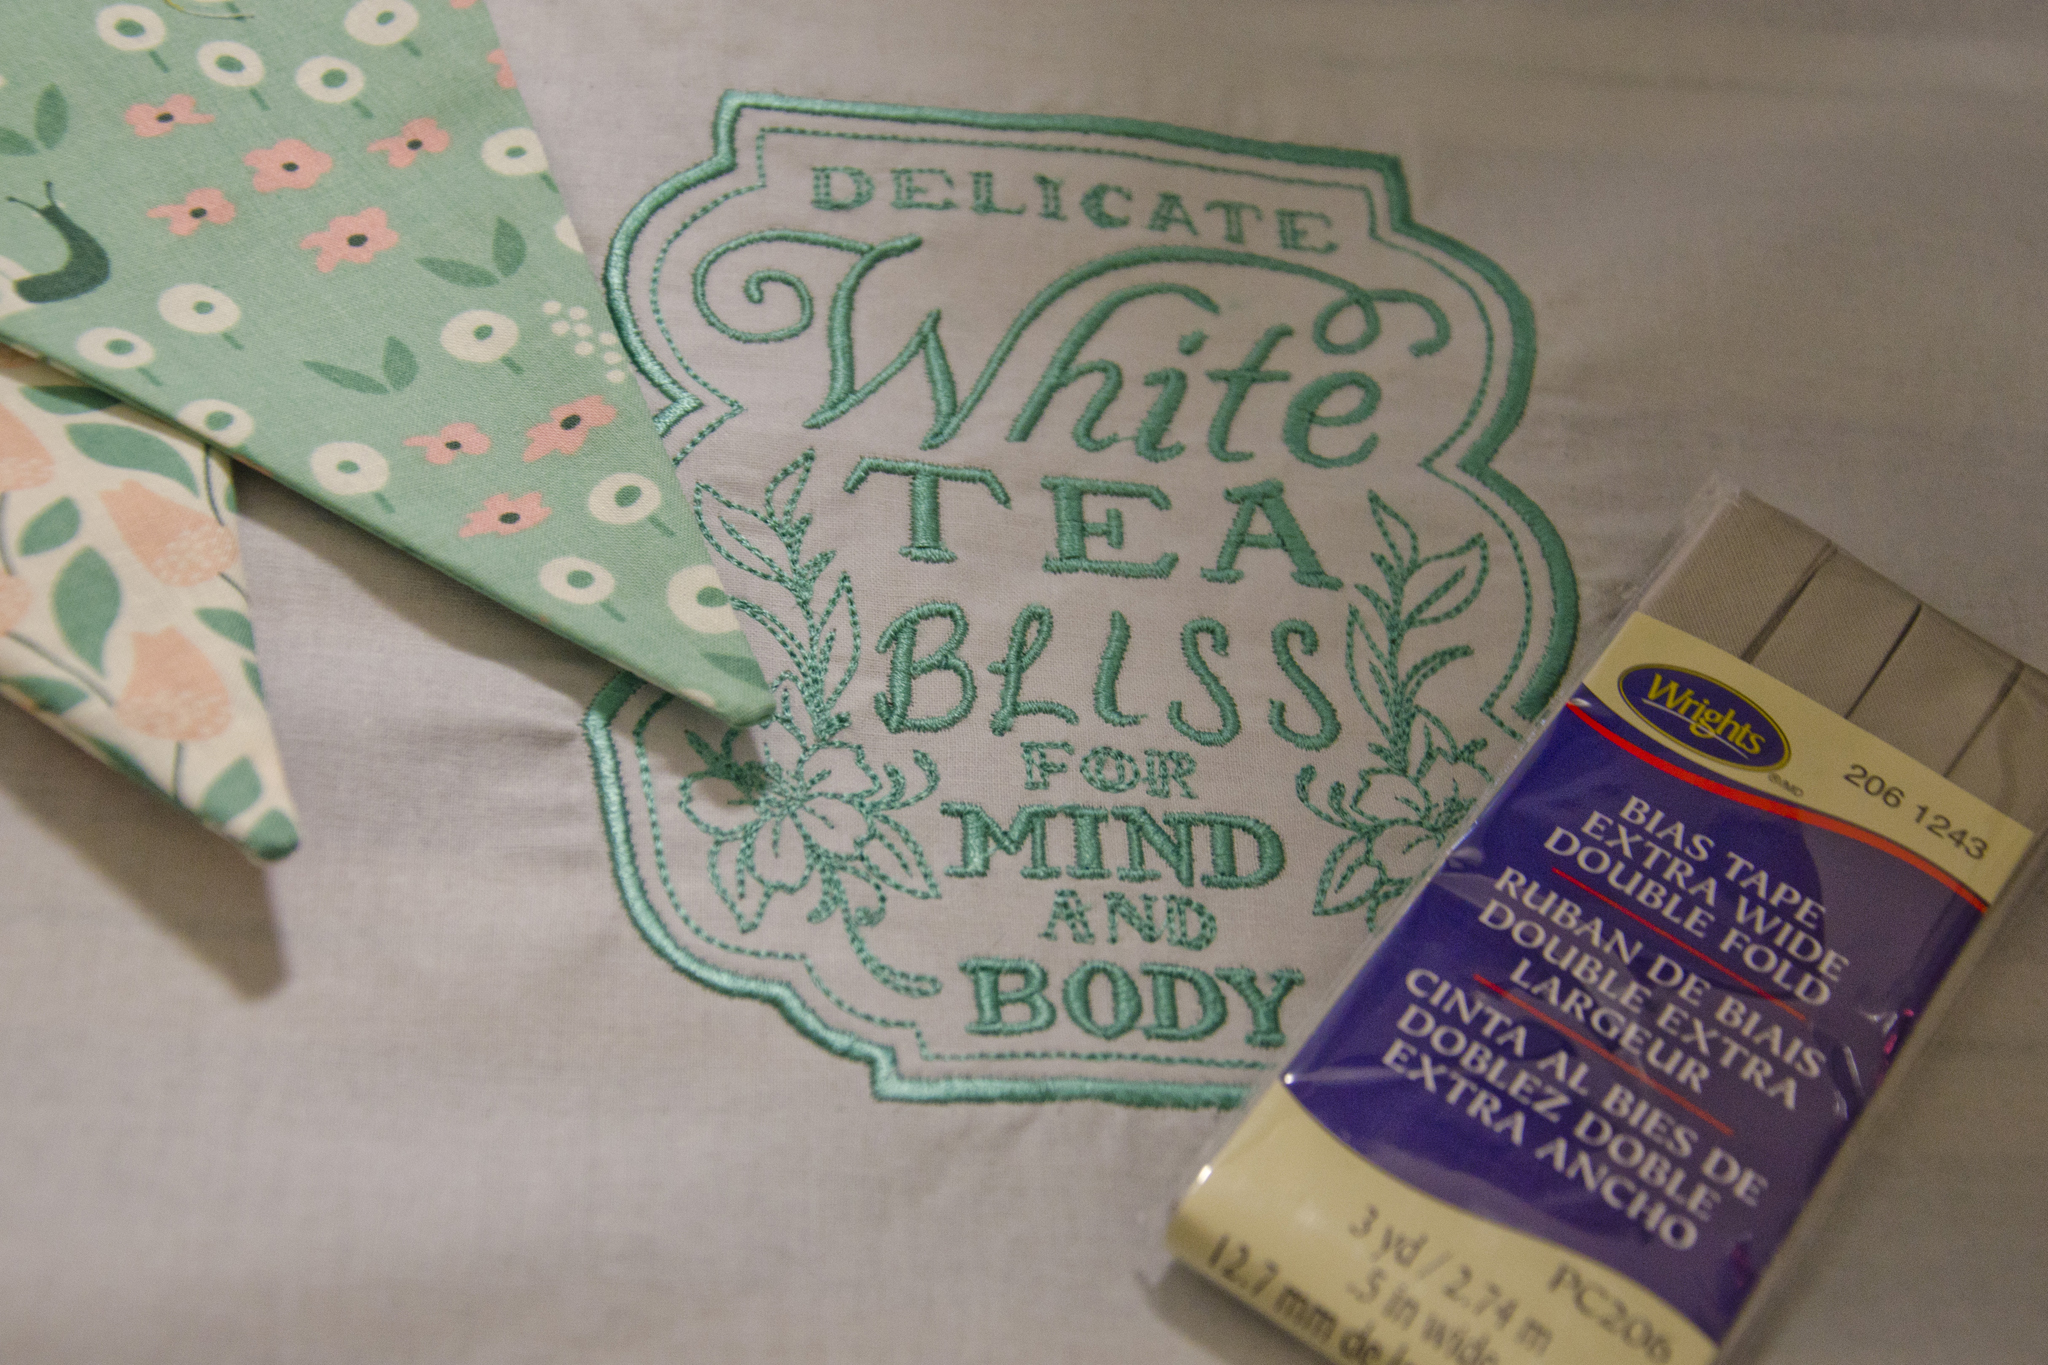
Tip 4

Use packaged double fold bias tape for a quick and easy finish, and a glue stick to hold everything in place while you sew the flags down.

Tea Party Bunting

Best of luck in your bunting endeavors!

May 21st, 2016

Makers Gonna Make Scrappy Pouches

Posted in Crafting

  • Bags
  • Fabric: Essex Yarn Dyed
  • Fabric: The Cottage Garden
  • Quick project
  • Zipper

Like many quilters, my scrap bin (boxes, cubes, bags…) is out of hand—unorganized, jumbled, and overflowing. This year, I’ve tried to be mindful of what is leftover from my projects and keep it organized in some way so that I don’t add to the existing problem. One solution has been offering up the leftover fabric to guild members—particularly when I’m “over” working with that line and there’s a substantial amount leftover. This especially made sense for my #mqgfabricchallenge scraps, since it meant another member may be able to enter. I already have more scraps than I think I’ll use in my life—particularly since I don’t make many scrappy things.

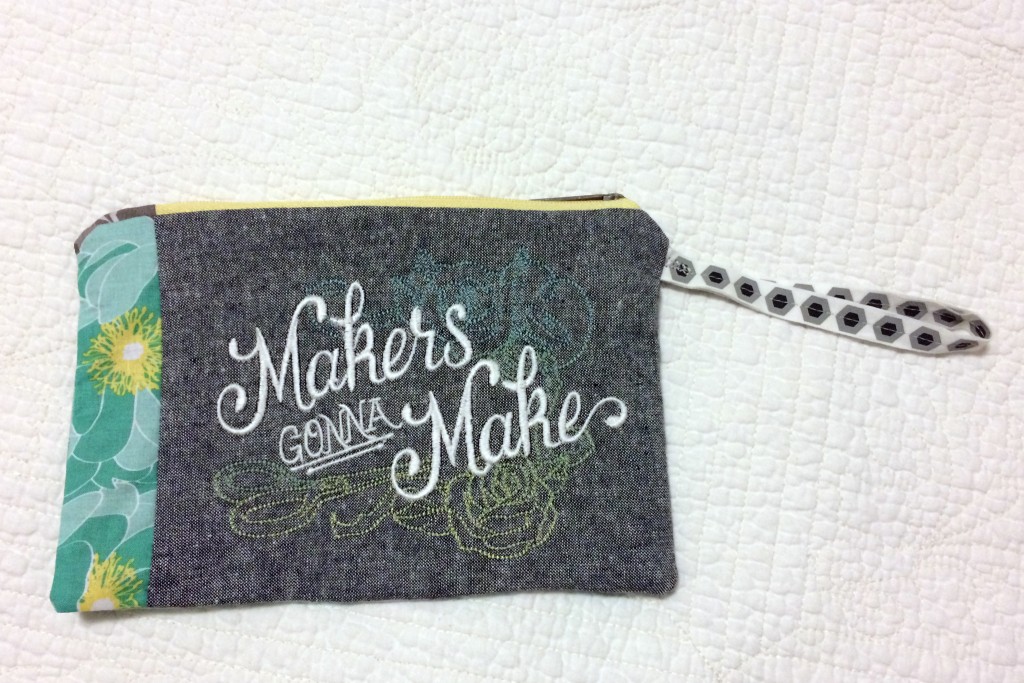
Makers Gonna Make Pouch Front

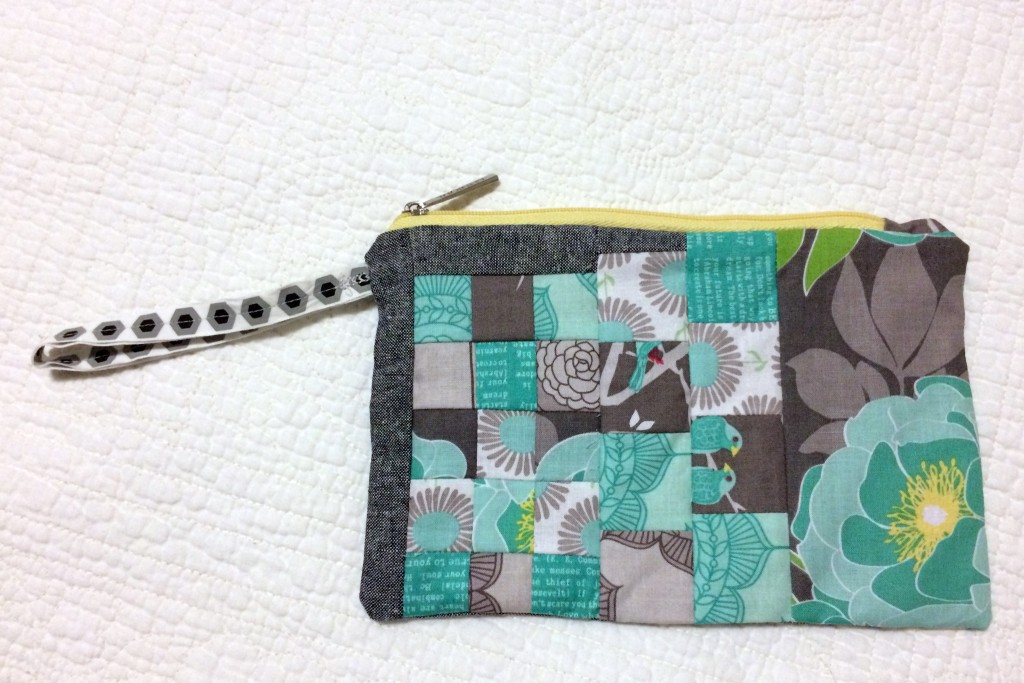
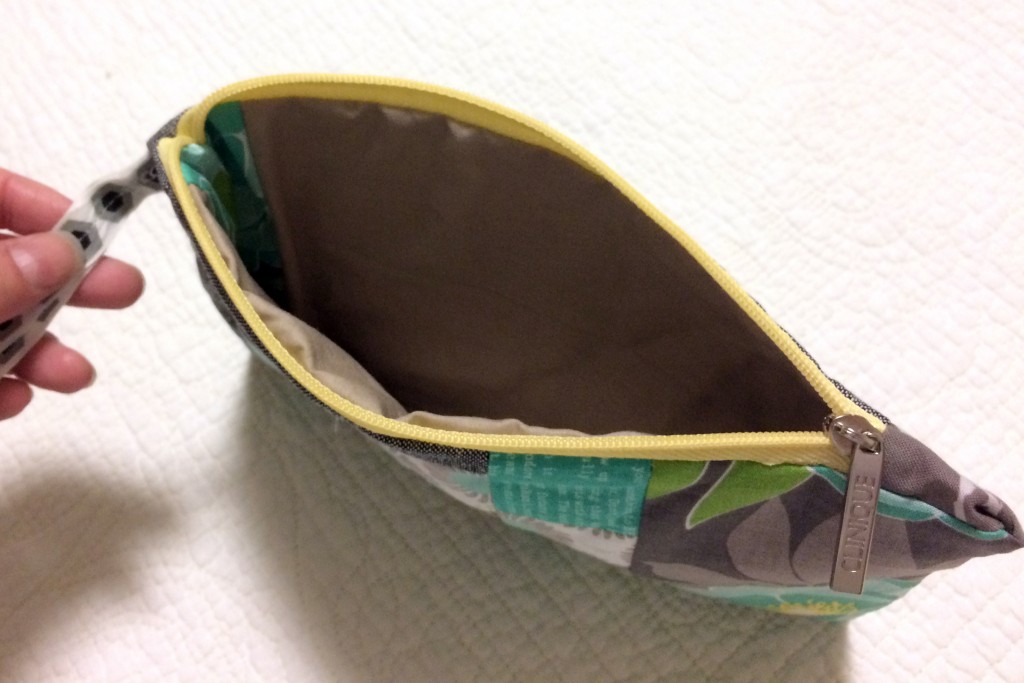
But, after packaging up my challenge scraps, I still had a few left that were already pieced together in various ways (cut-offs from piecing the bag). One thing I always appreciate having around are zip pouches—they’re handy for packaging up projects, carting things around, and organizing. So, I threw together a quick zip pouch from scraps, the ribbon from the fabric challenge bundle, another embroidery, and a recycled zipper from one of those free-gift-with-cosmetic-purchase vinyl pouches that always seem to clutter up my bathroom cabinets.

Makers Gonna Make Pouch Back

I didn’t spend much time on it, nor is the scrappy piecing the most aesthetically pleasing, but it’ll serve its purpose just fine.

Makers Gonna Make Pouch Open

What’s your favorite quick scrap busting project?

July 18th, 2015

Coral, Mint, Black, & White

Posted in Crafting

  • Fabric design

I’ve mentioned Spoonflower quite a few times, as I order all of my labels from there and used them to print the center medallion for the 1812 quilt. However, aside from those basic orders, I’ve never thought to try my hand at fabric design.

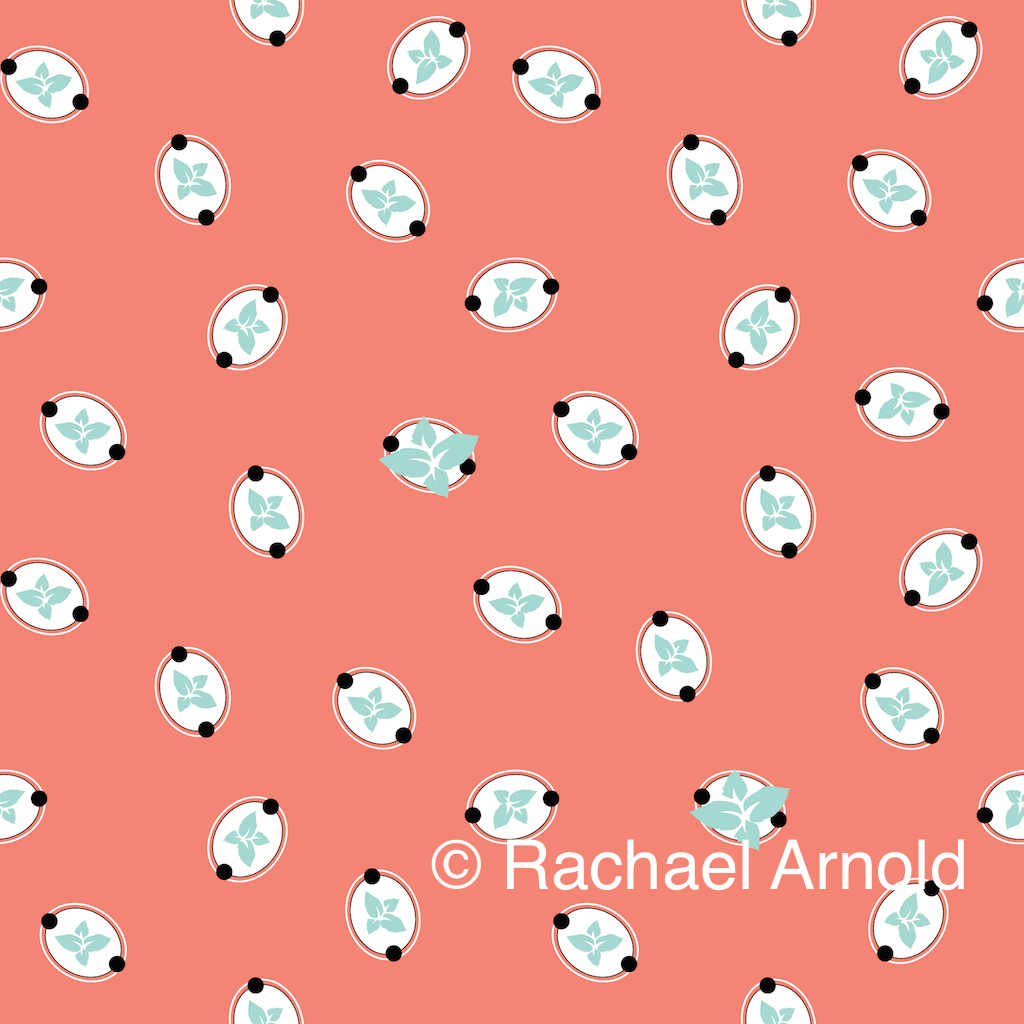
The VTMQG challenged us to create something this month using coral, mint, black, and white (and only those four colors) based on the Spoonflower Weekly Contest of the same theme. In honor of their inspiration, I decided to actually try to design something for the contest (plus, I knew sewing time would be sparse this month due to my work and teaching schedule).

So, decidedly unmodern as it is, here’s my attempt at designing fabric for the challenge. It seems very 1980s shabby chic farmhouse to me.

coral-mint-bw-design-web

You can see all of the entries (and vote for your favorites) here.

March 8th, 2015

Setting In a (Laptop) Sleeve

Posted in Crafting

  • Bags
  • Lifestyle
  • Technology

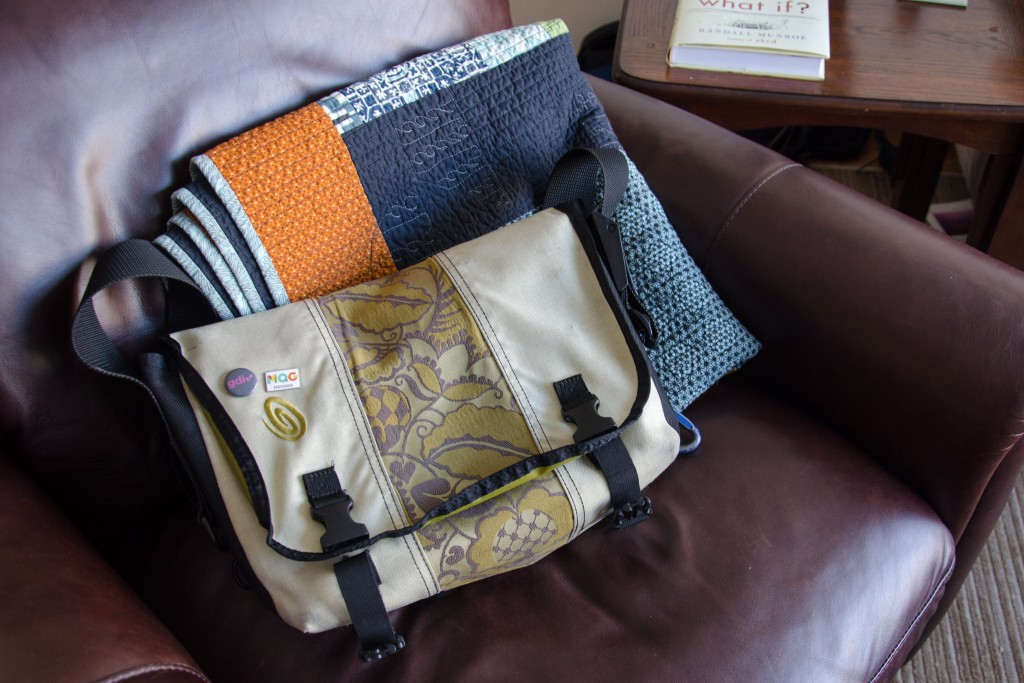
Eight years ago, after realizing I’d been going through a computer bag/backpack a year, I made my first “spend money on quality” purchase—a Timbuk2 bag that I picked up at their retail shop while working and living in the Bay Area for the summer. I had hoped to get a few good years out of it; I did not expect to still find it just as integral to my life now as it was in college—nor still in almost perfect shape (albeit a bit dingy).

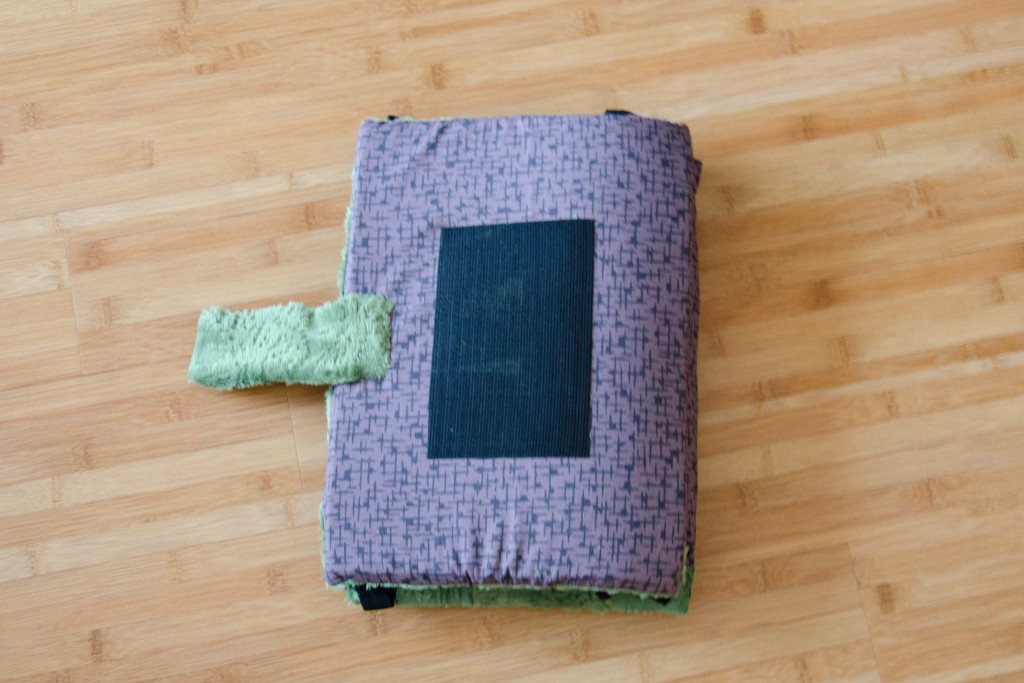
MacBook Pro Laptop Insert

The one regret I’ve always had is that I bought a plain messenger bag rather than one with a laptop sleeve. I had a neoprene sleeve for the laptop I bought that same summer, but for some reason always found it awkward to use. Then, I was abusive to the laptop that replaced that one and never bothered with a sleeve.

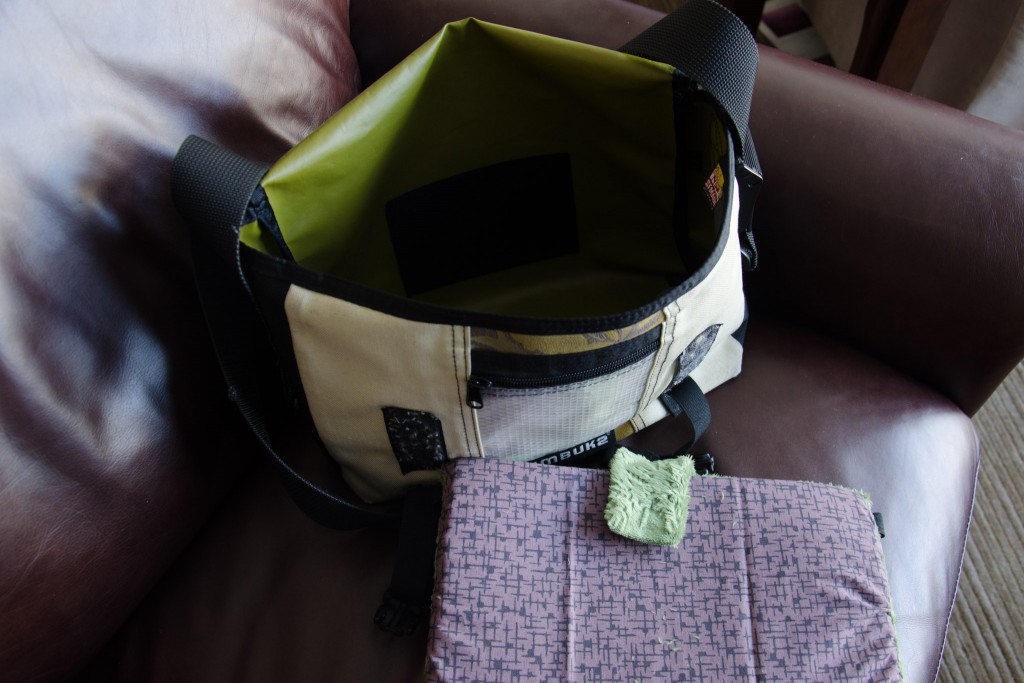
Knowing that my new laptop deserves better, I scoured local shops and websites for a replacement bag, but couldn’t find anything I like better than my bag. So, I decided to retrofit my trusty friend.

MacBook Pro Laptop Insert

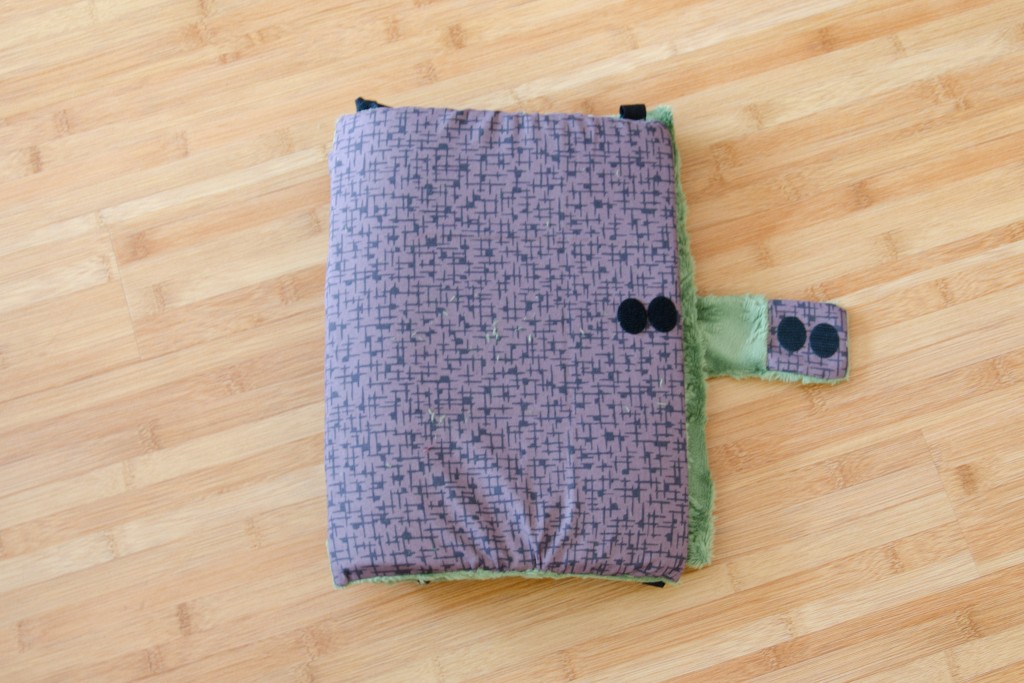
I bought a piece of .5″ tall foam (kismet—there was a scrap of the perfect size sitting forlornly in the foam-by-yard section), some elastic, and Velcro, and combined them with minky scraps and a stashed fat-quarter.

MacBook Pro Laptop Insert

I improvised the construction without a lot of forethought, so there are choices I’d have made differently a second time around—mainly securing the top flap and side elastic in the seams instead of hand-stitching them on later, and completely changing how the bottom is constructed.

MacBook Pro Laptop Insert

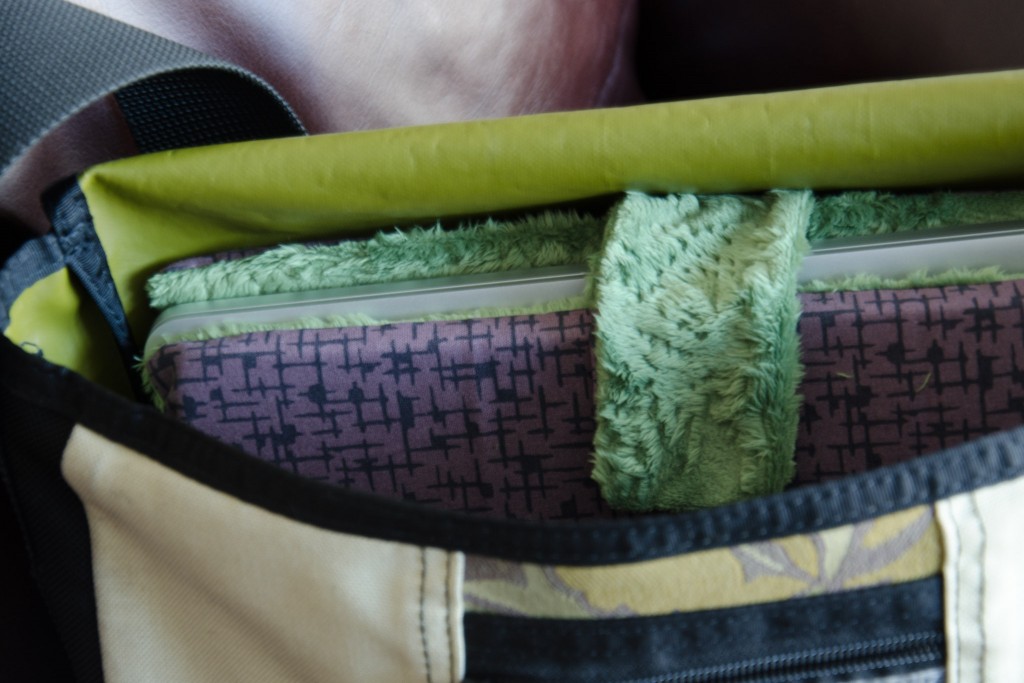
It’s secured to the bag interior with a huge strip of Velcro, and allows the laptop to slide in and out easily without having to fiddle with a zipper. Best of all, it’s perfectly fitted to the laptop.

MacBook Pro Laptop Insert

We’ll see if the bag and insert make it to laptop number four in a few years!

February 15th, 2015

Just the Right Size for a Lump of Coal

Posted in Crafting

  • Doggie
  • Handmade Holidays
  • Quick project
  • Template

It’s right around this time every year that I remember how much I dislike the season of giving. I love giving presents when I find/make just the right thing for someone; I dislike having to buy something just because it’s xmas. I hate, hate, hate being on the receiving end when someone clearly felt required to give me something—it takes all the fun out of being able to appreciate the thought behind the present.

Moof by tree, photo by Carl Pfranger
Moof is only sad because he’s not allowed to eat the ornaments. Photo by Carl Pfranger.

Growing up, giving holidays were always followed by a series of trips to the store to exchange all manner of things that didn’t fit or really weren’t my style—that, or trying to find a way to donate things that couldn’t be exchanged (which generally didn’t happen, so they became clutter in a mini-hoard). So, that’s the long-winded bah-humbug excuse for why my tween and teen niblings are all getting gift cards this year—instead of having to go return things from us in the days after Christmas, perhaps they can go to the store with us while we’re in town that week and use their gifts on things that suit them best.

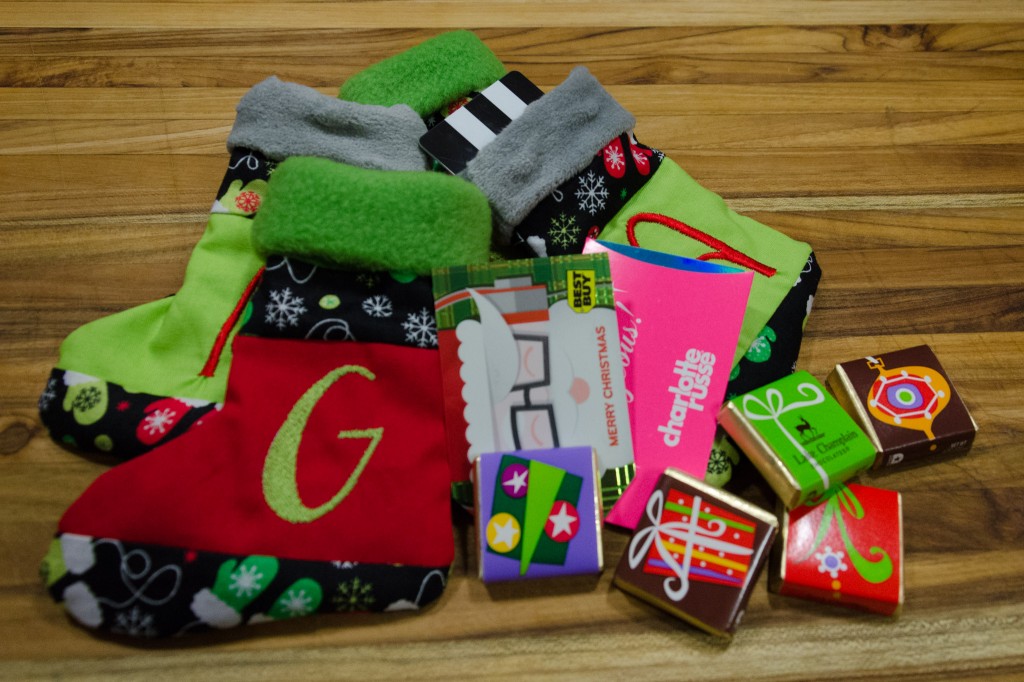
Gift Card Stockings

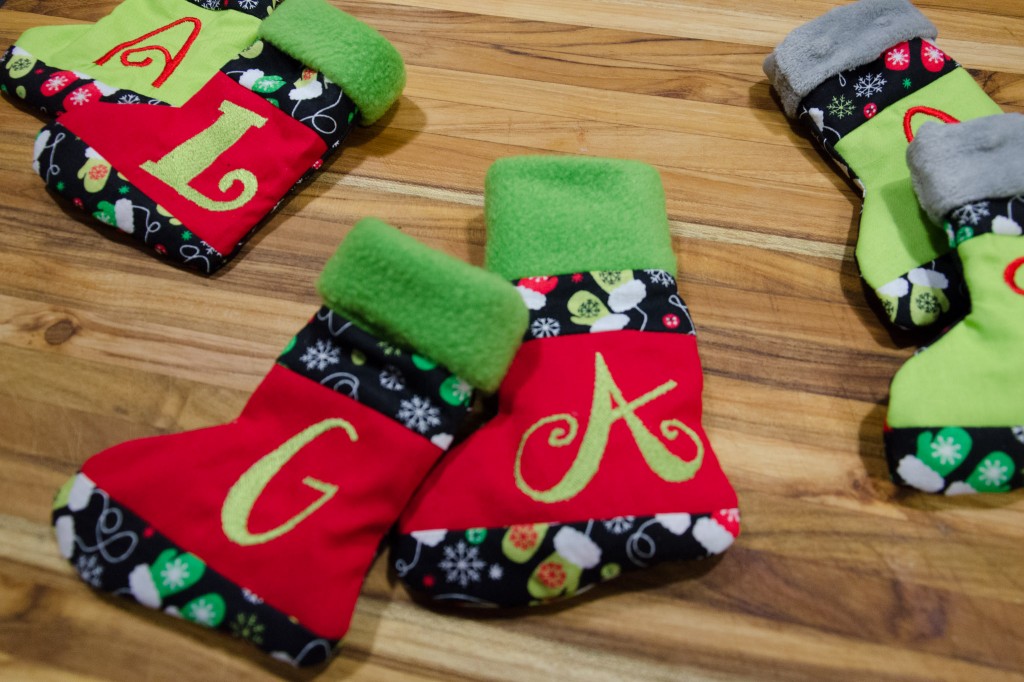
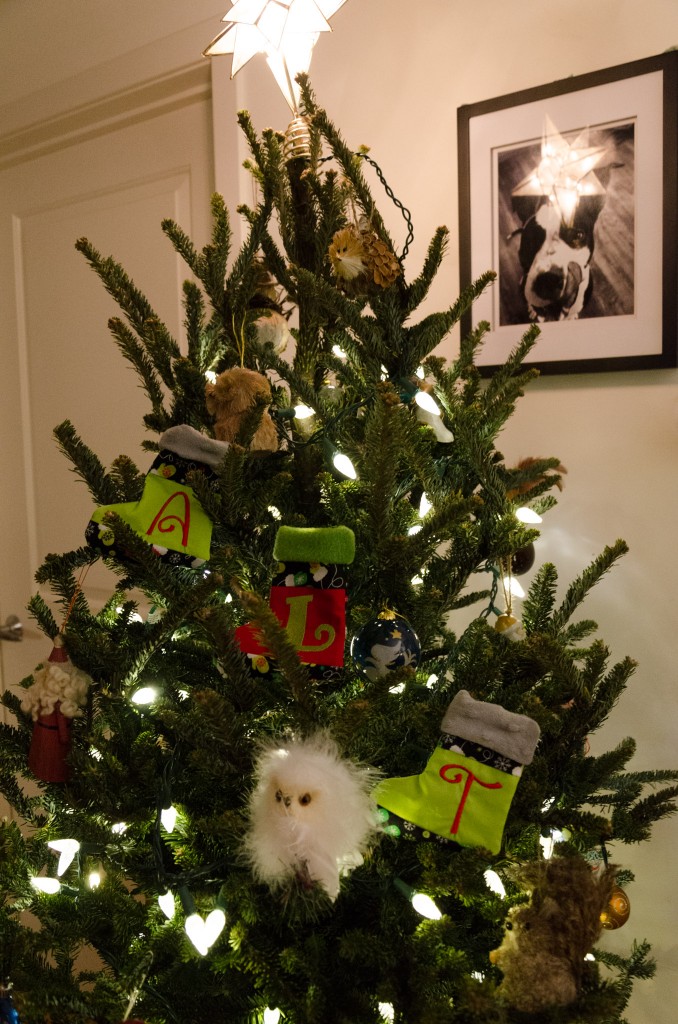
Gift cards are boring to unwrap, so I made a few gift card stockings as well. I personalized them with embroidered initials, and topped them with a bit of stashed fleece. Really, I was procrastinating on working on a quilt that I’ve lost the drive to finish.

Gift Card Stockings

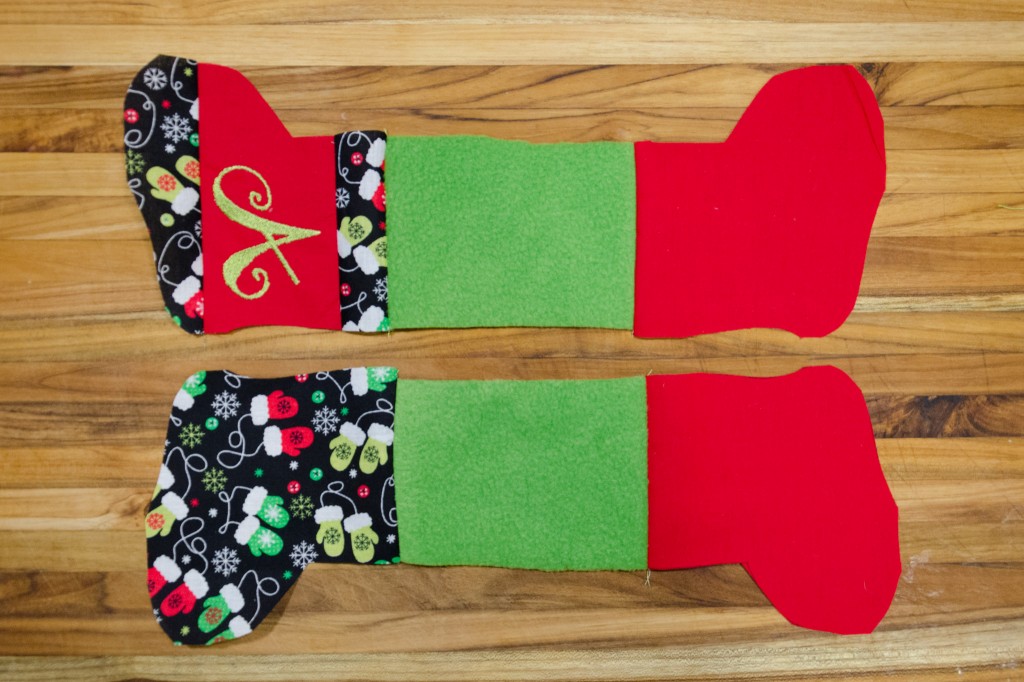
The easy way would be a single layer with pinked seam allowances to stop potential fraying. I made mine with a lining, because it means neat insides and I wanted to experiment with ordering of seams (that is, sewing the lining, cuff, and outside for one half together, then to the other, rather than some complicated nesting process).

Gift Card Stockings

Charm squares are the perfect size for these if you want to make a few of your own—you’ll need four per stocking. The cuffs are 3.5″x5″ rectangles (quilting cotton can work there too, or stash bust some fleece/Minky scraps). You can download the template I used if you want to muddle through construction on your own.

Gift Card Stockings

Despite my current lack of Yuletide gaiety, I am looking forward to the vacation time and chance to head back to MO to see my family! What’s your favorite part of the holiday season?

December 15th, 2014

A Key to Gifting

Posted in Crafting

  • Gifts
  • Lace
  • Machine embroidery
  • Urban Threads

I’m absolutely the worst at remembering to pop gifts in the mail on time for my various niblings’ birthdays. I think they’ve all come to expect that Aunt Rachael’s cards come sometime in the general month, likely mailed on their birthday or a few days after. Take these, for instance. Two of my nieces recently celebrated their 16th birthdays, one this past week, the other in September (to be fair, I didn’t have a mailing address at the time).

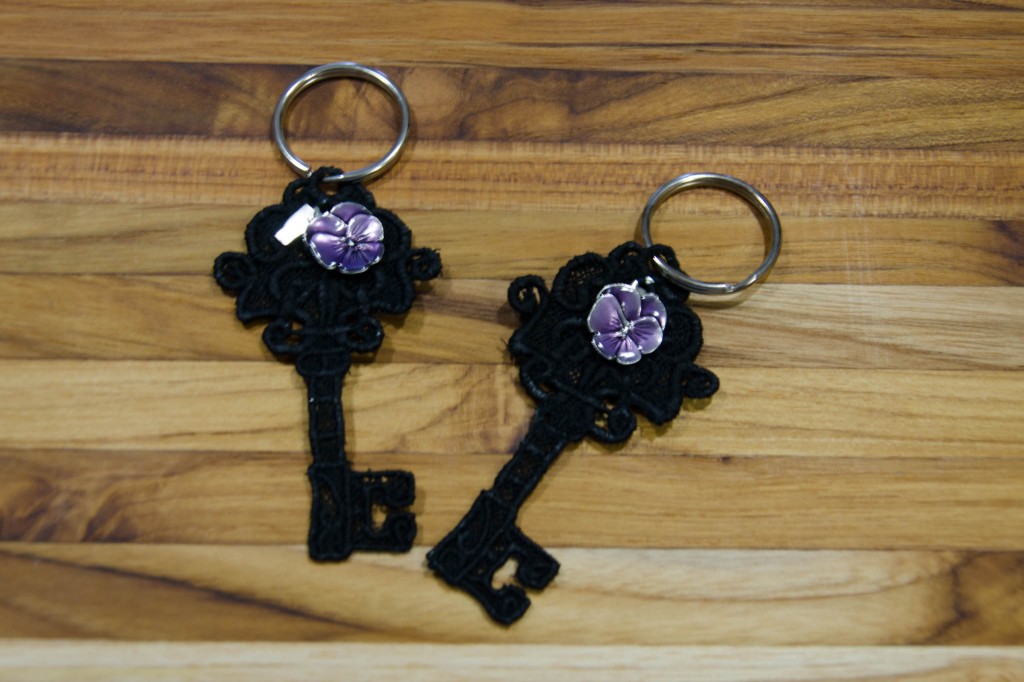
Urban Threads embroidered lace key with Danforth pewter charms
Charming lace key keychains, November 2014, Rachael Arnold.

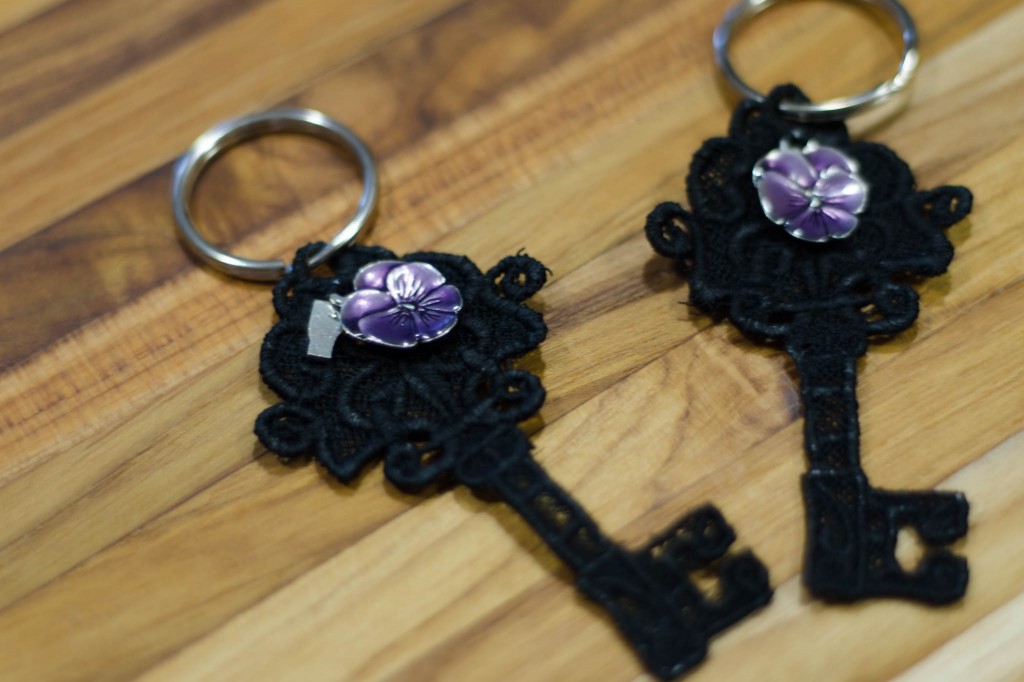
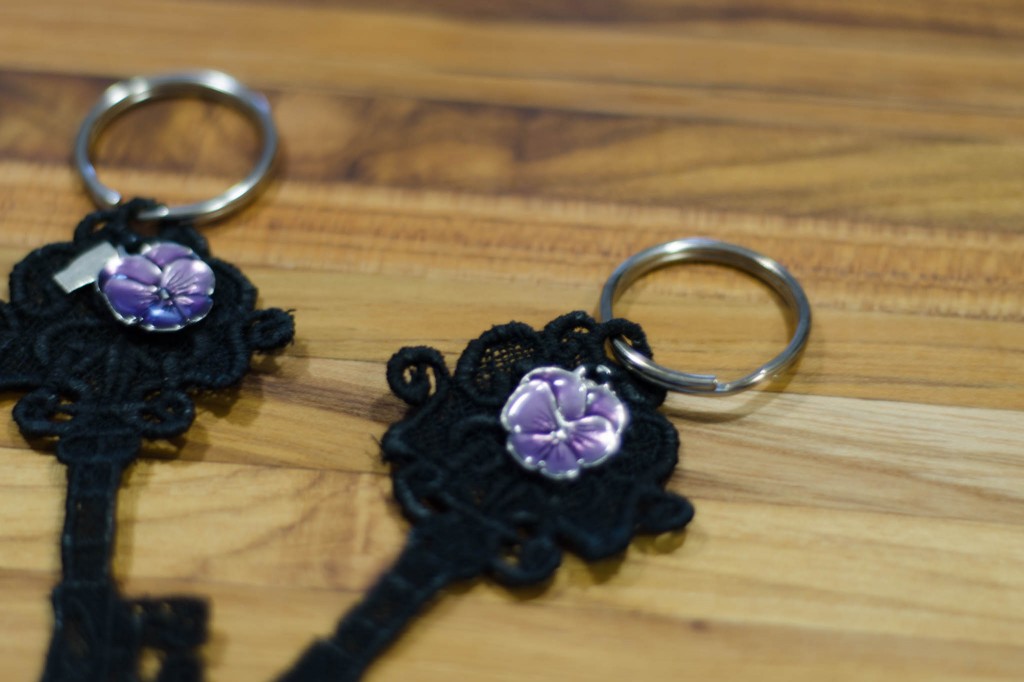
For birthdays, I usually drop a gift card in the mail, but since this was a special one, I added a small additional gift as well—a keychain composed of a free-standing lace design from Urban Threads and a pair of charms from Danforth Pewter (made here in Vermont).

Urban Threads embroidered lace key with Danforth pewter charms
Charming lace key keychains, November 2014, Rachael Arnold.

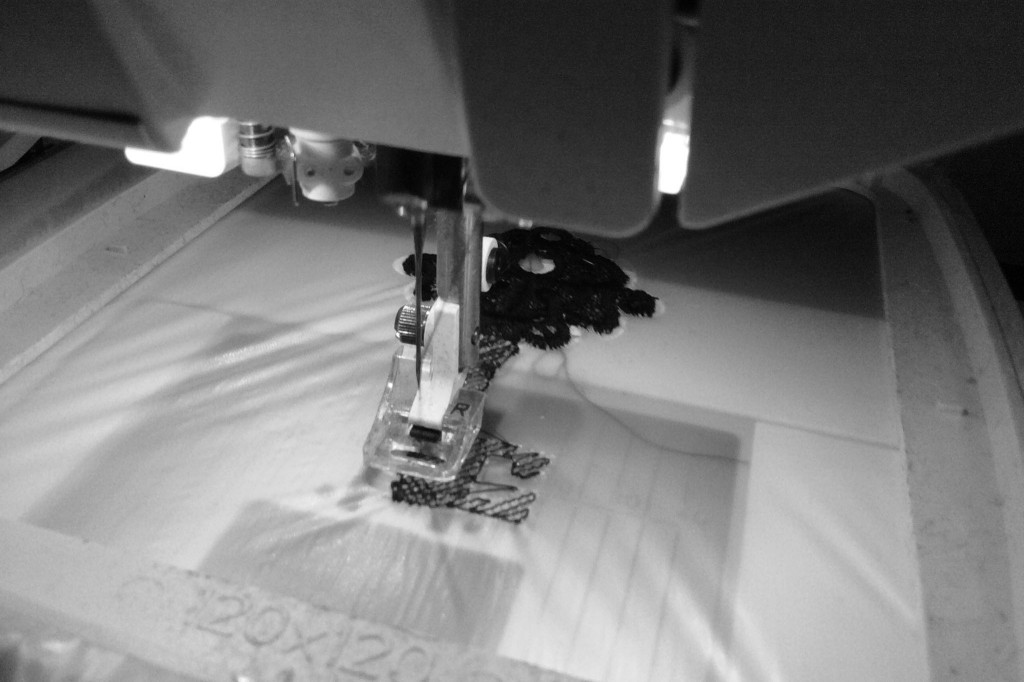
This is the first time I’ve tried stitching out a free-standing lace design, and it was a little rocky. My first attempt failed compeltely. The second time, I doubled up the water-soluble stabilizer and it turned out okay but the top thread broke about ten times, and it skipped a ton of stitches. The final product seems okay, despite all that.

Stitching out Urban Threads embroidered lace key
There are quite a few skipped stitches in this area.

The third time, I used three layers of stabilizer, and didn’t have to fight broken thread, however the stitches pulled the stabilizer apart, scrunching and mis-stitching a part of the key. It still came out okay, but I definitely have room for improvement.

Urban Threads embroidered lace key with Danforth pewter charms
Charming lace key keychains, November 2014, Rachael Arnold.

Now I just need to remember to make it to the post office tomorrow to send them on their way!

Have you had much experience stitching out free-standing lace designs?

November 16th, 2014

Ā Previous Posts

© 2008–2025 Raevenfea