Half-baked Blueprint: A Jelly Roll Race Modification

Posted in Quilting
A bit sooner than anticipated (prompted by a comment from a reader), here’s the next edition of my Half-baked Blueprint series. Remember, these are not patterns; think of them as rough outlines of the inspiration, math, fabric, and techniques I use in some of my quilts—there’s a lot you’ll have to fill in yourself. My hope is that it will inspire other quilters to play with quilt top designing rather than always reaching for published patterns.

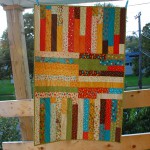
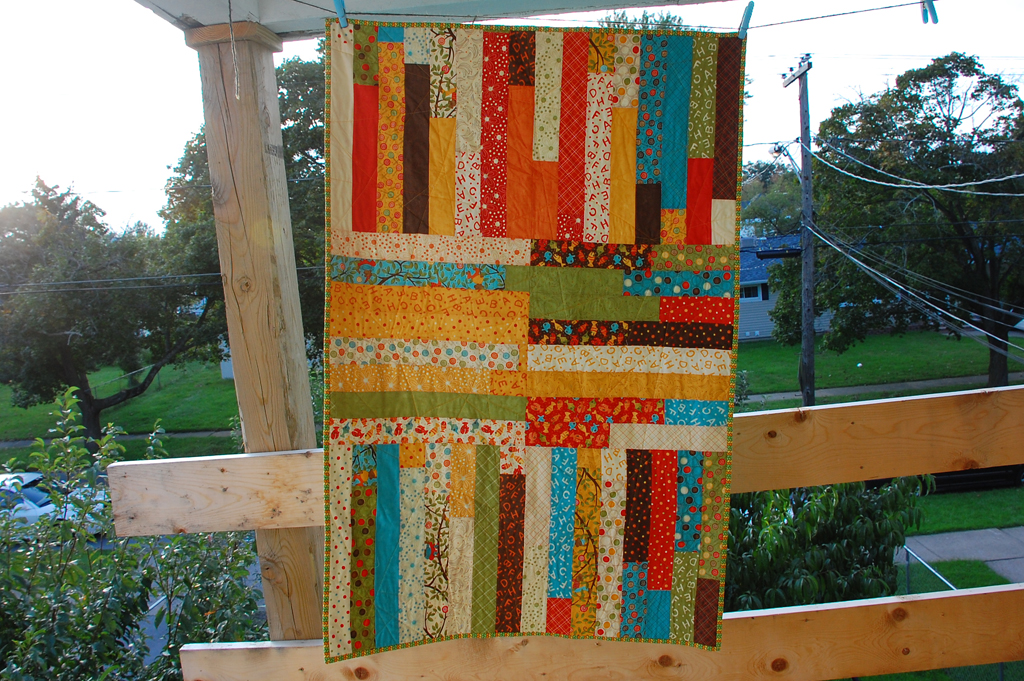
Three years ago, I pieced the Lollipop Baby Quilt quilt improvisationally, initially aiming at creating a straight-forward Jelly Roll Race quilt (albeit with a strange non-standard roll of half-strips). Halfway through, I paused to do a few quick math calculations and chose to piece it in four sections.

Supplies for the Quilt Top
20 2.5″ x width of fabric strips
Assumptions
- All of your strips are between 40-44″ long, with the selvages removed.
- You’re piecing straight across the strips, not diagonally as in some Jelly Roll Race quilts.
- If you want to piece the strips diagonally, you’ll need three (3) extra strips, 23 total.
- You’re sewing the strips together with an exact 1/4″ seam allowance.
Jelly Roll Race quilt measurements are inexact by nature—the whole point is to just sew everything together and square it up at the end, if needed. Piecing blocks is largely the opposite—you need relatively precise measurements so that everything joins up correctly. To mesh the two, you need to be willing to deal with both.
The (Mostly) Inexact Parts
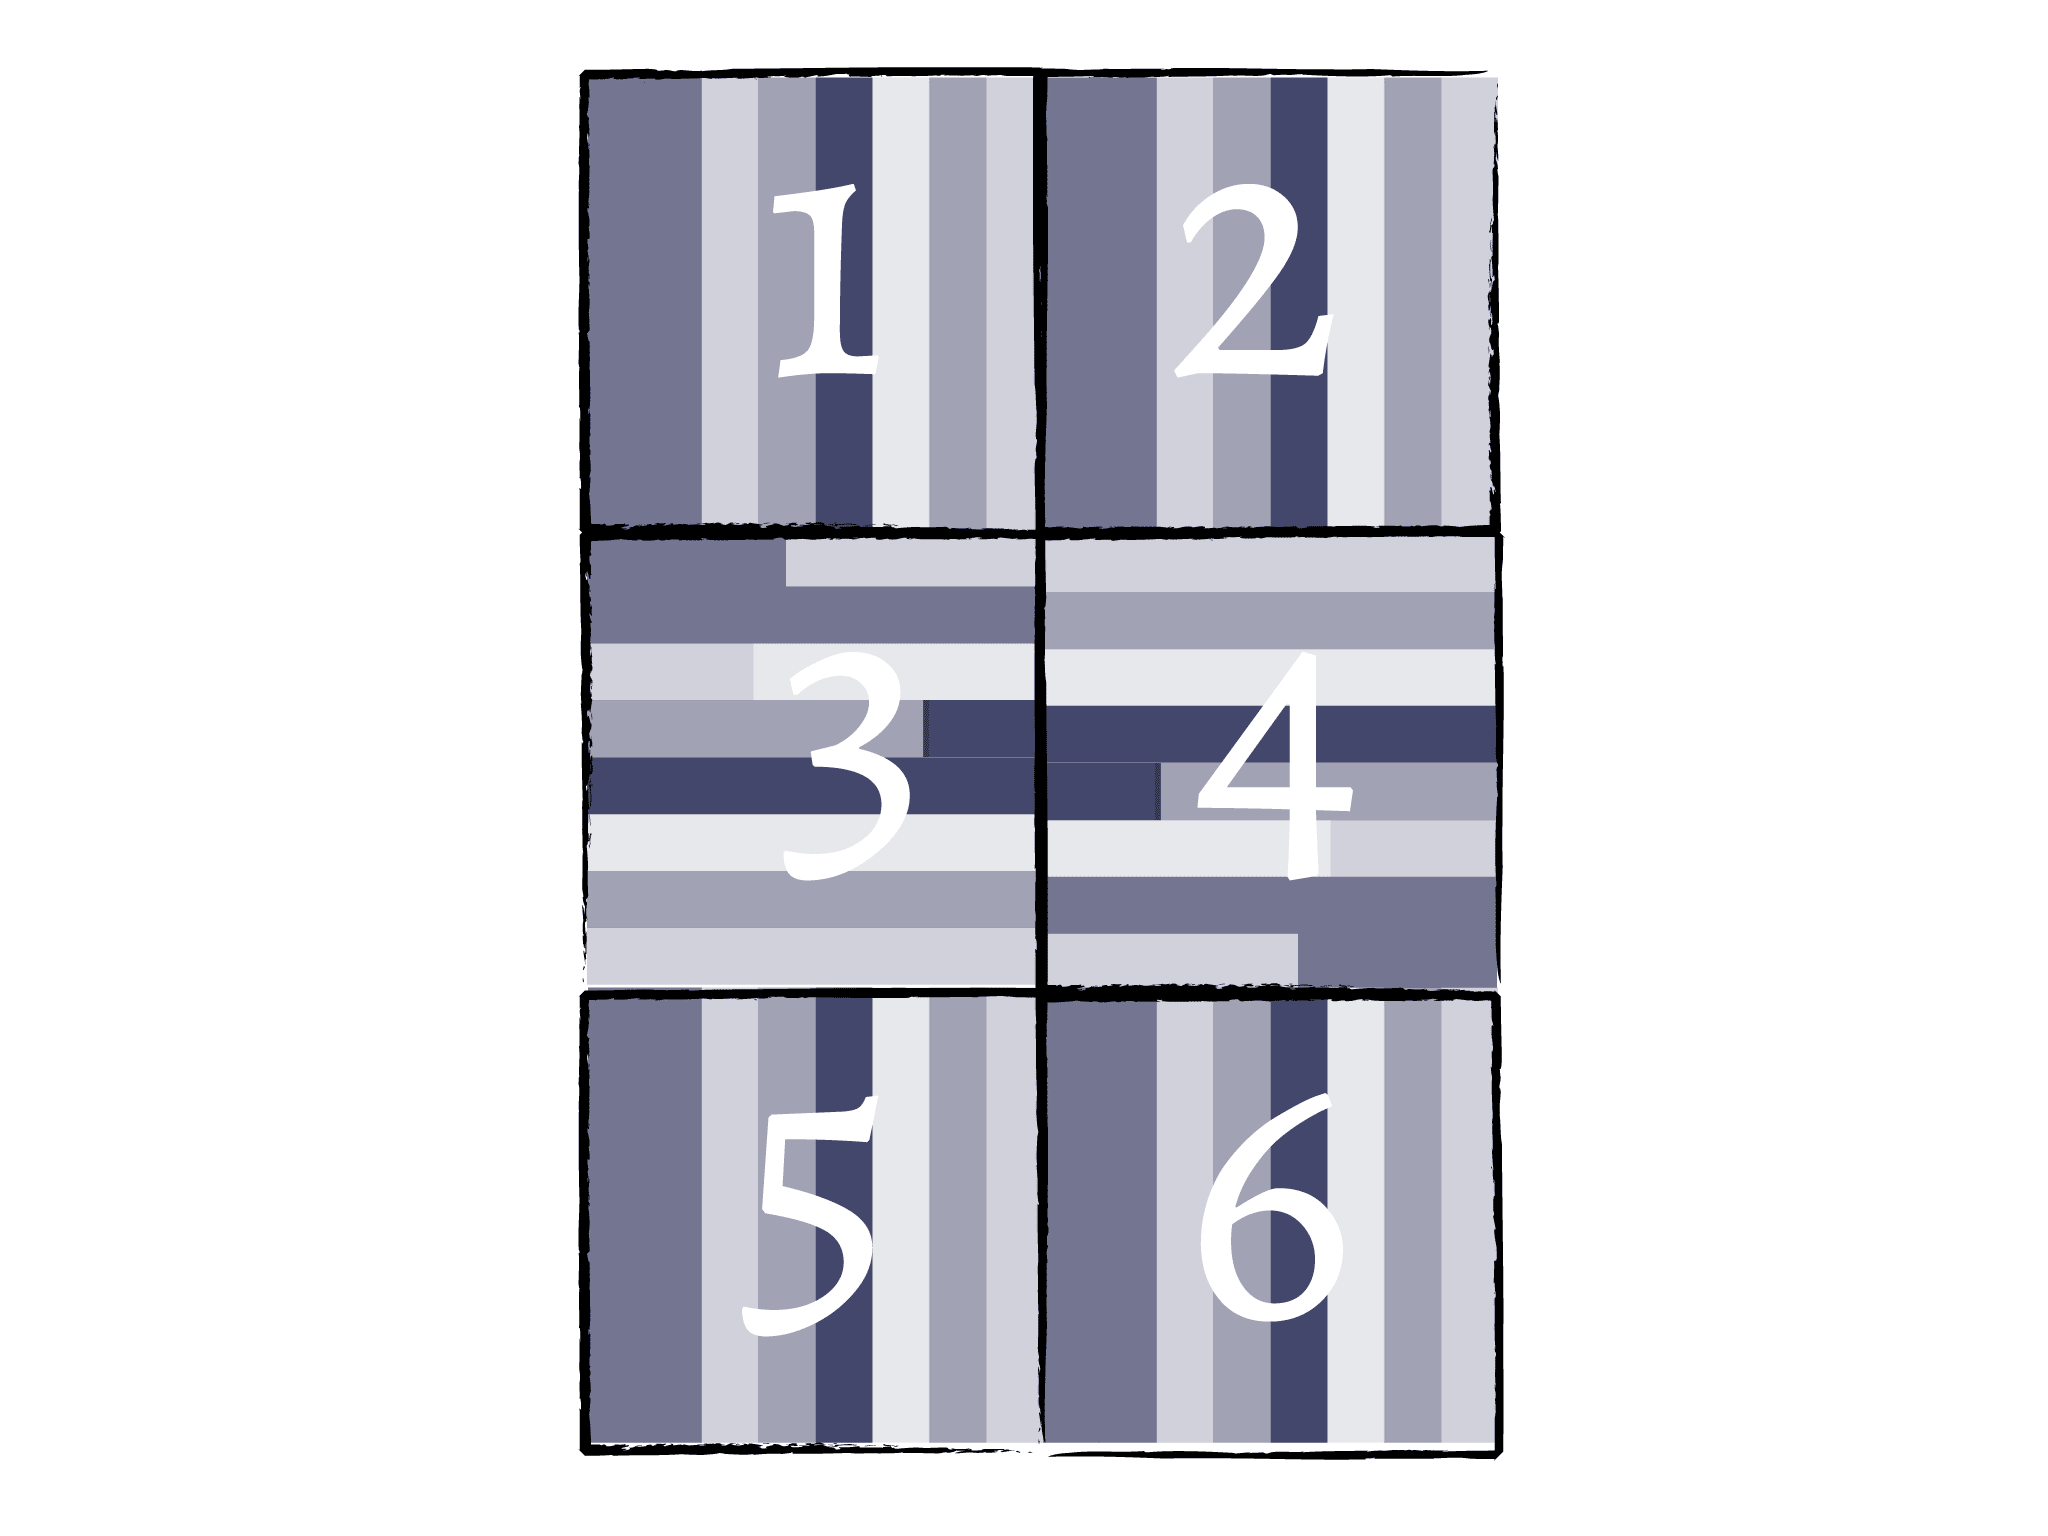
This is just basic Jelly Roll Race quilt making, but you stop mid-way through.
Sew all 20 strips together, end to end. You should have a strip that is at least 800″ long. If it is shorter, you need to add one more strip. If it is longer, that’s great. Most of the time, it should end up around 820″ long at this point.

Cut exactly in half, then sew the two strips together along the long side. Now, you should have something that is 4.5″ x 400″ or longer. Square up the ragged end if needed, but try to not cut off too much.

Cut in half, sew along the long side, result should be 8.5″ x 200″ or longer (4 strips tall). Square ends if needed.

Once more. Cut in half, sew, result should be 16.5″ x 100″ or longer (8 strips tall). Square ends if needed.

Now stop.
The (Mostly) Precise Parts
The finished quilt is just 6 squares cut from your strip set.
Cut six 16.5″ blocks off (you should have a few inches leftover—discard it, use it on the back, or in a different project), then sew the blocks together in three rows, where rows one and three have stripes vertically, row two has them horizontally.
You now have a completed quilt top.
Other Options
A whole standard jelly roll can make a 48″x64″ quilt. You’ll use 40 strips. You’ll start with a pieced strip 1600″ or more long. Your finished strip set will still be 8 strips tall (16.5″), but 200″ or longer, and you’ll cut 12 squares. Just remember, not all rolls have the same number of strips, and you’ll need more strips than a standard jelly roll if you piece diagonally (46 strips total).

Rather than cut six blocks, you can cut two off of your strip set for the middle row, then sew the remaining length into a 16-strip-wide strip set and cut that in half for rows 1 and 3—this is a little less exact, but will let you use up the full length rather than discarding the remaining few inches leftover after cutting blocks. Doing it that way likely accounts for the longer length of my quilt.
Good luck with your own quilt-making!
Caveat: I donated the quilt to the Linus Project a few months after finishing it in 2011, so I’m working partially from memory/partially by working out the math and logic again in 2014. The latter has some contradictions to the original post, such as the finished size. I claimed that the original quilt is ~36″ × 51″, but my current math concludes that it should be 32″ × 48″. My best explanation is that I must have (really) sloppily measured the unwashed, finished quilt and rounded up. I feel confident that the new measurements are correct (plus or minus an inch or two to account for piecing/cutting/shrinking deviations).