Raevenfea

Maker of various fabric things

This is a static export of a blog I put on ice many years ago, that still has personally relevant content. No promises can be made around linkrot, styles, or working functionality.

Posts tagged: Fabric: Essex Linen

A Yarn-Dyed Bionic Gear Bag

Bionic Gear Bag and what can fit in

Posted in Crafting

  • Bag
  • Fabric: Essex Linen
  • Fabric: Essex Yarn Dyed
  • From a published pattern
  • Notions

A few years ago, two sewing kit bag patterns were making the rounds online—the Bionic Gear Bag and the Sew Together Bag. While I wanted to make one (either one), I never managed to prioritize it amongst other projects. Events this year have sparked that desire again, and when I found myself tossing all of my tools and notions into a cardboard box to tote down to GA, making one quickly jumped toward the top of my project list.

Bionic Gear Bag loaded and ready to travel

First, a confession: I hate buying patterns for quilts and bags. If I’m going to pay for something, I want to learn something, and so many patterns don’t introduce any new ideas or skills. In other words, I can do addition and geometry; teach me the out-of-the-box, or simpler, or more couture, or more resilient way of making the thing. If not for the fact that I’ve never made a bag with interior divider pocket/zips like this, I would never have used this pattern. It was so chatty, unpolished, poorly photographed, and needlessly long. So, caveat emptor if, like me, you’re a bit behind the bandwagon on this.

Bionic Gear Bag detail

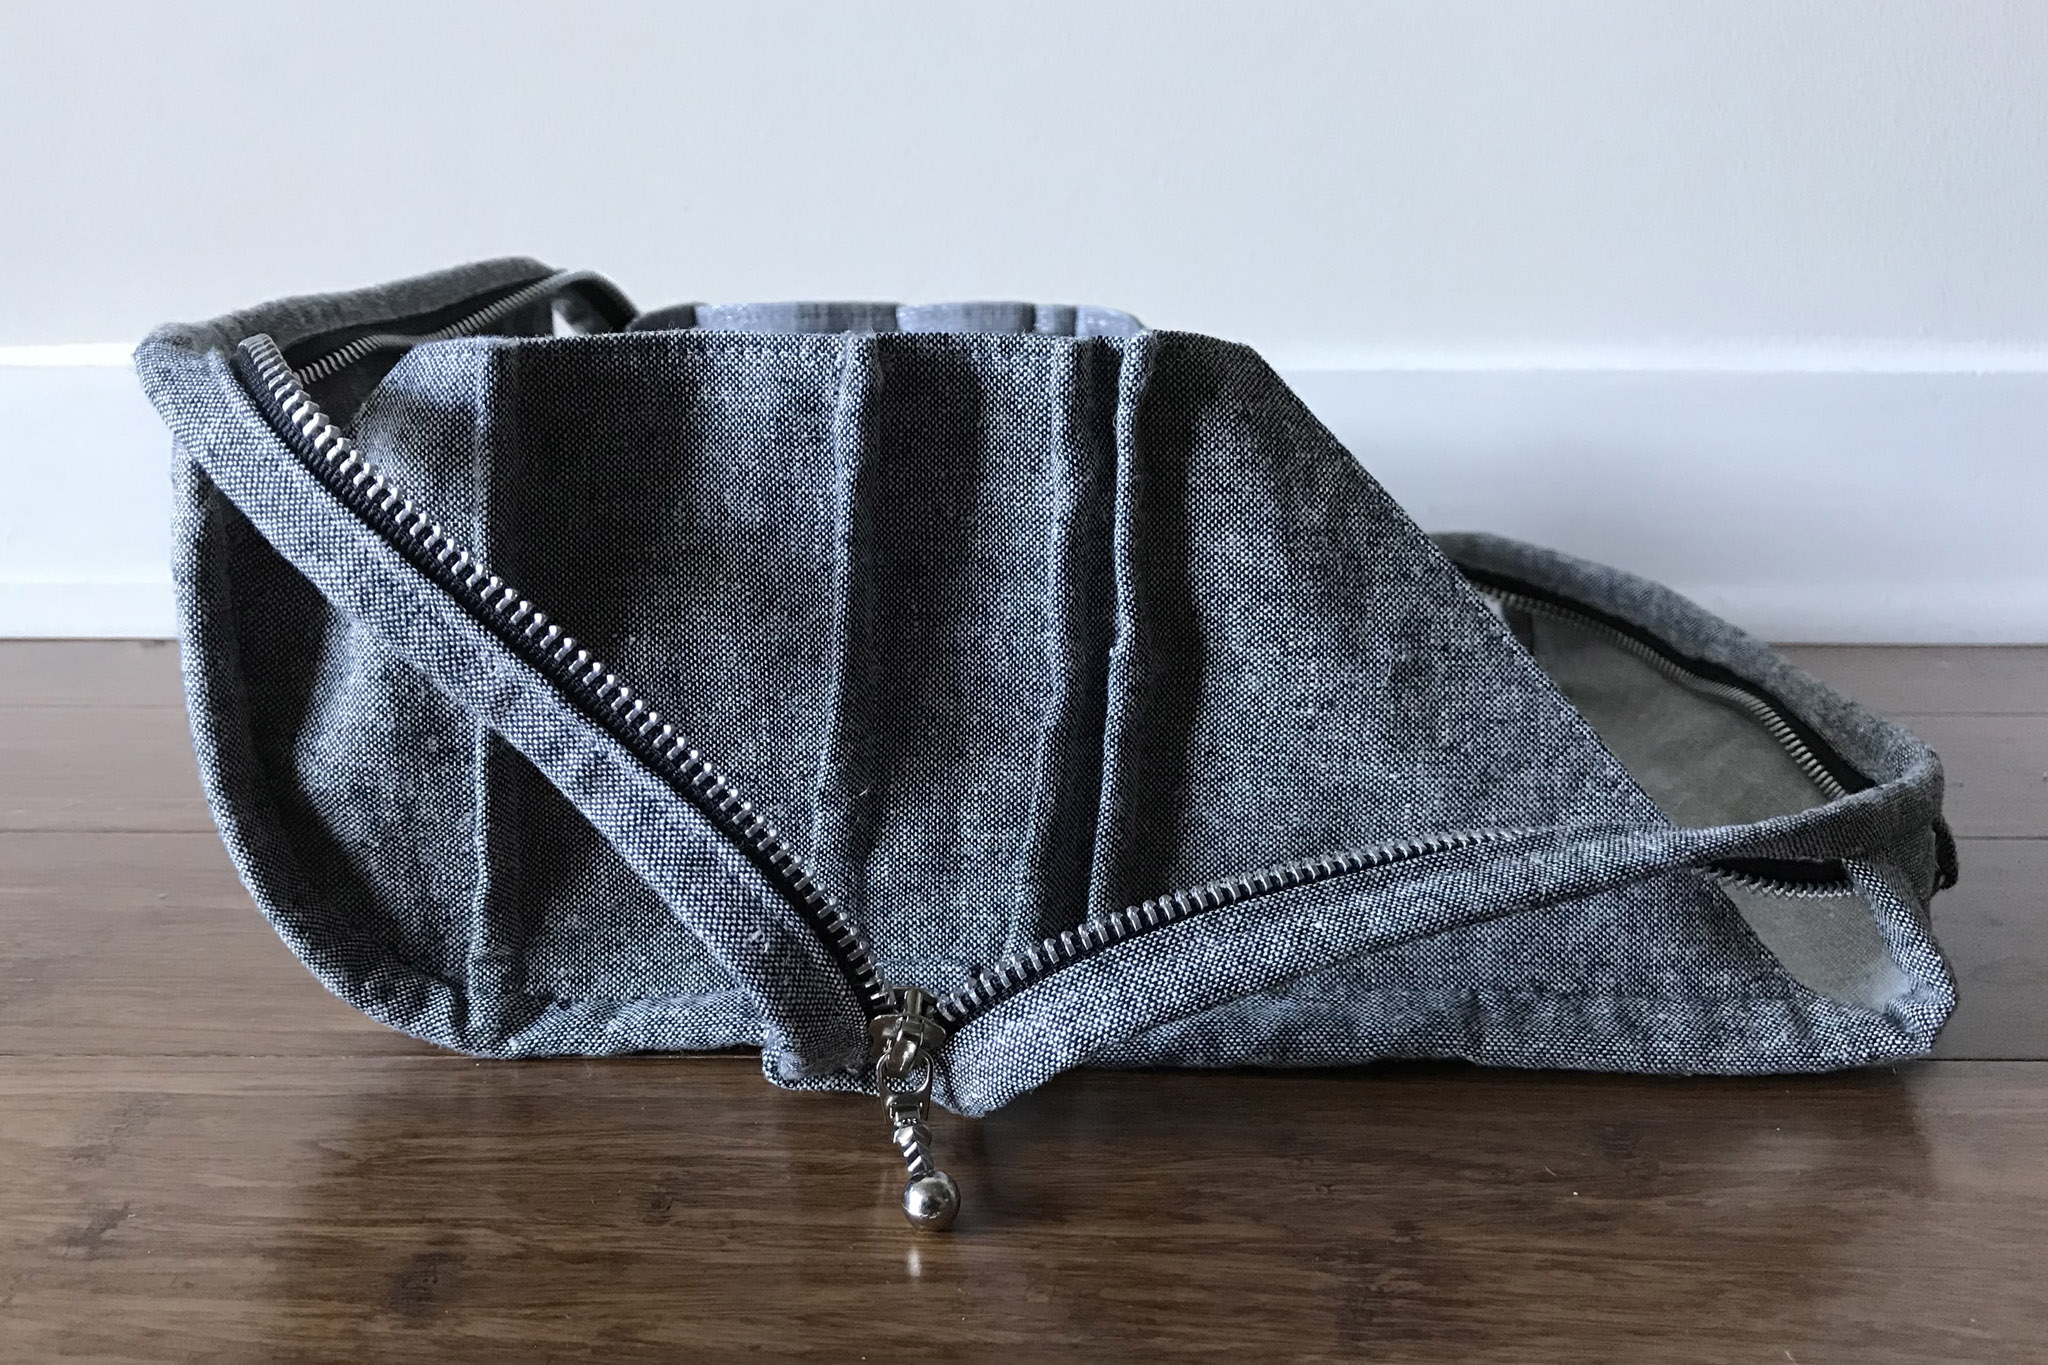
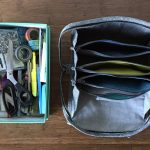
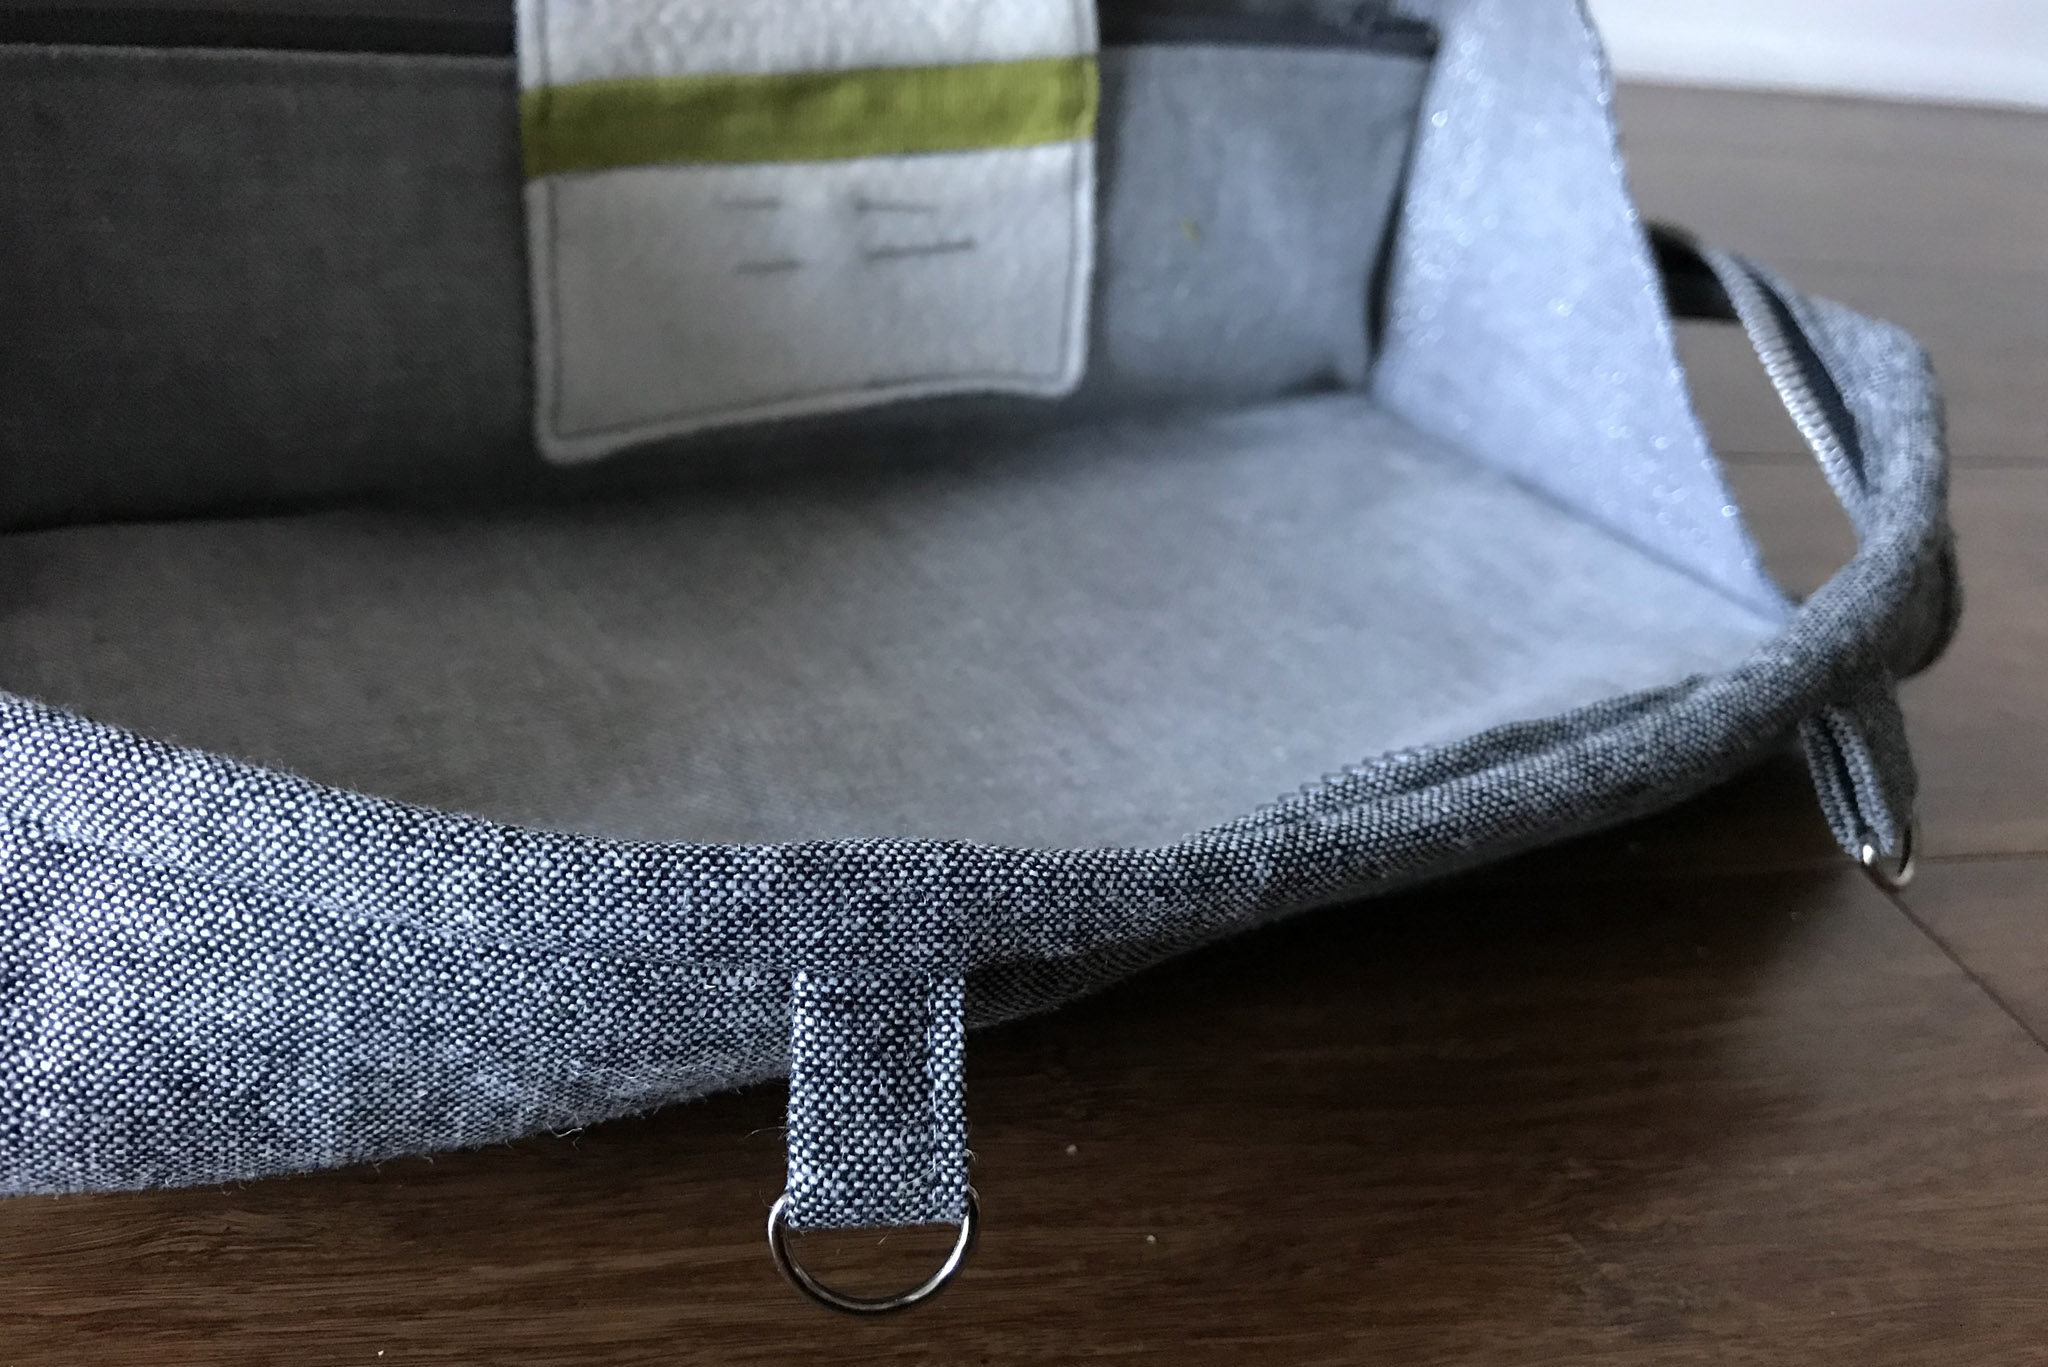
I chose the Bionic Gear Bag over the other for two reasons. First, I was able to see the product in person; three fellow guild members brought theirs to our spring retreat. Second, I like that the front becomes a tray when open, which gave me a place to modify the pattern with d-rings to hook a thread catcher bag onto (another long-term non-prioritized want). I don’t have any criticisms of the final product the pattern produces, just the pattern itself.

Bionic Gear Bag and what can fit in

I did very little in the way of modifications. I chose to leave off the snaps and not make the fabric dish (another 36 pages of instructions!). I added a needle minder to the front pocket (made from a couple of batting scraps and fabric). And I added the aforementioned d-rings to the binding that becomes the front of the tray, so that I can attach a small Open Wide Pouch (modified with swivel hooks attached and a cutting error that makes it deeper than it should be) that acts as a thread/scrap catcher.

Bionic Gear Bag detail

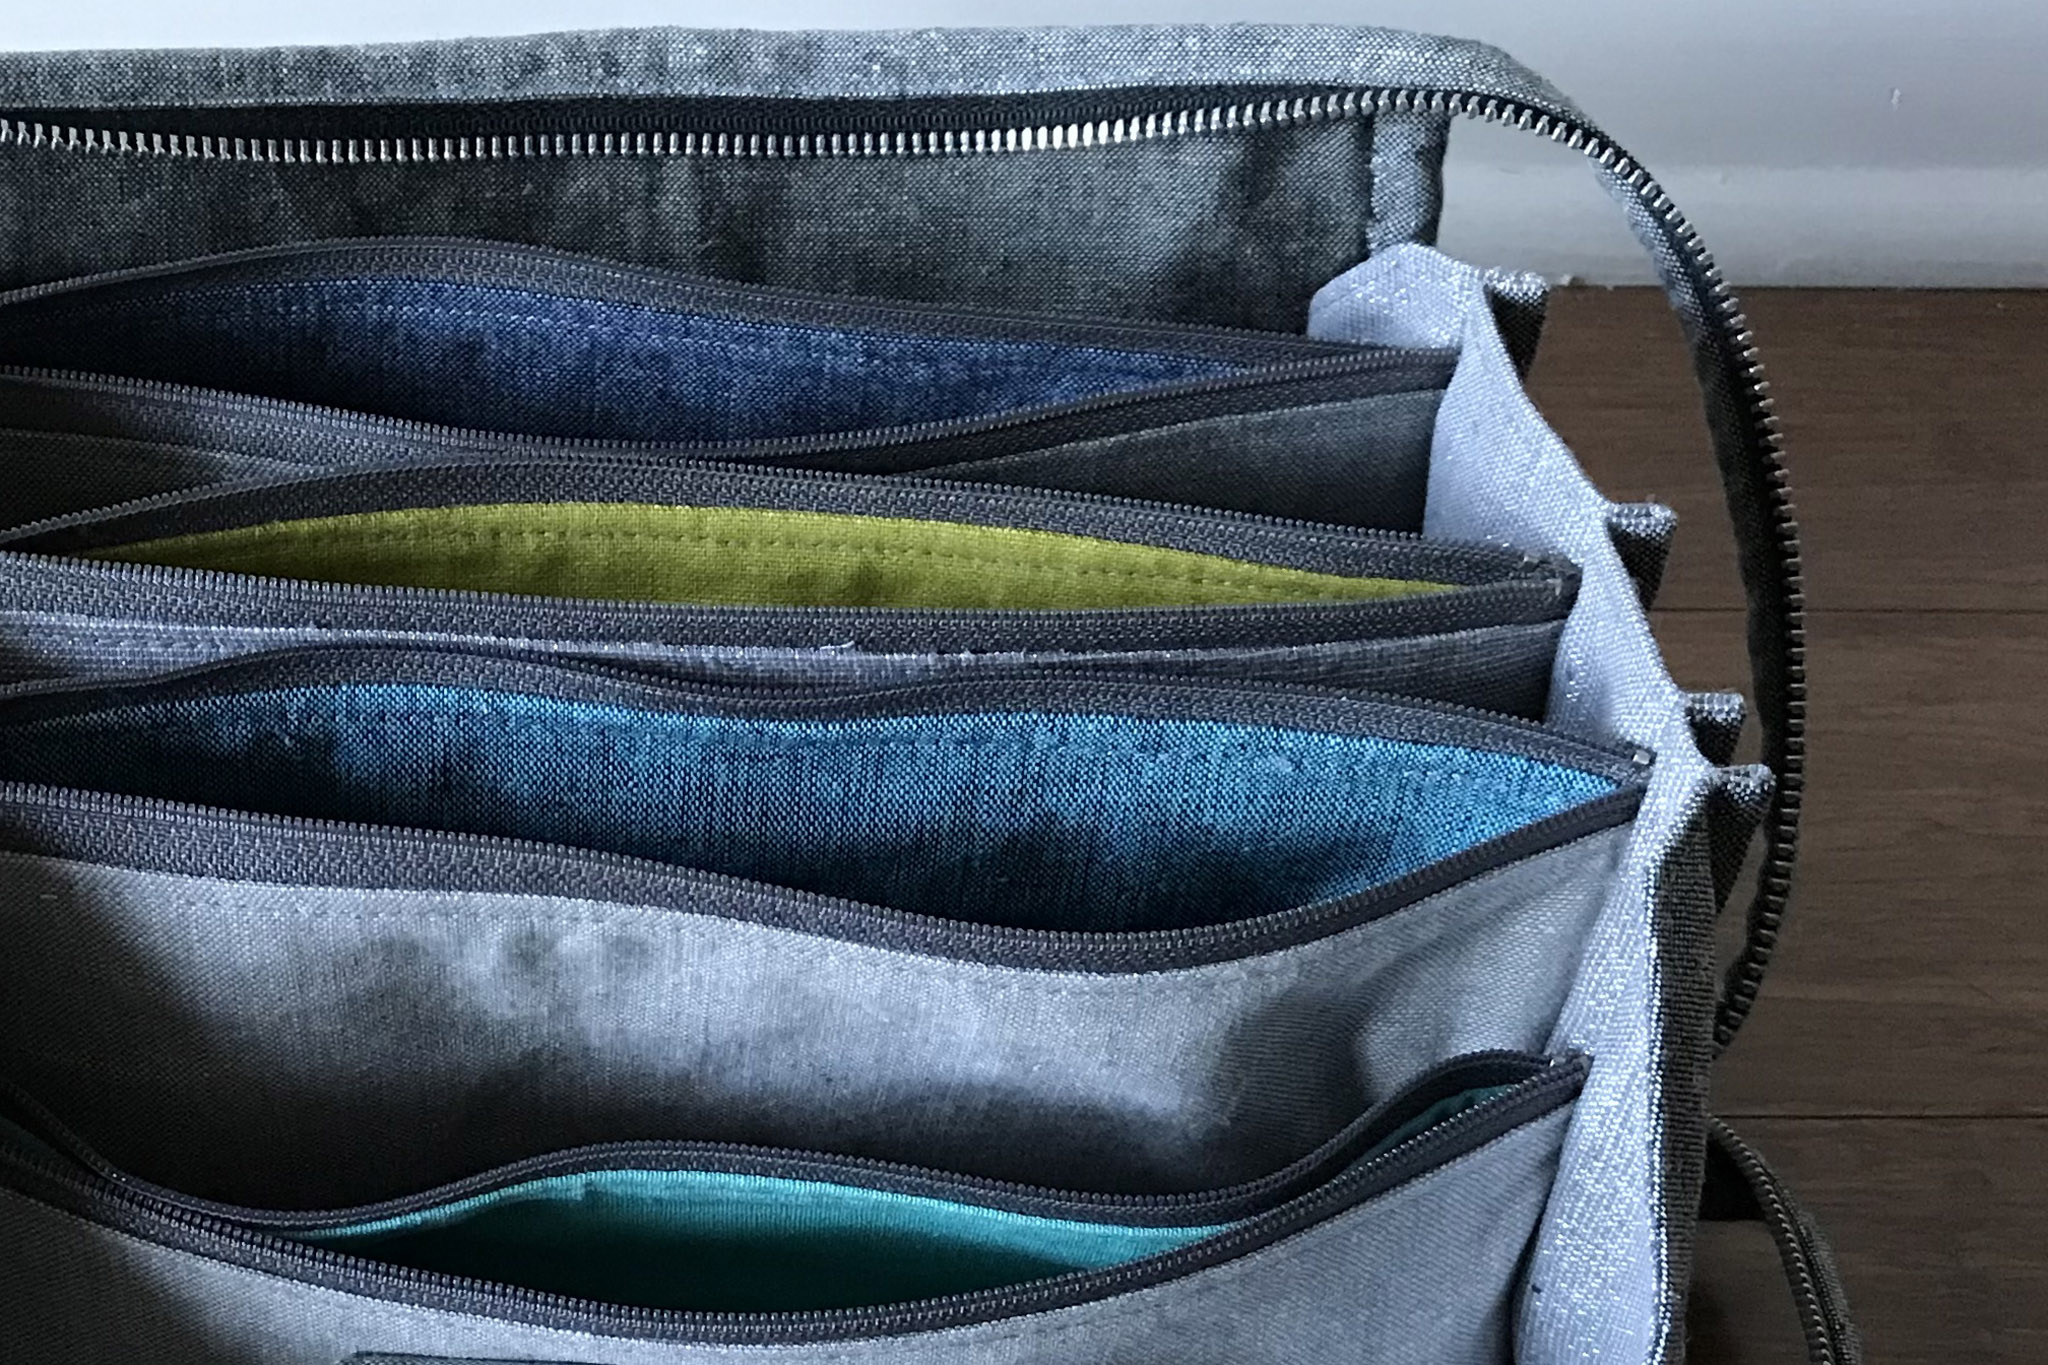
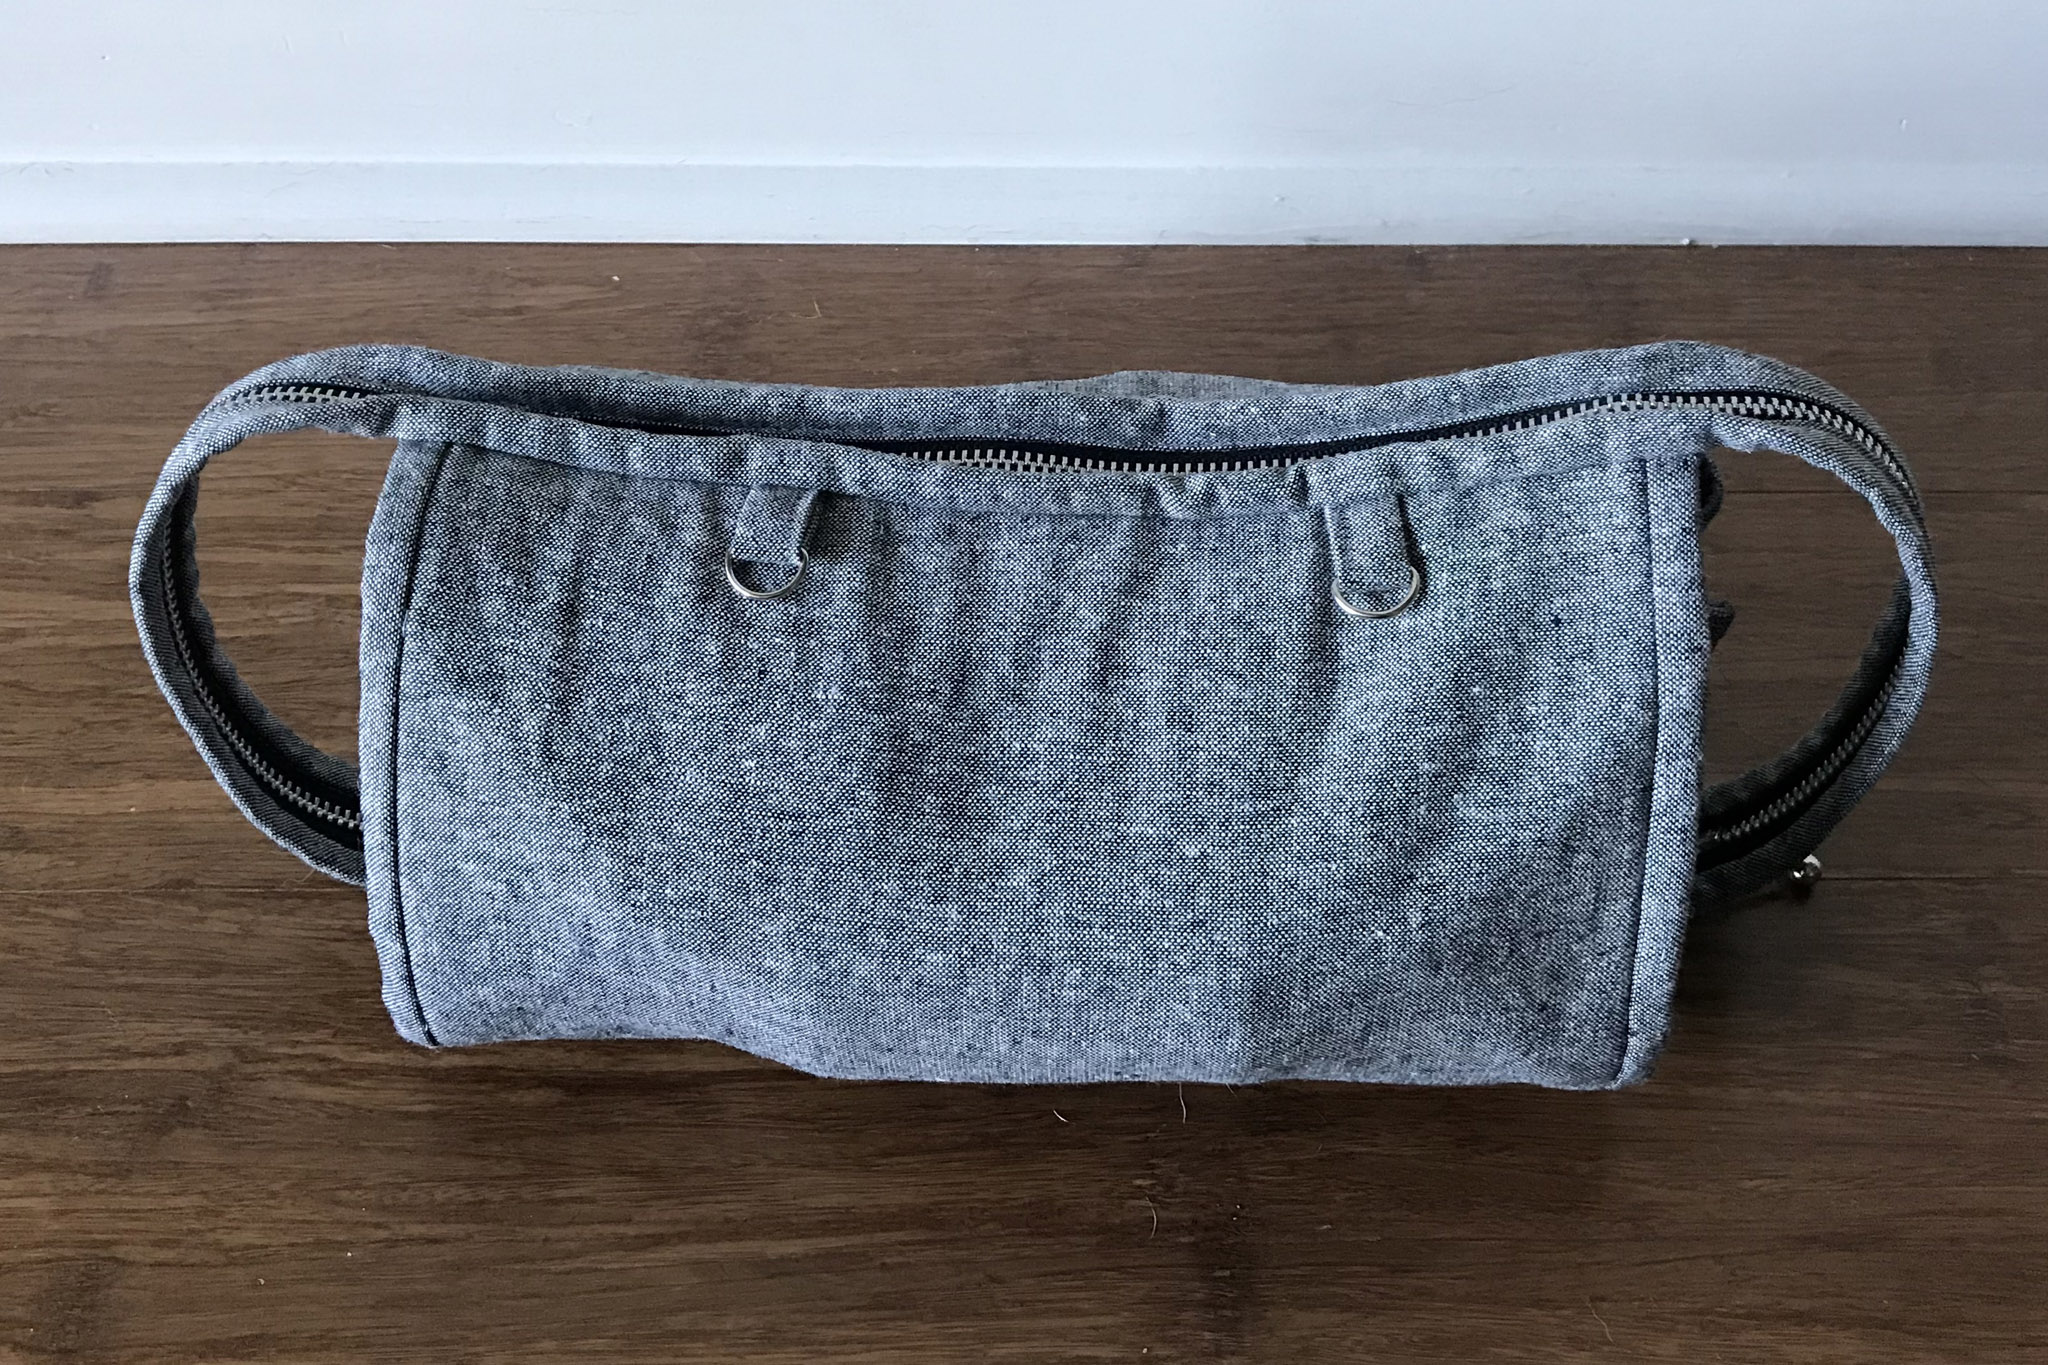
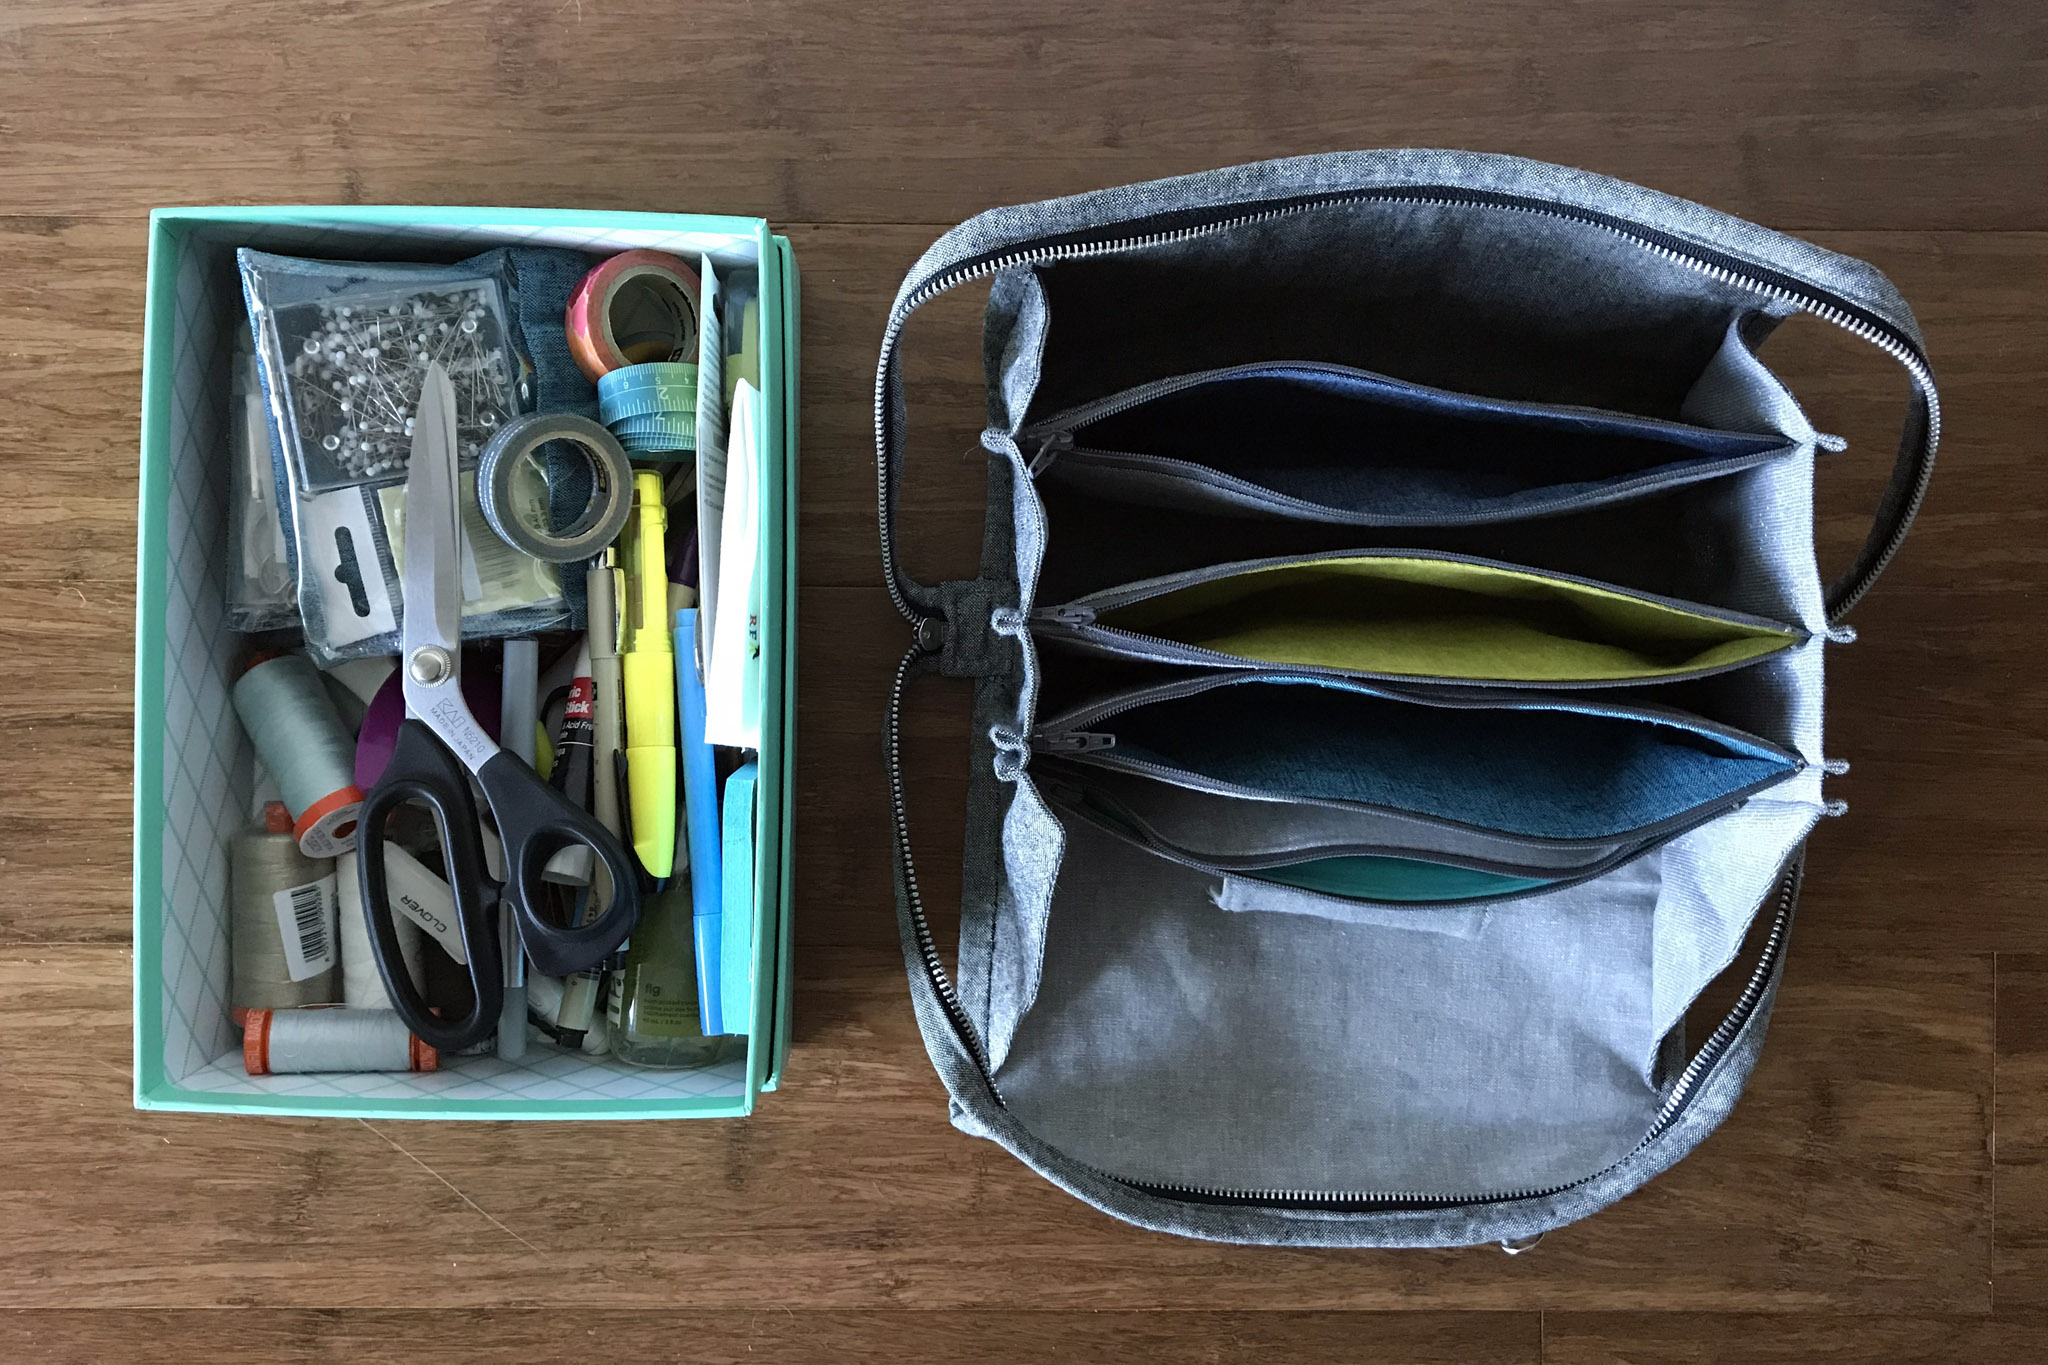
I also went pretty basic with fabric on this; there is no fussy cutting, printed patterns, or decoration to be found. All of the fabrics are Essex Linen Blends, mostly yarn dyed. The interior is made of shades of gray; the zippered pouch interiors are the only pops of (solid) color. I did order a slightly fancy metal zipper for the exterior with an interesting zipper pull. I love the overall minimalism of the bag and am looking forward to making a machine cover in the same fabrics.

Bionic Gear Bag loaded and ready to work

I can’t wait to travel with this. I’m signed up for a couple of classes locally and am heading back to VT for a few days later this month, conveniently at the same time as one of my guilds’ fall retreats, so I have ample occasions to use it. And it certainly fits a ton of stuff. Almost everything I stuffed into this box when traveling to GA fit into the bag (or, in the case of zippers, became part of the bag)!

Bionic Gear Bag detail

September 15th, 2018

Tea in the Park

Posted in Crafting

  • Bags
  • Fabric Designer: Elizabeth Olwen
  • Fabric: Essex Linen
  • Fabric: Kaffe Fasset Collective Shot Cotton
  • Fabric: Park Life
  • Gifts
  • Home decor
  • Machine embroidery

I bought far more fabric than I needed to make the bridal shower tea party bunting (half yard cuts of six prints, a yard of another), so the obvious thing to do was to use some as part of a shower gift for the bride and groom. I ended up with a suite of gifts perfect for a picnic at the park.

Tea in the Park Gift Set

Napkins

I made a pair of basic mitered-corner napkins using a half yard of fabric. They finished at 17″ square. There are many good mitered corner napkin tutorials online if you need one. I used this one from Purl Soho as a refresher for the corners because I can never recall how to do it properly. Here’s another one from Craftsy if you don’t want to be sold hard on buying more fabric.

Tea in the Park Gift Set

Roll-up Placemats

When I cut out bunting pieces, I ended up with extra triangles and end pieces since I simply sliced up a 9″ strip of each fabric. I wanted to use up those pieces in any piecing, so started putting together the placemat design with improvisational piecing taking cues from the triangles. I paired the Park Life prints with Kaffe Fasset Shot Cotton in Latte from my stash—slightly different than the solid gray I used in the bunting, but a better match for the colors in Park Life—it’s a slightly taupe-ish gray.

Tea in the Park Gift Set

The back is pieced from more triangles and a strip of the gray. After piecing, I inserted a strip between one piecing seam and the binding that acts as a napkin ring on the front. I quilted them in 1/4″ lines with a gray-taupe Aurifil, then bound them in the gray with one small scrap of print to give a bit of visual weight to the right side.

Tea in the Park Gift Set

Because the intent was that these are portable for a picnic, I tried to figure out a way to secure them while rolled up for easy transportation. Going back to the pile of leftover triangles, I made a pennant, slid it into the binding, and used a bit of Velcro to allow it to fasten flat to the back, or to itself if you roll up the placemat. It turned out to be my favorite feature.

Tea in the Park Bag

Tote Bag

What good are traveling placemats and napkins if you’ve nothing to carry them in? Using the Art Student Tote as a general design guide, I pulled together a bag made of dark gray Essex Linen, straps in a Park Life print, and a machine embroidered pocket using a coordinating solid from my stash and one of the tea embroideries from the bunting.

Tea in the Park Bag detail

The bag is 13″x18″x4″—a hybrid of the two Art Student Tote sizes. I only added one pocket to the front, no closures, and no interior dividers/pockets. Since I lined it in the exterior linen, I modified the construction a little bit and added a flange for a pop of color around the top of the interior. Having learned from using my own Art Student Tote, I made sure to use a woven interfacing for the straps—mine are starting to stretch out and warp due to the medium-weight non-woven—and cut an extra strip to get the full suggested 128″ instead of the approximate three widths of fabric—mine are a smidgen short when the bag is loaded up. I also modified the strap construction to use two different fabrics (one on each side), as I didn’t have enough of any one fabric.

The Whole Package

To round out the picnic theme, I added a few store-bought gifts as well.

Tea in the Park Gift Set

It was a dreary, rainy day when I tried to take photos before shipping it off. I hope the couple has many sunny days in their future.

Even with this whole package, I still have a quarter yard of five of the prints—and a few more triangles—but for now I’ll retire that to the depths of my stash and move on to some other things!

June 30th, 2016

The Sum of Scraps

Posted in Quilting

  • Fabric Designer: Melody Miller
  • Fabric Designer: Rashida Coleman-Hale
  • Fabric: Essex Linen
  • Quick project
  • Scrap projects
  • Wall hangings

When I make baby quilts, I typically whip up a doll quilt with the leftovers—a winning solution that adds another gift for the kid and eats up scraps. Mustang Summing isn’t a baby quilt, per se (or maybe it will be whenever I give it away), but I needed something that could be bound with facing for a quilt guild demo I gave in November, so I played with scraps and made a doll-quilt-sized wall hanging.

The Sum of Scraps wall hanging
“The Sum of Scraps” wall hanging, Rachael Arnold, November 2014, 12.5″x19″.

The top is just a couple hours of playing around, growing it out from the center of the log cabin block, sewing things together that seemed to work. Cut, sew, press, trim, cut, sew and on and on.

The Sum of Scraps wall hanging (detail)
“The Sum of Scraps” wall hanging (detail), Rachael Arnold, November 2014, 12.5″x19″.

I went simple with quilting, stitching out a square spiral in a gray thread that blends well with just about anything. In a few places, I added highlights using the heavier russet thread I used on Mustang Summing.

The Sum of Scraps wall hanging (back)
“The Sum of Scraps” wall hanging (back), Rachael Arnold, November 2014, 12.5″x19″.

Since it’s a wall hanging, I just used a solid from the stash on the back and finished it with facings using binding strips that were leftover from the other quilt.

This is the first time I’ve used this type of binding, but it seems to work well for this sort of application. I especially like that the top can double as a hanging sleeve. For shows, I imagine you’d have to increase the size of the facing piece to create a standard 4″ sleeve, but I wasn’t too concerned about that for something at home.

The Sum of Scraps wall hanging (detail)
“The Sum of Scraps” wall hanging (detail), Rachael Arnold, November 2014, 12.5″x19″.

It took me three months to sit down and take 30 minutes to sew the facings down by hand (and another two weeks to photograph it), and I still haven’t figured out where to hang it (not to mention that I need a better hanger)!

If you’re looking to learn this technique, I cobbled together my method from memories of various things I’ve read, so I can’t direct you to a specific tutorial for exactly how I made this (should have taken photos and made my own, huh?). Here’s one that seems similar: Super-Duper Easy Way to Face a Quilt (but doesn’t include the hanging sleeve). I know I read about turning the top into a hanging sleeve somewhere, but can’t find the article or blog post. Sorry!

What’s your favorite wall hanging finish?

February 23rd, 2015

Mustang Summing

Posted in Quilting

  • Fabric Designer: Melody Miller
  • Fabric Designer: Rashida Coleman-Hale
  • Fabric: Essex Linen
  • Fabric: Linen
  • Finished projects
  • Q014BI

Two things burrowed their way into my subconscious during six months of not quilting this year: all the plus quilts floating around blogland / Pinterest and the new kids on the fabric block, Cotton+Steel. It shouldn’t surprise me that I brought home a fat quarter pack from the local quilt shop comprising prints from Cotton+Steel (and coordinating solids, a coordinating Cloud9 print), nor that my brain immediately thought “plus quilt”! Add in a yard of Olive Essex Yarn Dyed linen/cotton blend, et voilà: Mustang Summing.

Mustang Summing
“Mustang Summing”, Rachael Arnold, October 2014, 48″x56″. Photo by Carl Pfranger.

I sketched out the layout in Illustrator, aiming for something in the 50″ range on each side, moving things around until I was happy. The arrangement that looked right used 4.5″ unfinished squares, making the quilt 48″x56″. In hindsight, I could have used 5″ squares with the fabric I had, but I have a serious problem about miscalculating the number of squares from fat quarters.

Mustang Summing front
“Mustang Summing”, Rachael Arnold, October 2014, 48″x56″. Photo by Carl Pfranger.

In software engineering, we say that good programmers are lazy programmers—good code doesn’t have tedious, repetitive sections because we generalize things to save typing, and automate anything we can. In quilting, I often think the adage is inverse—a good quilter is masochistic and likes using as many small pieces as possible in repetitive ways. More often than not, the engineer in me wins out. I used two 4.5″ squares and a 12.5″ rectangle for each plus rather than make them entirely from squares (except for the three that I cut wrong, which are five squares). Less cutting and less seaming makes piecing more efficient. If only I could automate the cutting with technology I have at home.

Mustang Summing
“Mustang Summing” (detail), Rachael Arnold, October 2014, 48″x56″. Photo by Carl Pfranger. You can see my cutting mistake in the navy/aqua plus.

I love the warm brown/olive tone in the Essex Yarn Dyed (and how it blends into a warm gray from a distance), and let that guide my choice of quilting threads—a heavyweight russet Gutermann poly thread. I kept the quilting simple, echoing the seams, with Nature’s Touch White batting in the middle.

Mustang Summing back
“Mustang Summing” (back), Rachael Arnold, October 2014, 48″x56″. Photo by Carl Pfranger.

It took a while to solve the problem of backing and binding. The first backing yardage I purchased was too cool, the scraps from the top too few, and nothing in my stash inspired me. I finally settled on another yard dyed linen, mixed with a column of strips leftover from the top. I settled on a plain blue solid (Kona Nightfall) from the stash to bind it.

Mustang Summing label
“Mustang Summing” (back detail), Rachael Arnold, October 2014, 48″x56″. Photo by Carl Pfranger.

With this finish, I’ve completed more quilts this year than I did in 2013, despite not quilting for six months. Things go so much more quickly when I actually complete everything I start! As of now, the only unfinished project I’ve started this year is a corset that I spent a few hours on back in May. Not too shabby.

“Mustang Sally” was stuck in my head the entire time I worked on this quilt. Thus the name, if you can make the same mental leap I seemed to do.

November 9th, 2014

Stars for Lennon

Posted in Quilting

  • Baby quilts
  • Fabric Designer: Heather Ross
  • Fabric: Essex Linen
  • Fabric: Nursery Versery
  • Q014BE
  • Stars for Lennon

My very oldest (and dear) friend’s three-year-old son is my most dedicated fan (of the quilts, at least). I’ve mentioned the love he’s given the quilt I made for his birth quite a few times on here. While his newborn sister can’t bear the distinction of receiving the first quilt I ever made, I wanted it to be special too—so, she’s receiving the first quilt I’ve made with Kokka fabric. Okay, maybe that doesn’t sound special to you, but I’ve lusted after many Kokka fabrics and this quilt finally convinced me to buy some.

Stars for Lennon front
“Stars for Lennon”, Rachael Arnold, March/April 2014, 48″x48″. Photo by Carl Pfranger.

It all started with an FQ of Nursery Versery, but in the final top there’s only one print from that set (the patchwork print). The back is pieced, and includes a big chunk of the mouse print from that line. The stuffed giraffe and doll quilt that I gifted at her shower were also made with those prints.

Stars for Lennon quilt back
“Stars for Lennon” (back), Rachael Arnold, March/April 2014, 48″x48″. Please forgive the half-basted binding.

When I was shopping around (there are two shops around here that carried the line!), I fell in love with the design of a print in Comma that was conveniently placed next to Nursery Versery on the shelf.

lennon-comma-inspiration

However, I couldn’t figure out how to turn that layout into a quilt top using the prints I’d purchased in the Kokka FQ. So, I pulled more prints from the shop in a complementary color scheme. Those ended up comprising the top of the quilt, paired with Essex Linen.

Stars for Lennon front
“Stars for Lennon”, Rachael Arnold, March/April 2014, 48″x48″. Photo by Carl Pfranger.

I drew up the 12″ block in Illustrator, then printed it and created templates. Another first: I’ve never made a whole quilt top that required templates to piece the blocks. My technique leaves much to be desired—there are more lost points than there are good ones and the whole top was a little wobbly before quilting. But, I’m happy with the final outcome even if it has flaws.

Stars for Lennon label
“Stars for Lennon” (label), Rachael Arnold, March/April 2014, 48″x48″. Photo by Carl Pfranger.

I planned to do an all-over swirl like I did on the coordinating doll quilt, but had to work around a broken FMQ foot. Limited to my walking foot and a floating embroidery foot (which worked better than expected), I let the quilt talk to me and it turned out even better than I expected. Pellon Nature’s Touch batting gives it a good weight and drape.

Stars for Lennon quilting detail
“Stars for Lennon” (quilting detail), Rachael Arnold, March/April 2014, 48″x48″. Photo by Carl Pfranger.

The 48″ square quilt is bound in a Denyse Schmidt print and topped off with a label. I hope she loves it as much as her brother loves his.

lennon-quilt-detail-cover
“Stars for Lennon” (detail), Rachael Arnold, March/April 2014, 48″x48″.

If she doesn’t love it (and if her brother doesn’t steal it), Moof is always willing to take it back.

lennon-moof-approval

April 30th, 2014


© 2008–2025 Raevenfea