Raevenfea

Maker of various fabric things

This is a static export of a blog I put on ice many years ago, that still has personally relevant content. No promises can be made around linkrot, styles, or working functionality.

Posts tagged: Home decor

Tea in the Park

Posted in Crafting

  • Bags
  • Fabric Designer: Elizabeth Olwen
  • Fabric: Essex Linen
  • Fabric: Kaffe Fasset Collective Shot Cotton
  • Fabric: Park Life
  • Gifts
  • Home decor
  • Machine embroidery

I bought far more fabric than I needed to make the bridal shower tea party bunting (half yard cuts of six prints, a yard of another), so the obvious thing to do was to use some as part of a shower gift for the bride and groom. I ended up with a suite of gifts perfect for a picnic at the park.
Tea in the Park Gift Set

Napkins

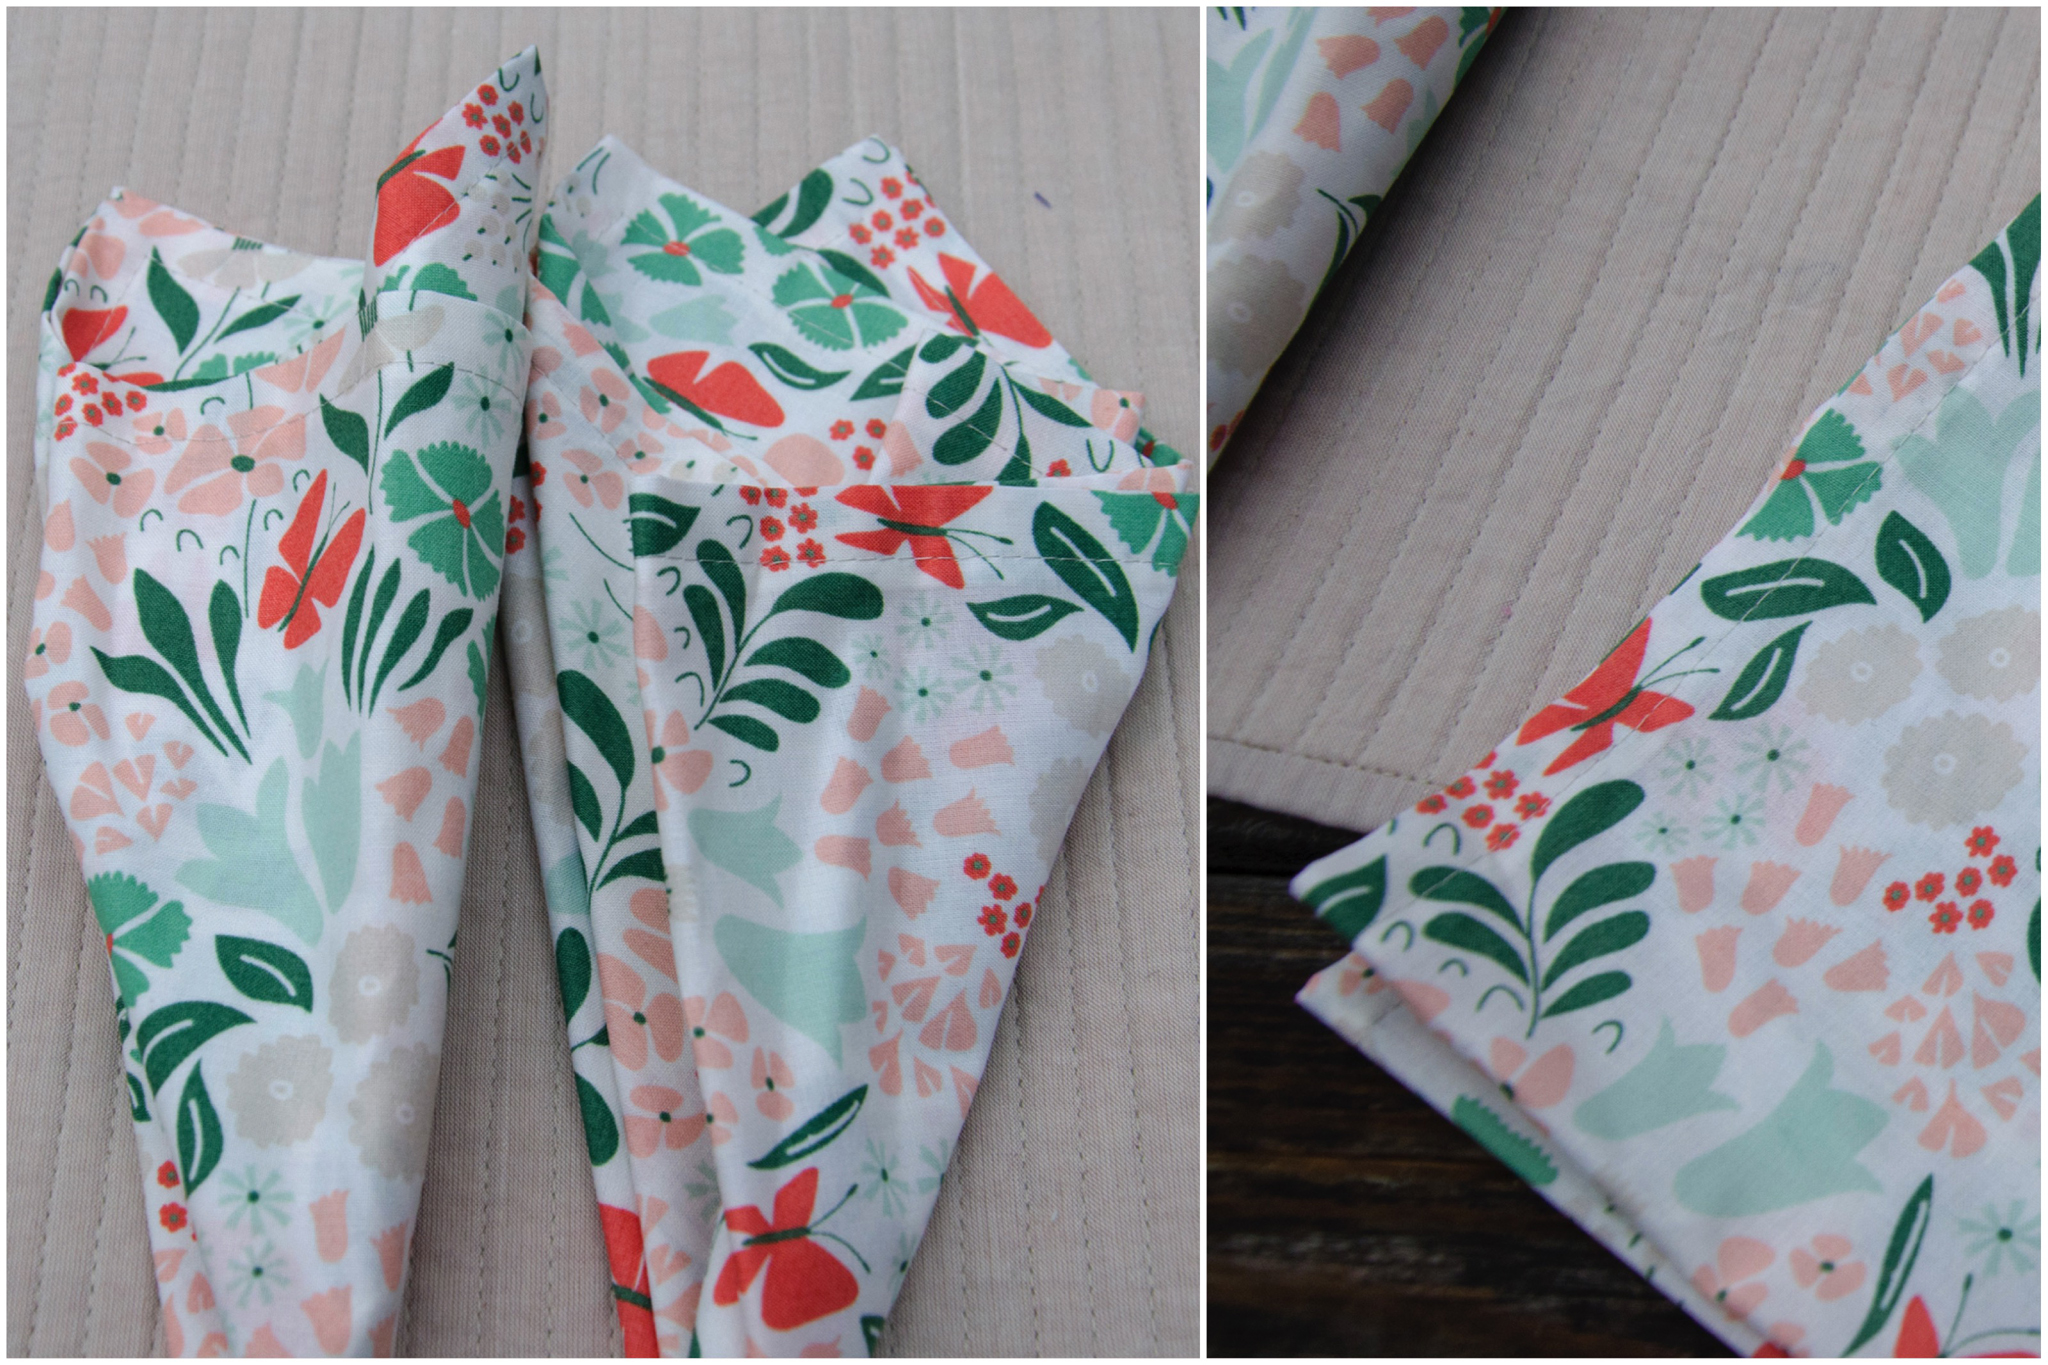
I made a pair of basic mitered-corner napkins using a half yard of fabric. They finished at 17″ square. There are many good mitered corner napkin tutorials online if you need one. I used this one from Purl Soho as a refresher for the corners because I can never recall how to do it properly. Here’s another one from Craftsy if you don’t want to be sold hard on buying more fabric.
Tea in the Park Gift Set

Roll-up Placemats

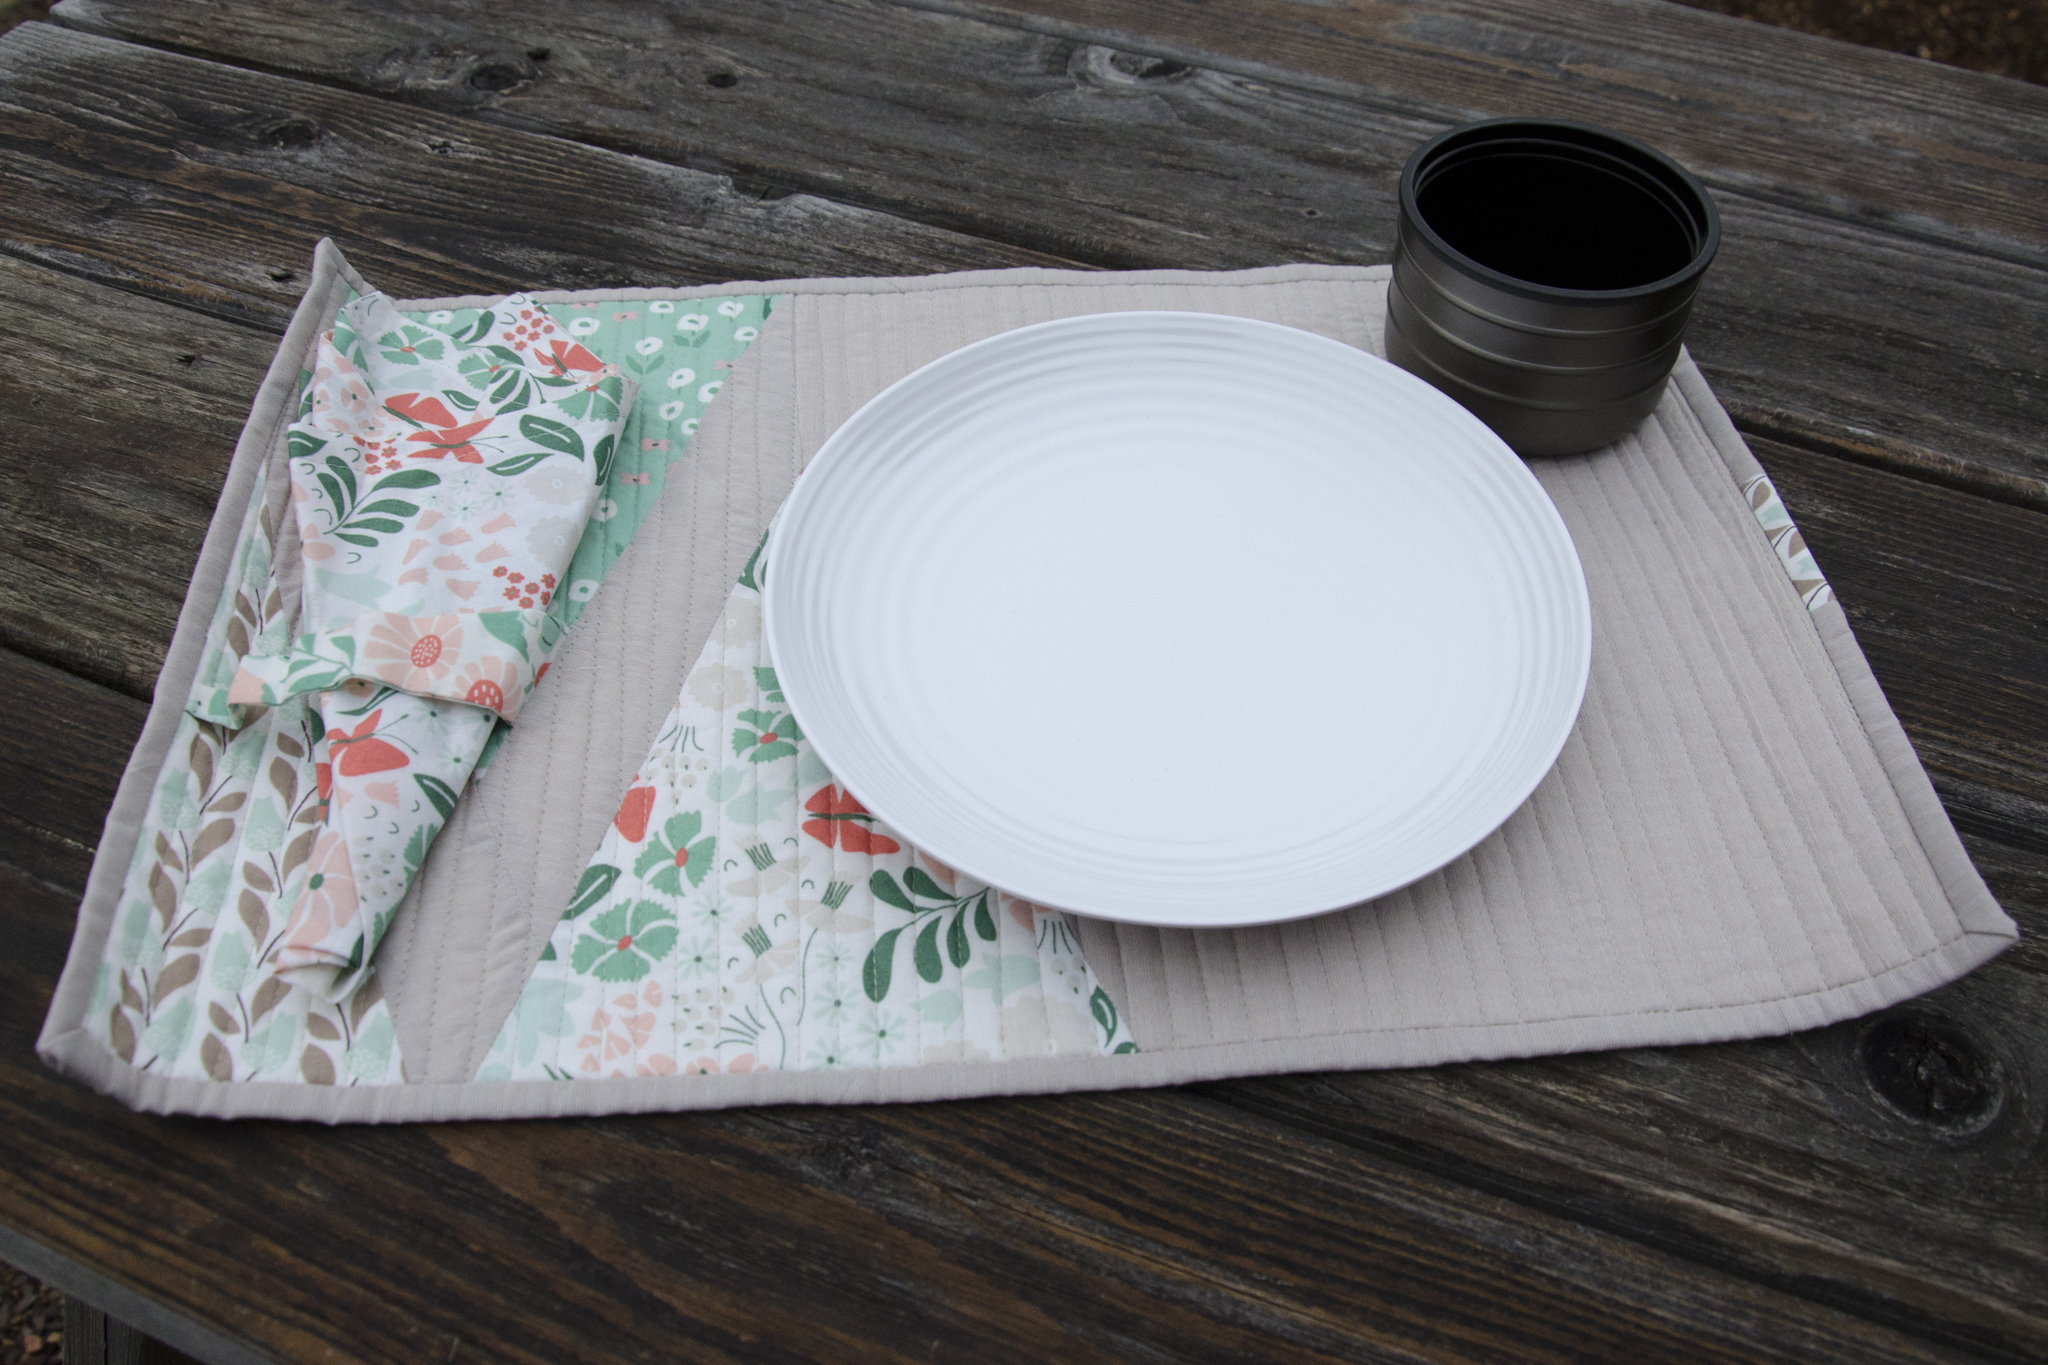
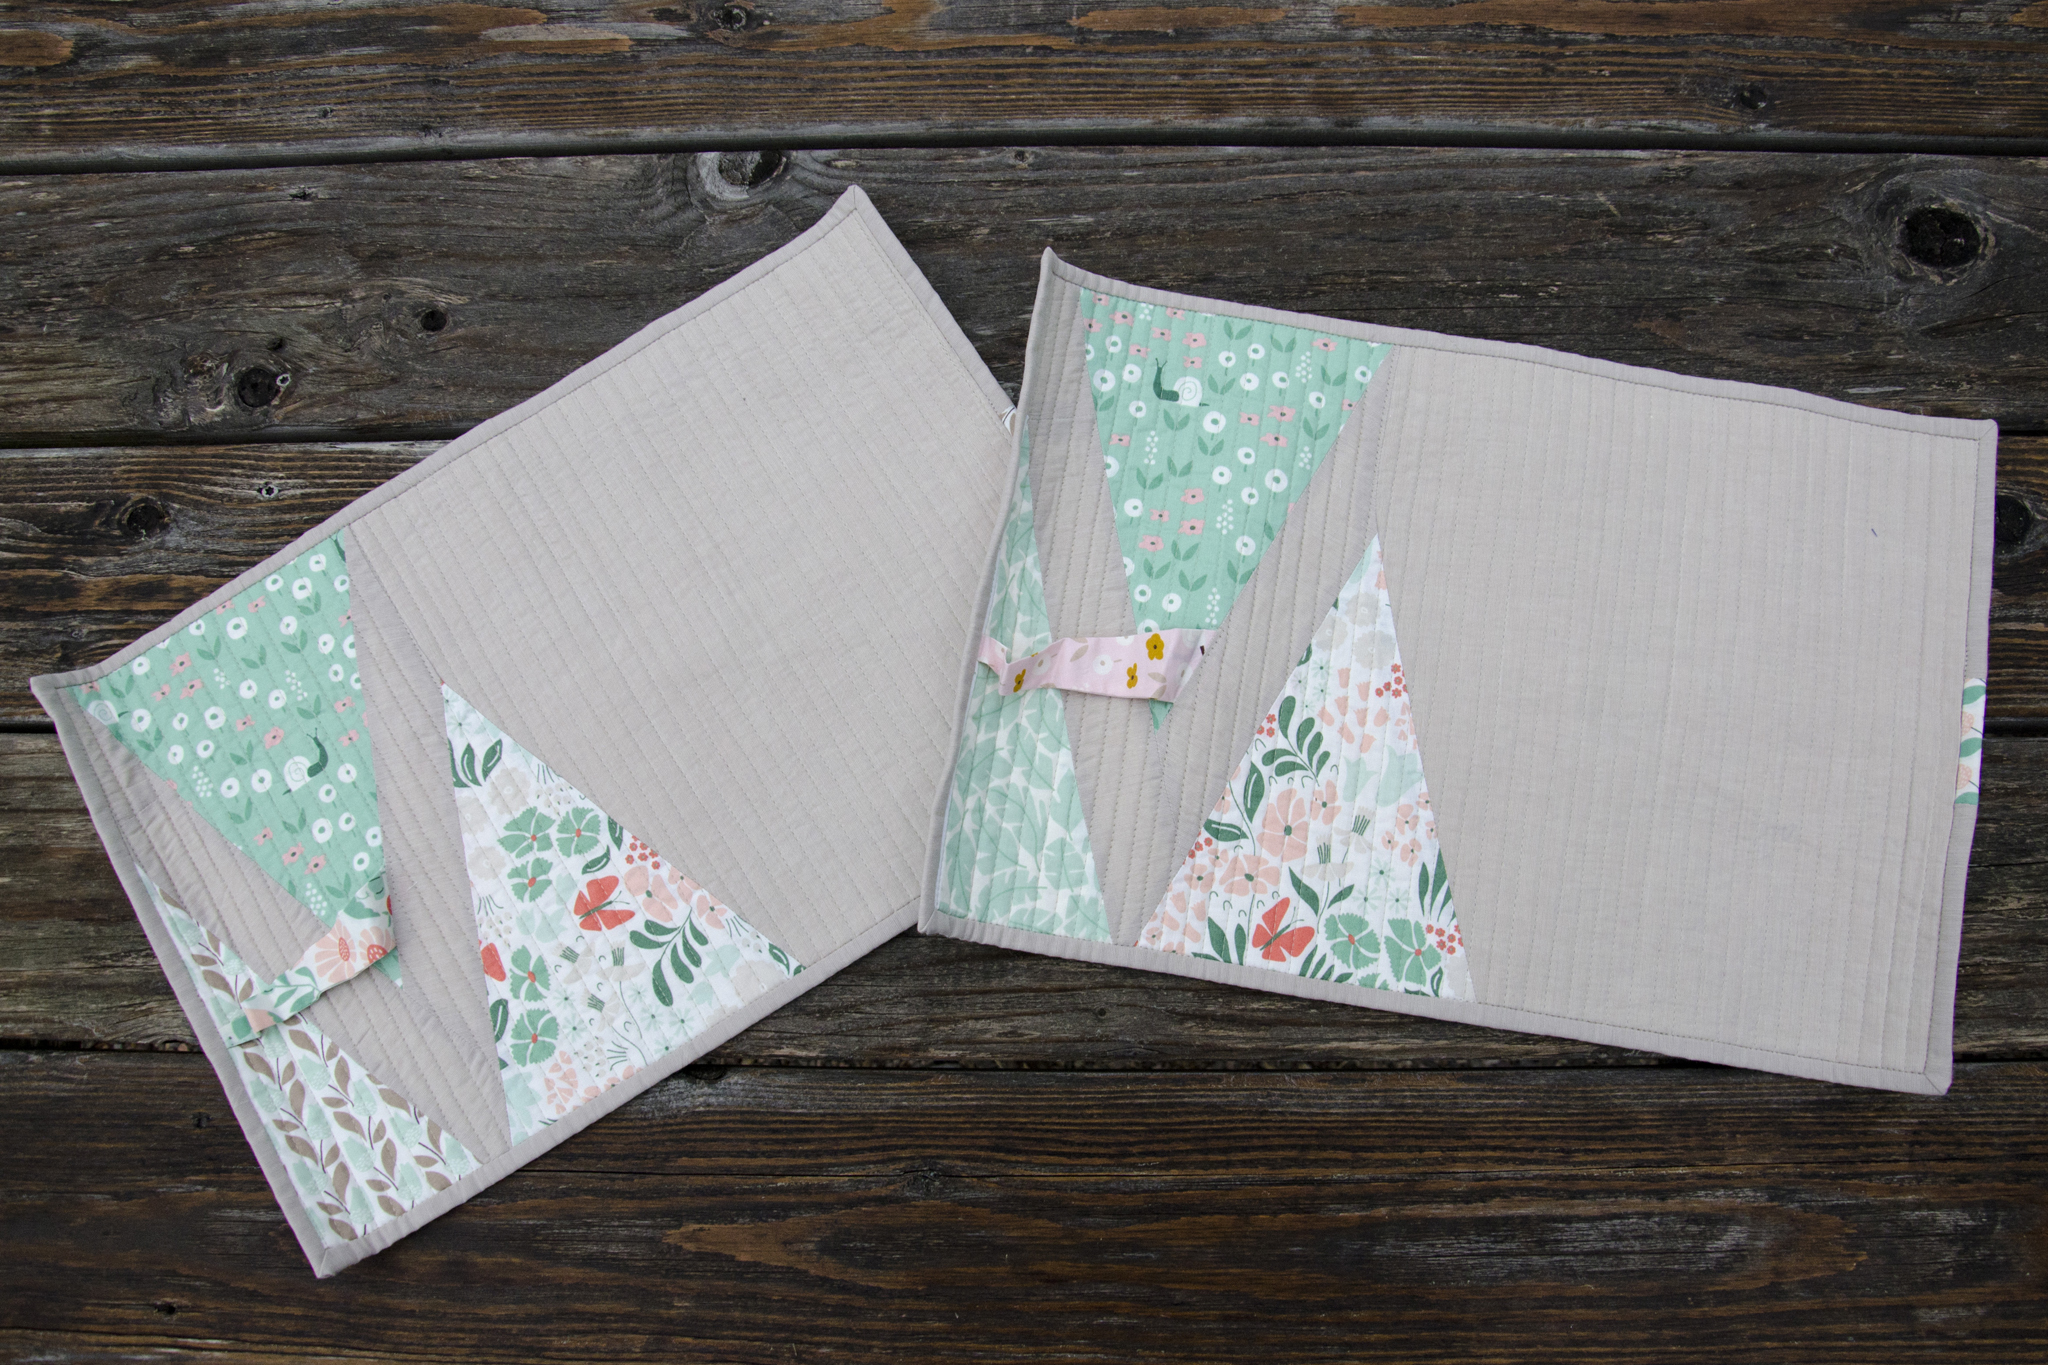
When I cut out bunting pieces, I ended up with extra triangles and end pieces since I simply sliced up a 9″ strip of each fabric. I wanted to use up those pieces in any piecing, so started putting together the placemat design with improvisational piecing taking cues from the triangles. I paired the Park Life prints with Kaffe Fasset Shot Cotton in Latte from my stash—slightly different than the solid gray I used in the bunting, but a better match for the colors in Park Life—it’s a slightly taupe-ish gray.
Tea in the Park Gift Set

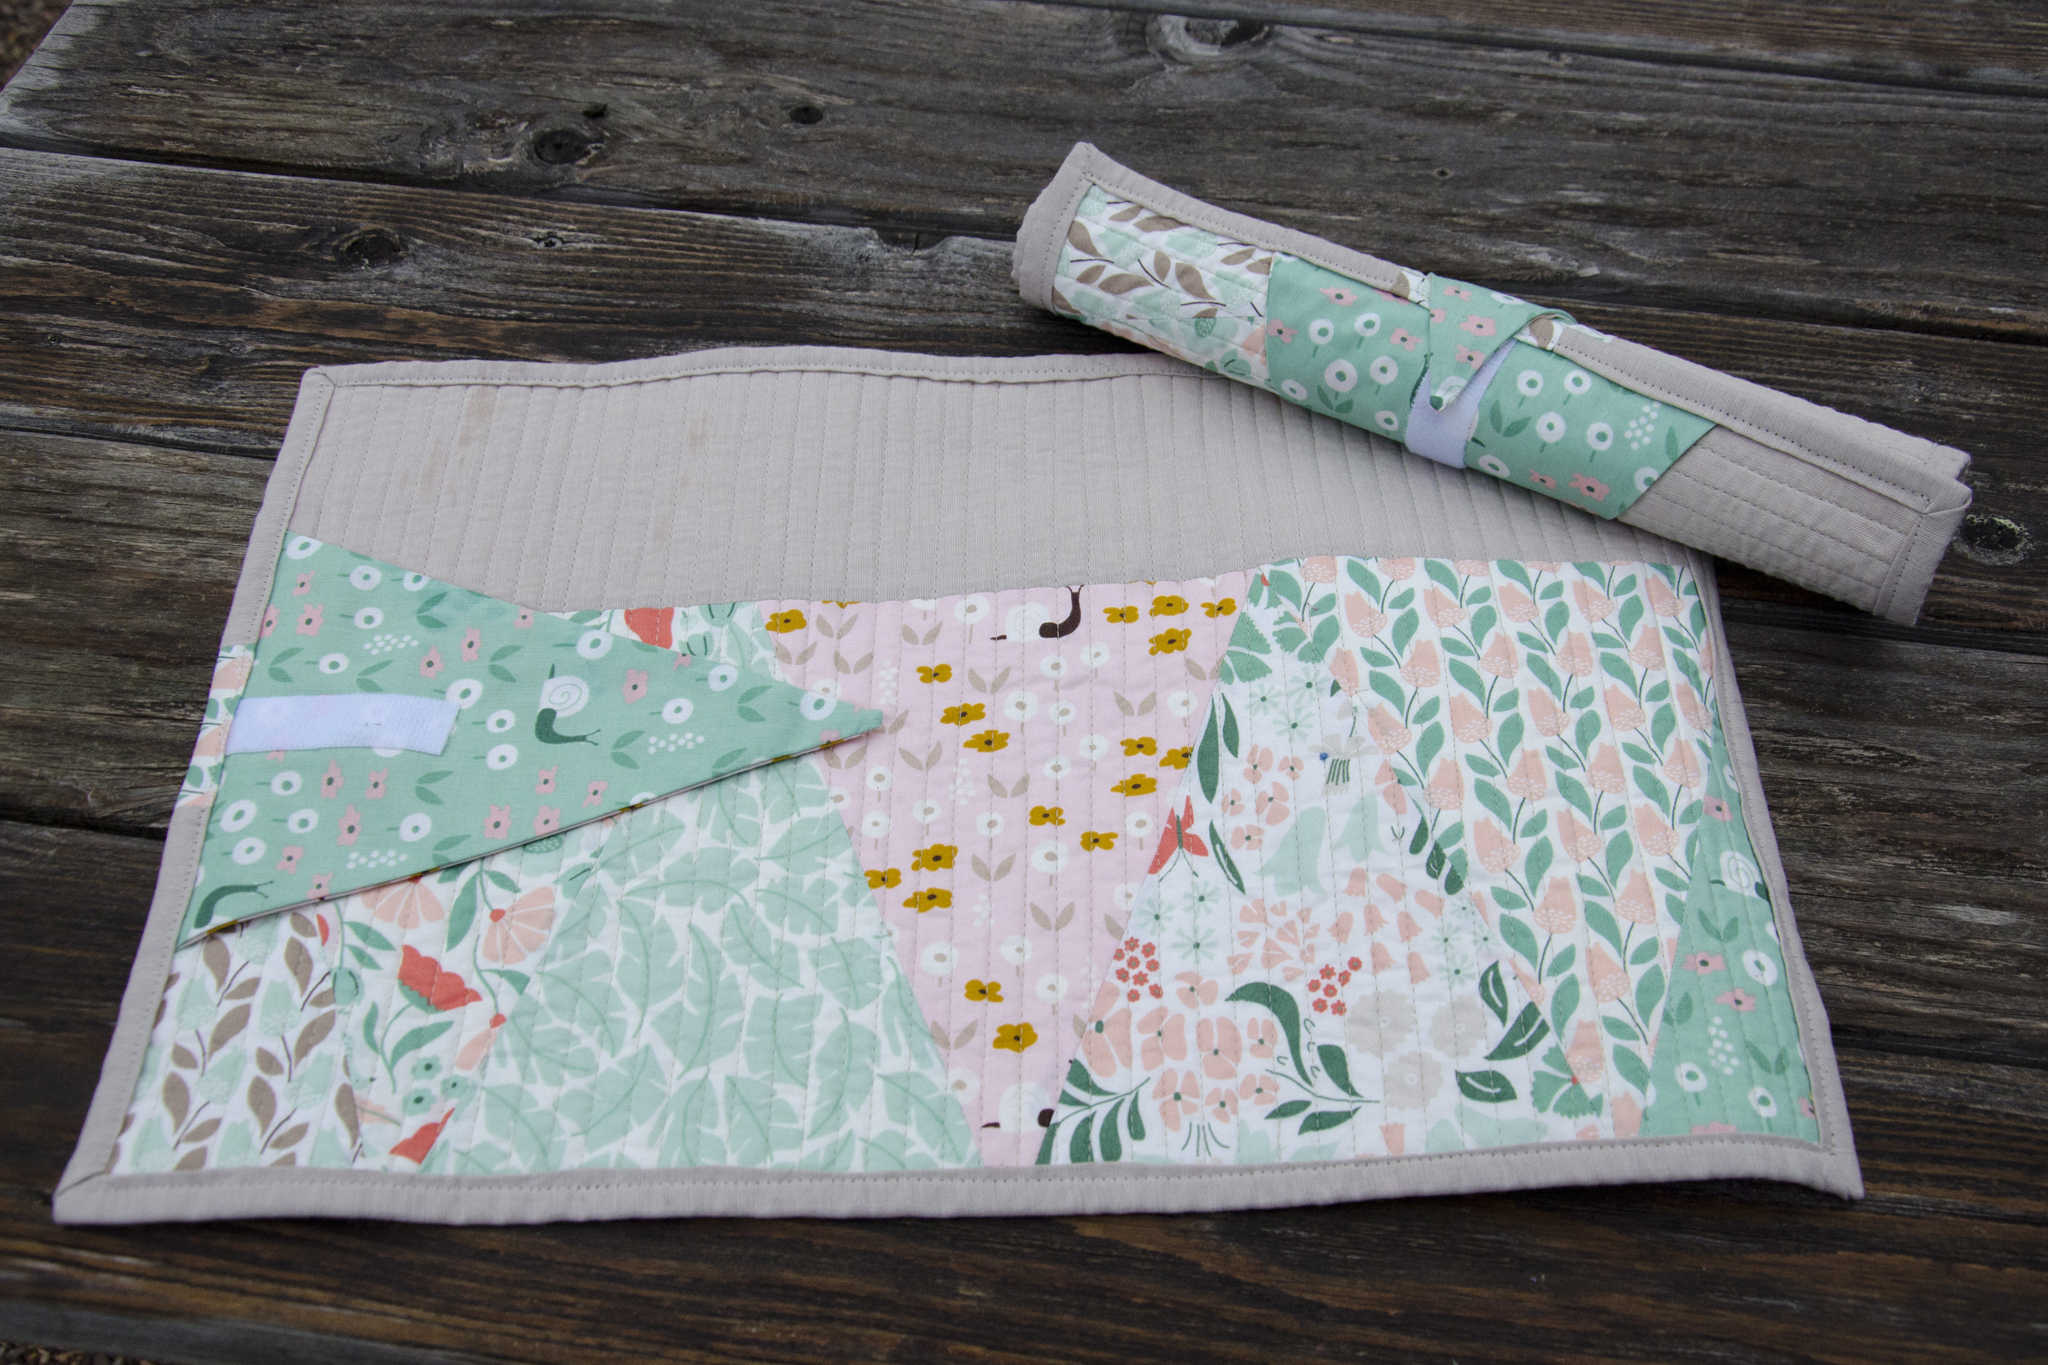
The back is pieced from more triangles and a strip of the gray. After piecing, I inserted a strip between one piecing seam and the binding that acts as a napkin ring on the front. I quilted them in 1/4″ lines with a gray-taupe Aurifil, then bound them in the gray with one small scrap of print to give a bit of visual weight to the right side.
Tea in the Park Gift Set

Because the intent was that these are portable for a picnic, I tried to figure out a way to secure them while rolled up for easy transportation. Going back to the pile of leftover triangles, I made a pennant, slid it into the binding, and used a bit of Velcro to allow it to fasten flat to the back, or to itself if you roll up the placemat. It turned out to be my favorite feature.
Tea in the Park Bag

Tote Bag

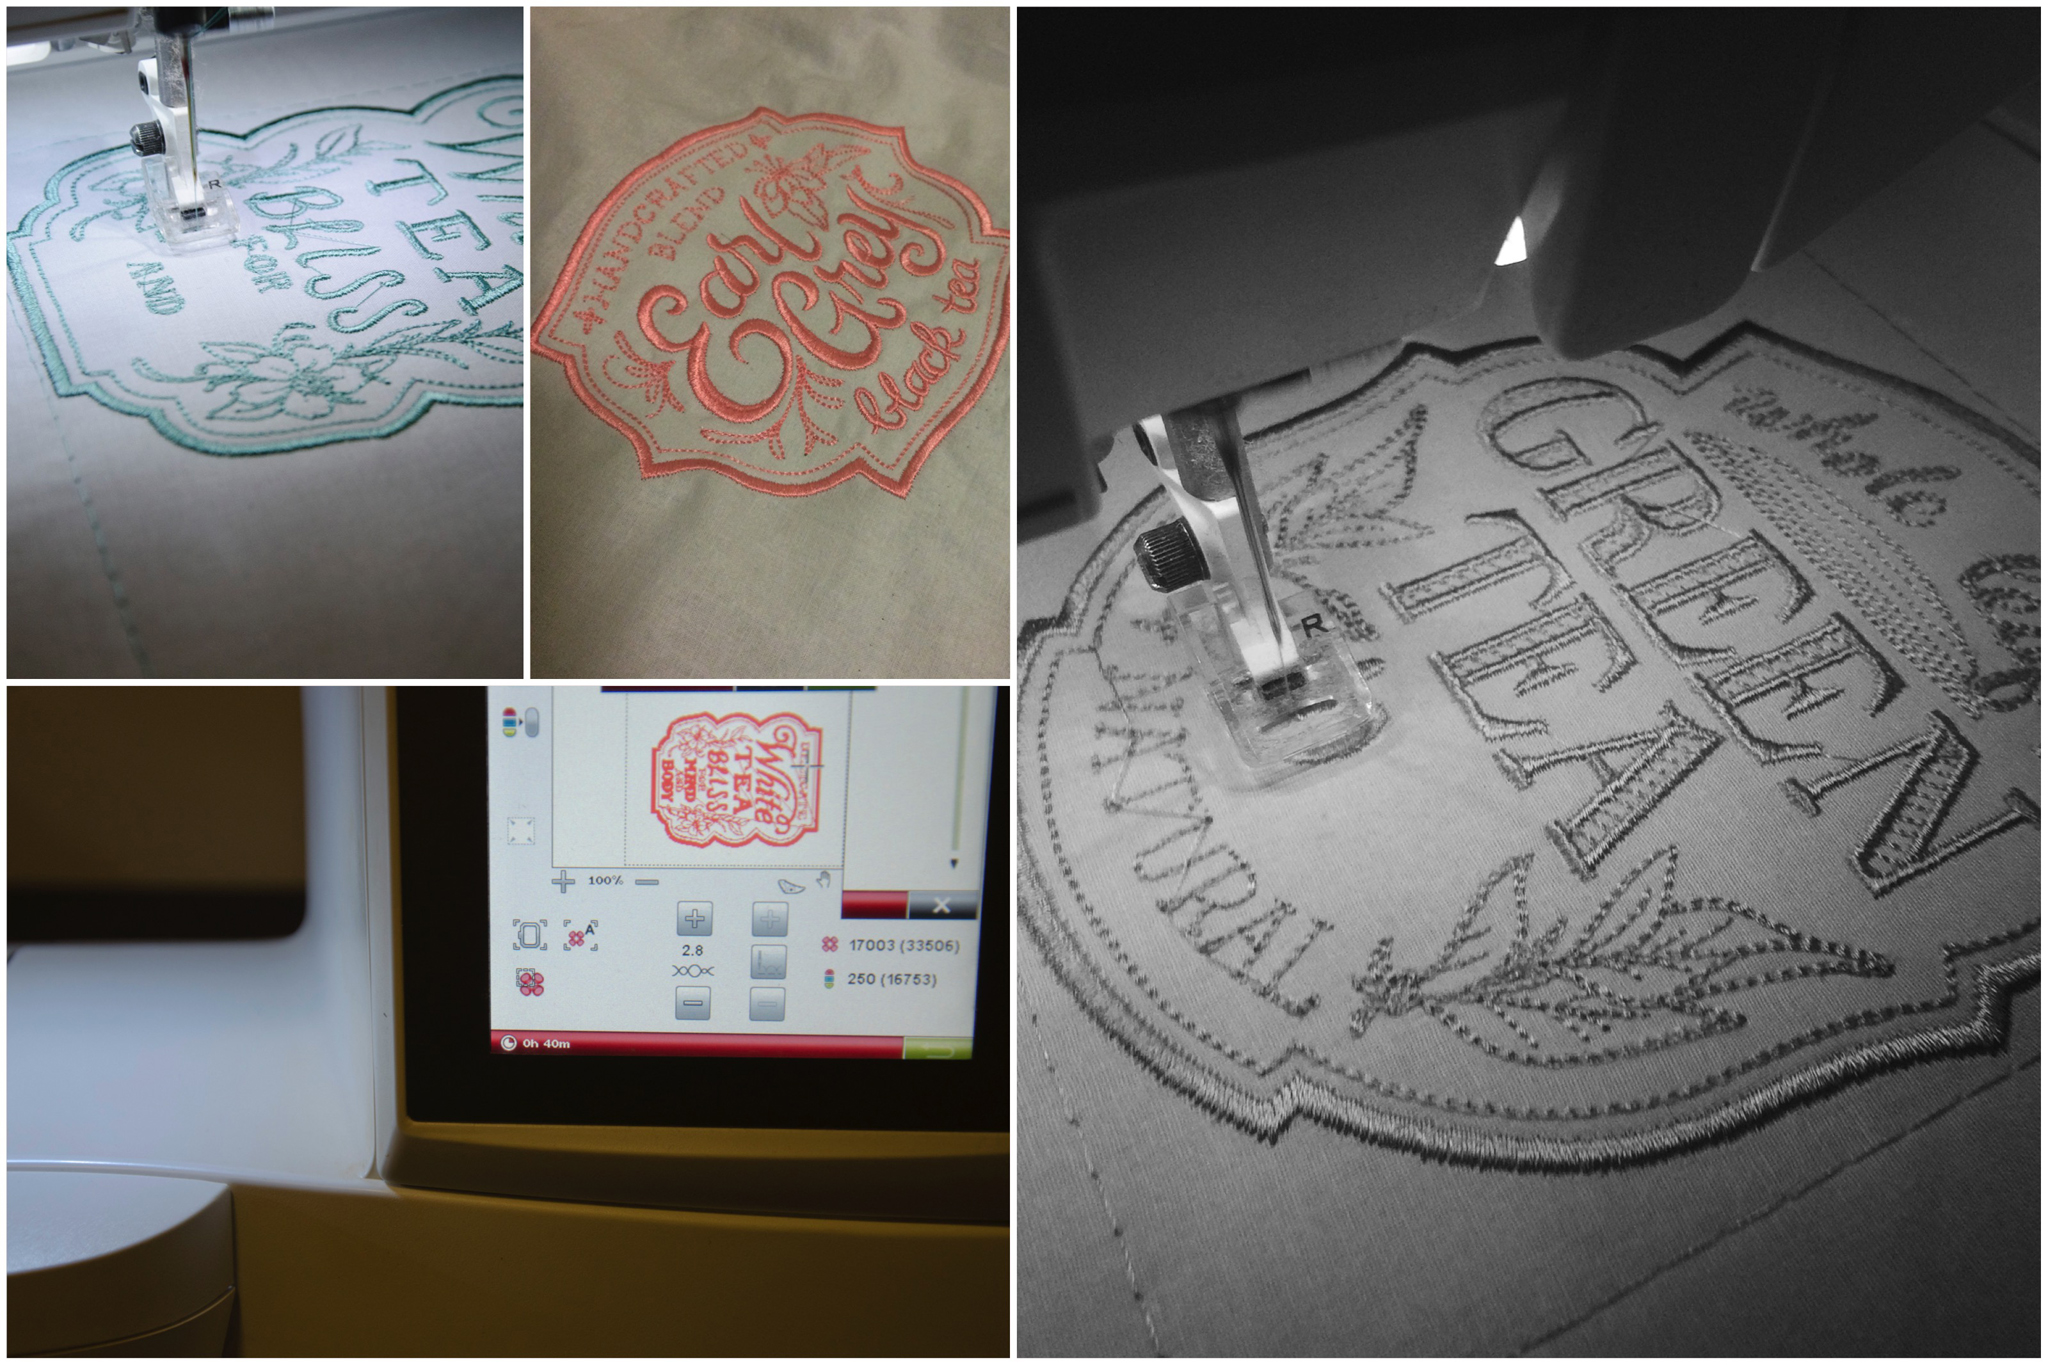
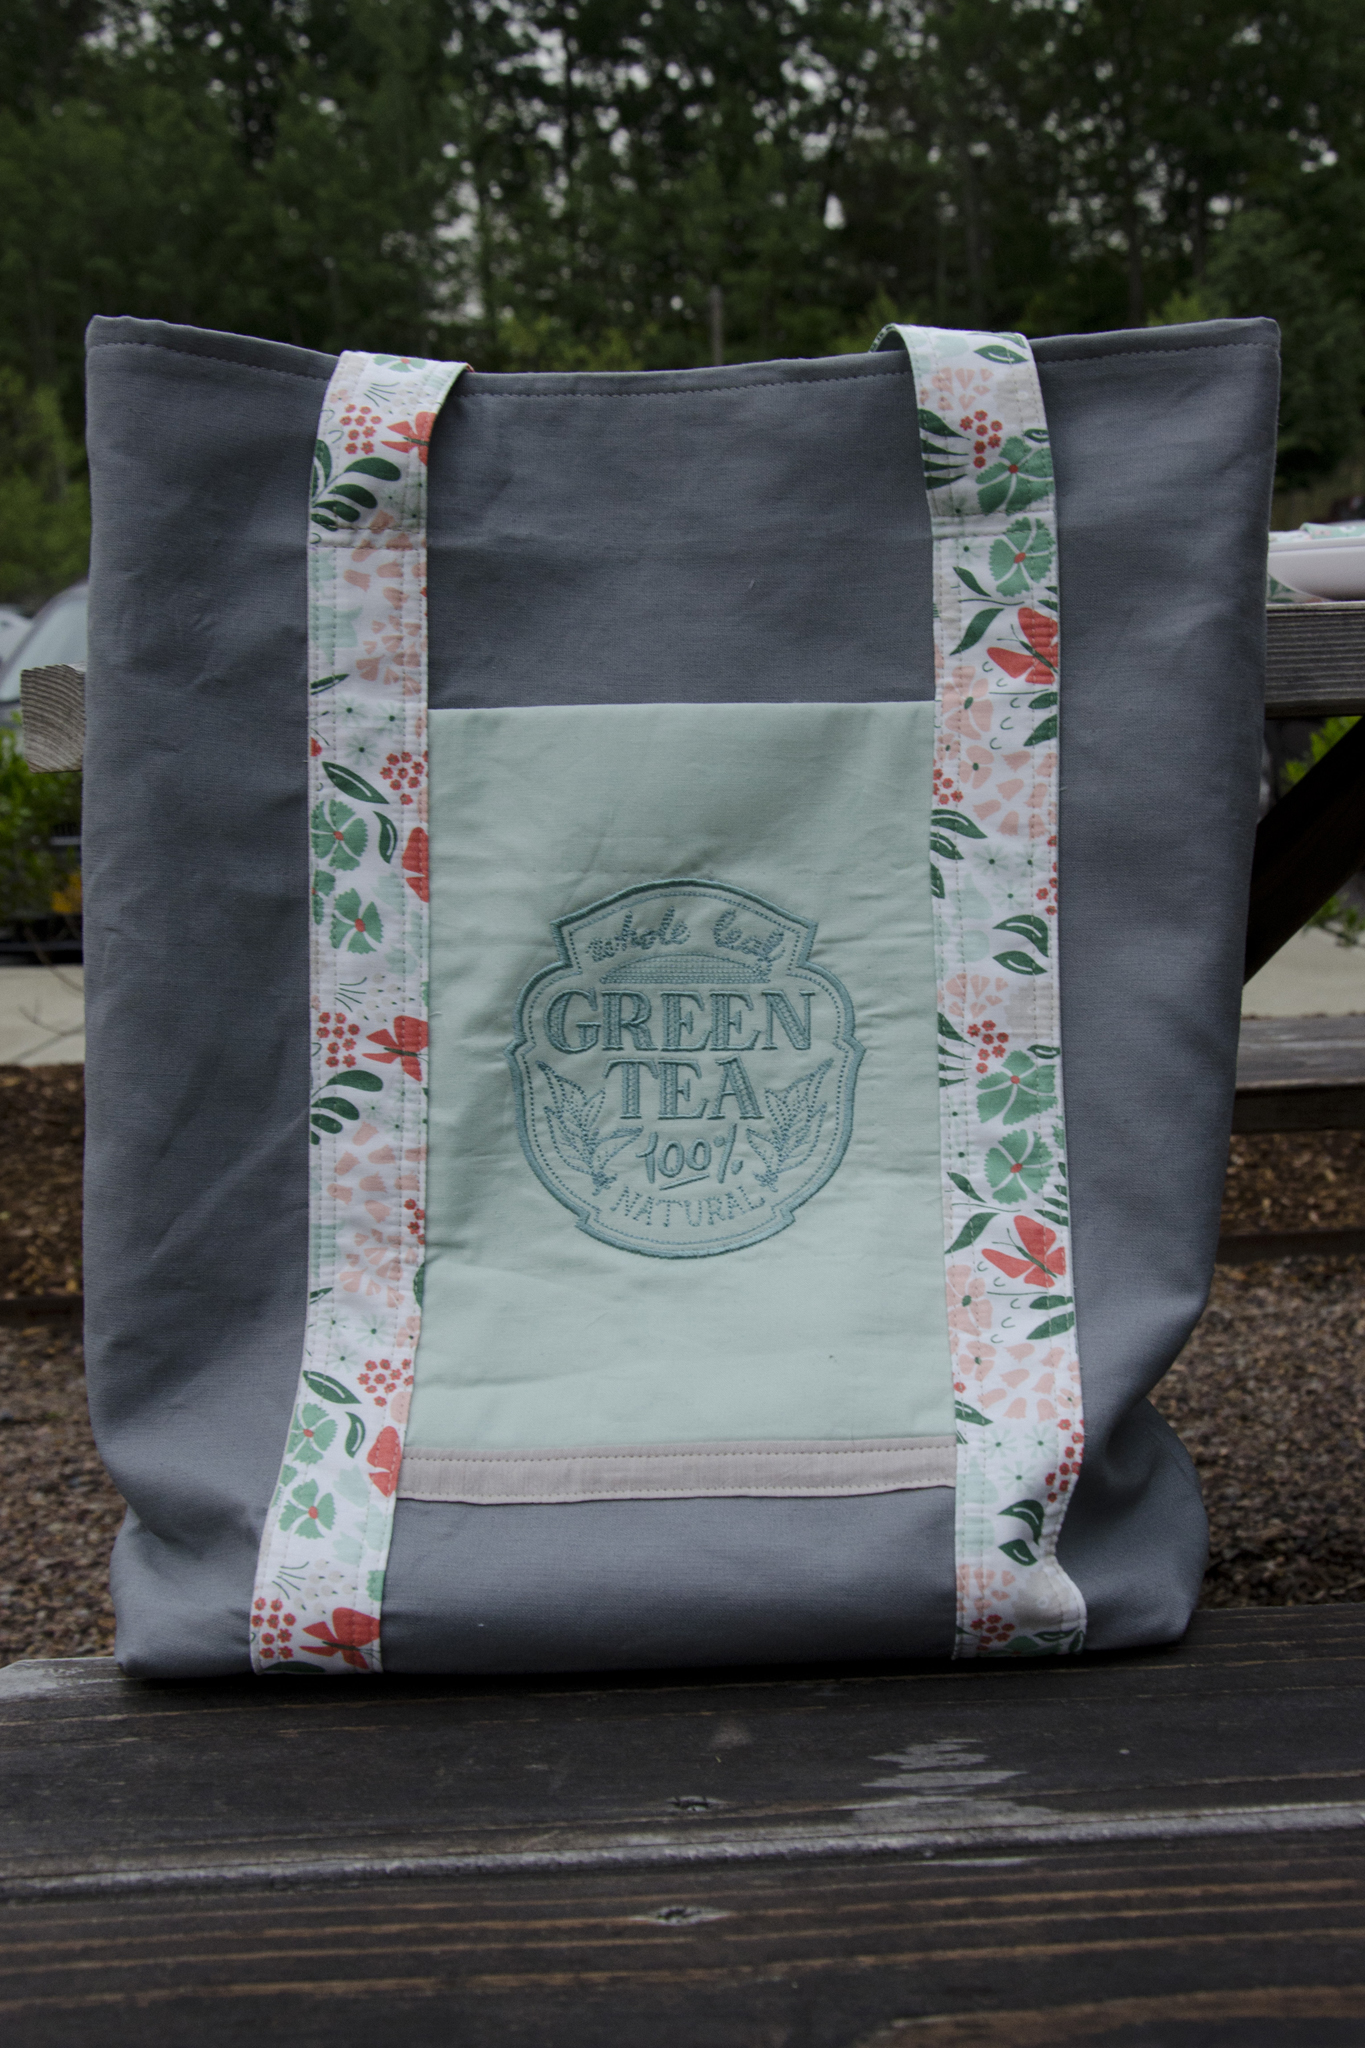
What good are traveling placemats and napkins if you’ve nothing to carry them in? Using the Art Student Tote as a general design guide, I pulled together a bag made of dark gray Essex Linen, straps in a Park Life print, and a machine embroidered pocket using a coordinating solid from my stash and one of the tea embroideries from the bunting.
Tea in the Park Bag detail

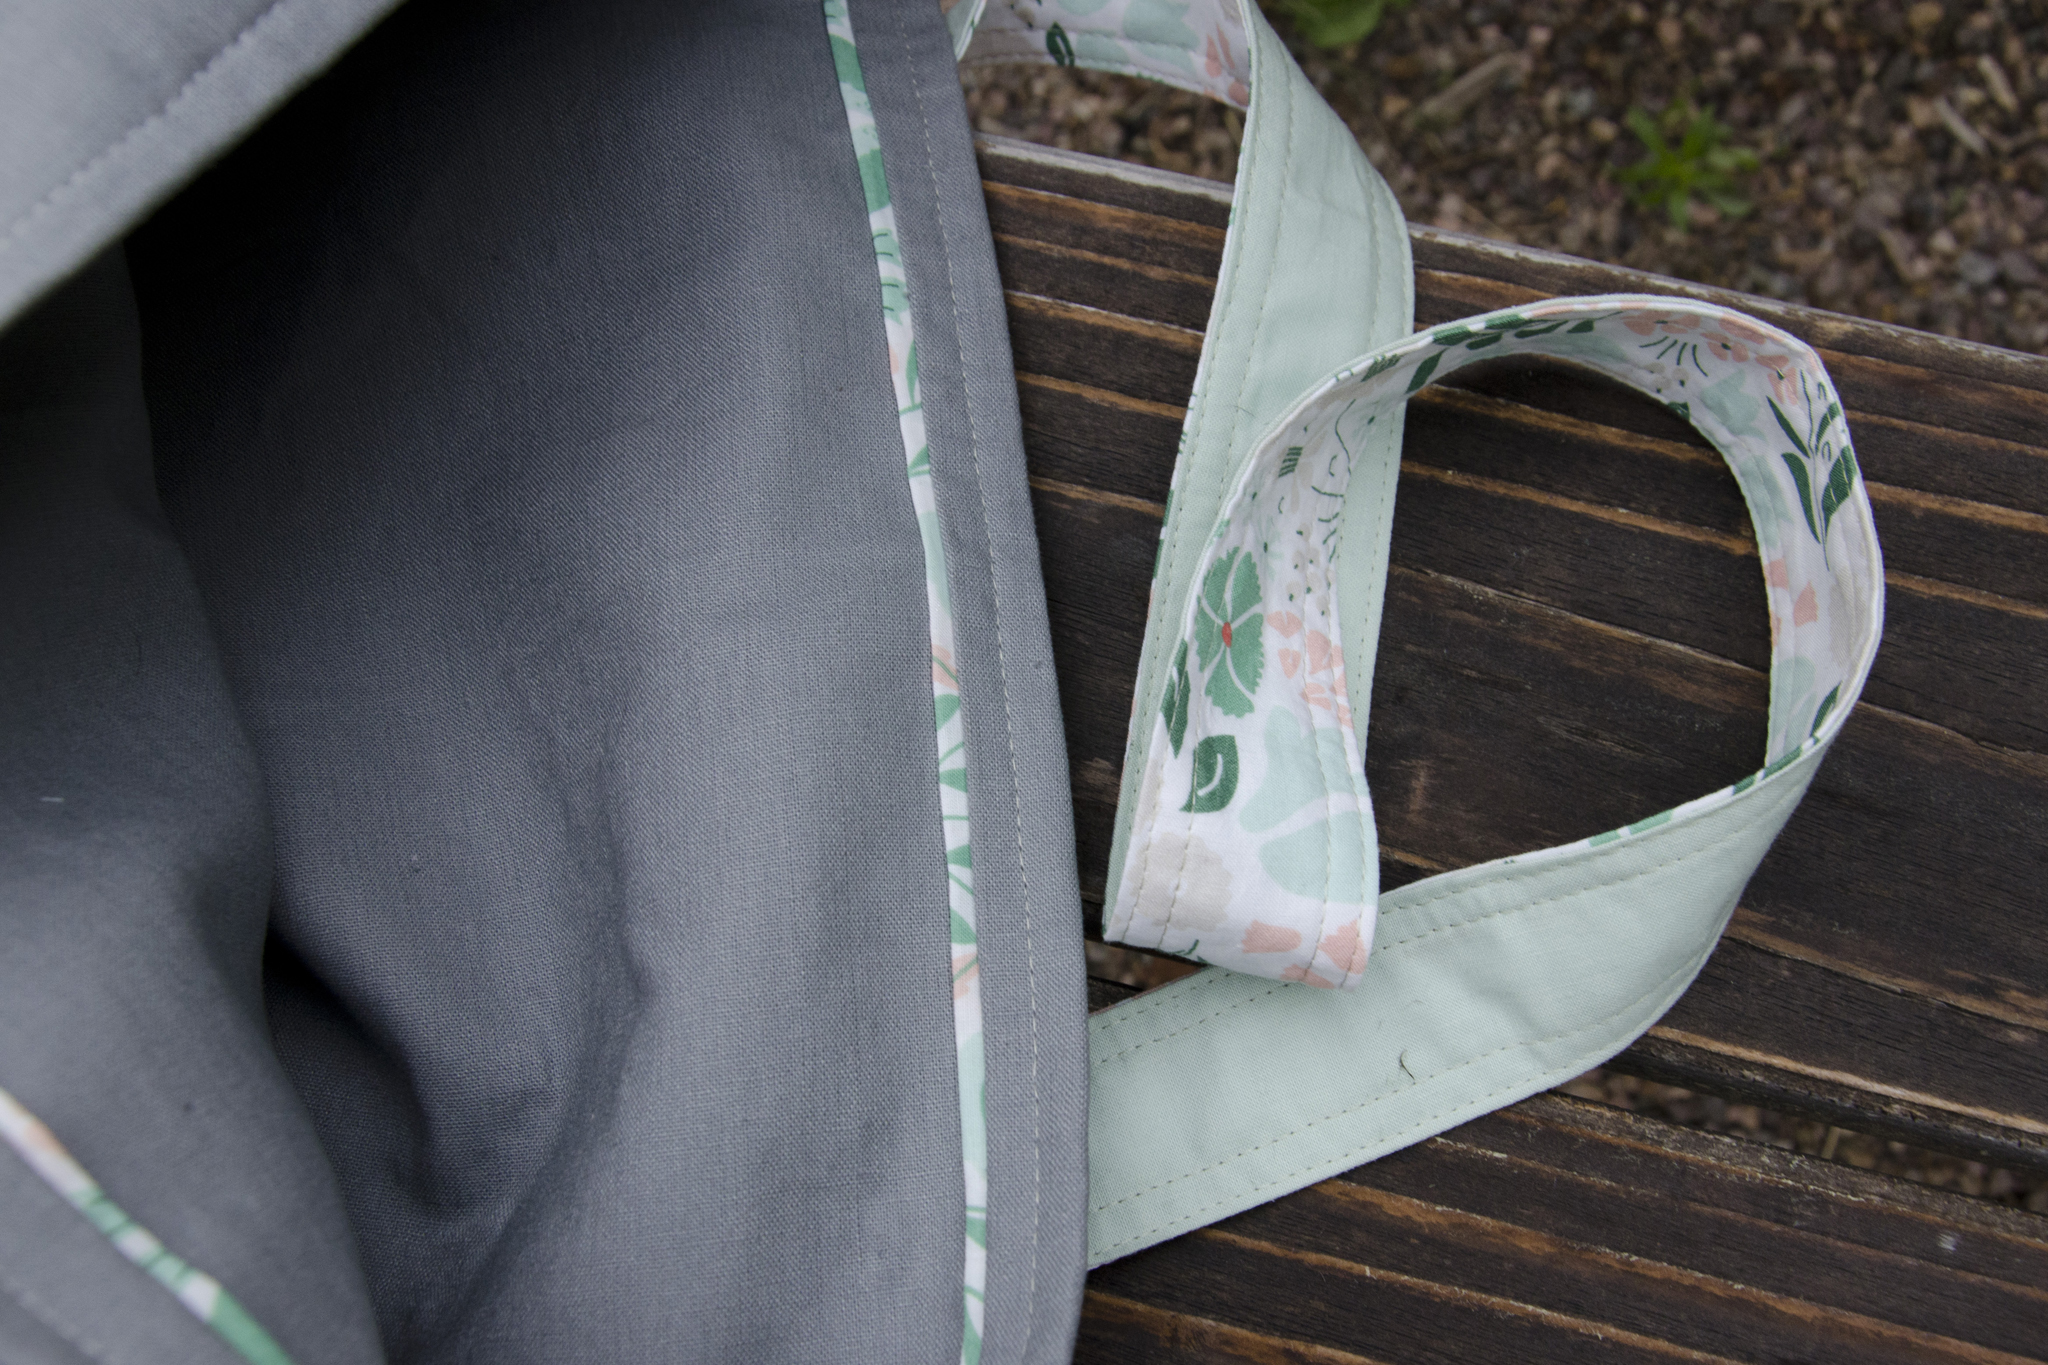
The bag is 13″x18″x4″—a hybrid of the two Art Student Tote sizes. I only added one pocket to the front, no closures, and no interior dividers/pockets. Since I lined it in the exterior linen, I modified the construction a little bit and added a flange for a pop of color around the top of the interior. Having learned from using my own Art Student Tote, I made sure to use a woven interfacing for the straps—mine are starting to stretch out and warp due to the medium-weight non-woven—and cut an extra strip to get the full suggested 128″ instead of the approximate three widths of fabric—mine are a smidgen short when the bag is loaded up. I also modified the strap construction to use two different fabrics (one on each side), as I didn’t have enough of any one fabric.

The Whole Package

To round out the picnic theme, I added a few store-bought gifts as well.
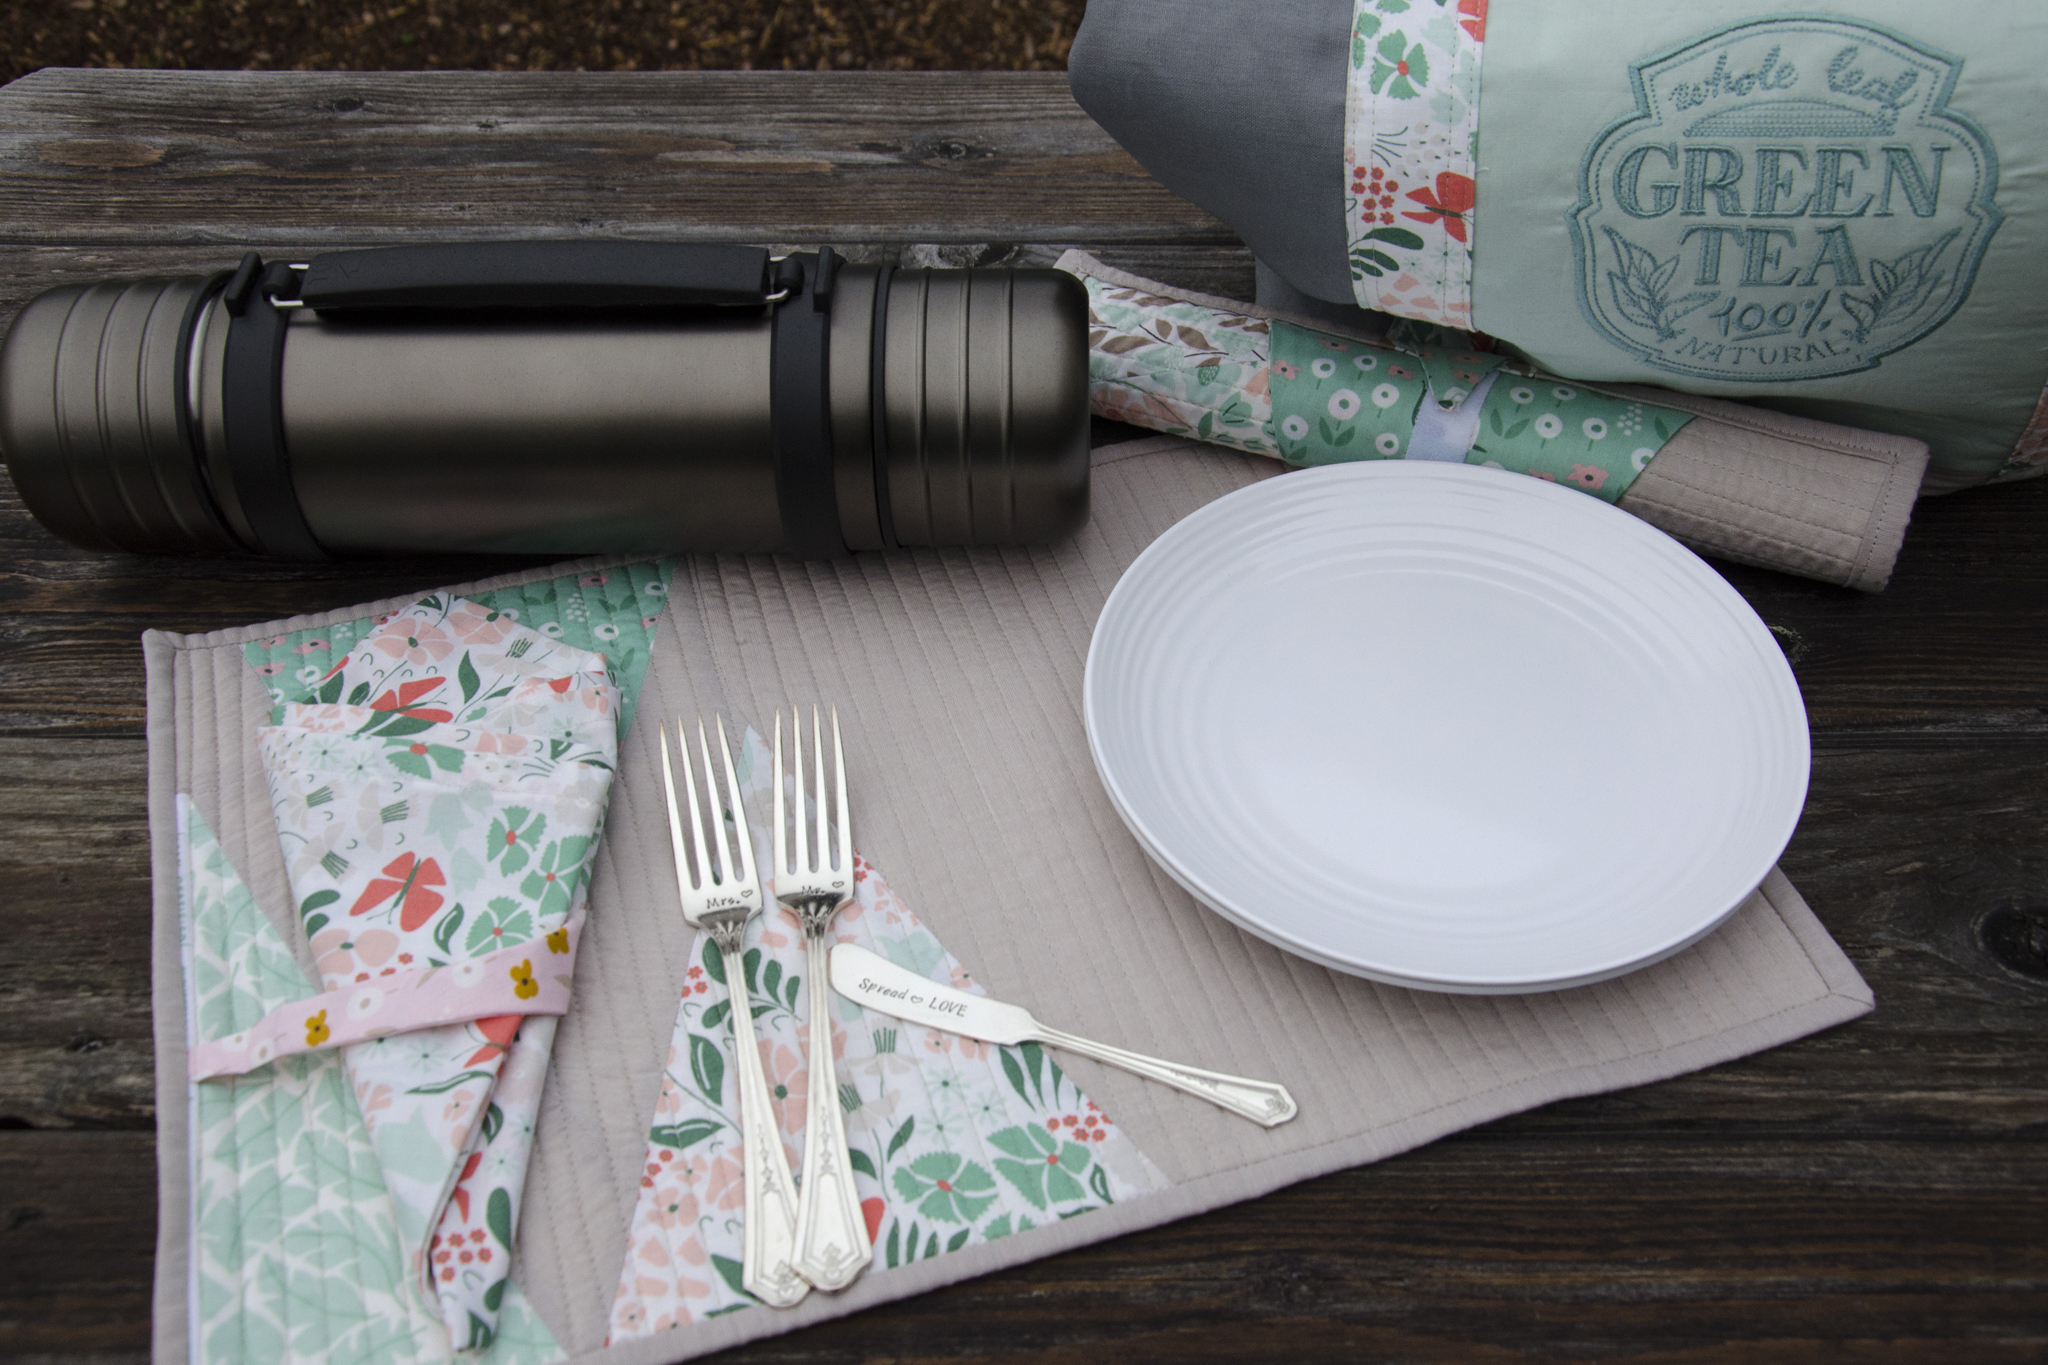
Tea in the Park Gift Set

It was a dreary, rainy day when I tried to take photos before shipping it off. I hope the couple has many sunny days in their future.

Even with this whole package, I still have a quarter yard of five of the prints—and a few more triangles—but for now I’ll retire that to the depths of my stash and move on to some other things!

June 30th, 2016

Bunting Tips and Tricks

Posted in Crafting

  • Fabric Designer: Elizabeth Olwen
  • Fabric: Park Life
  • Home decor
  • Machine embroidery
  • Quick project
  • Tips and tricks

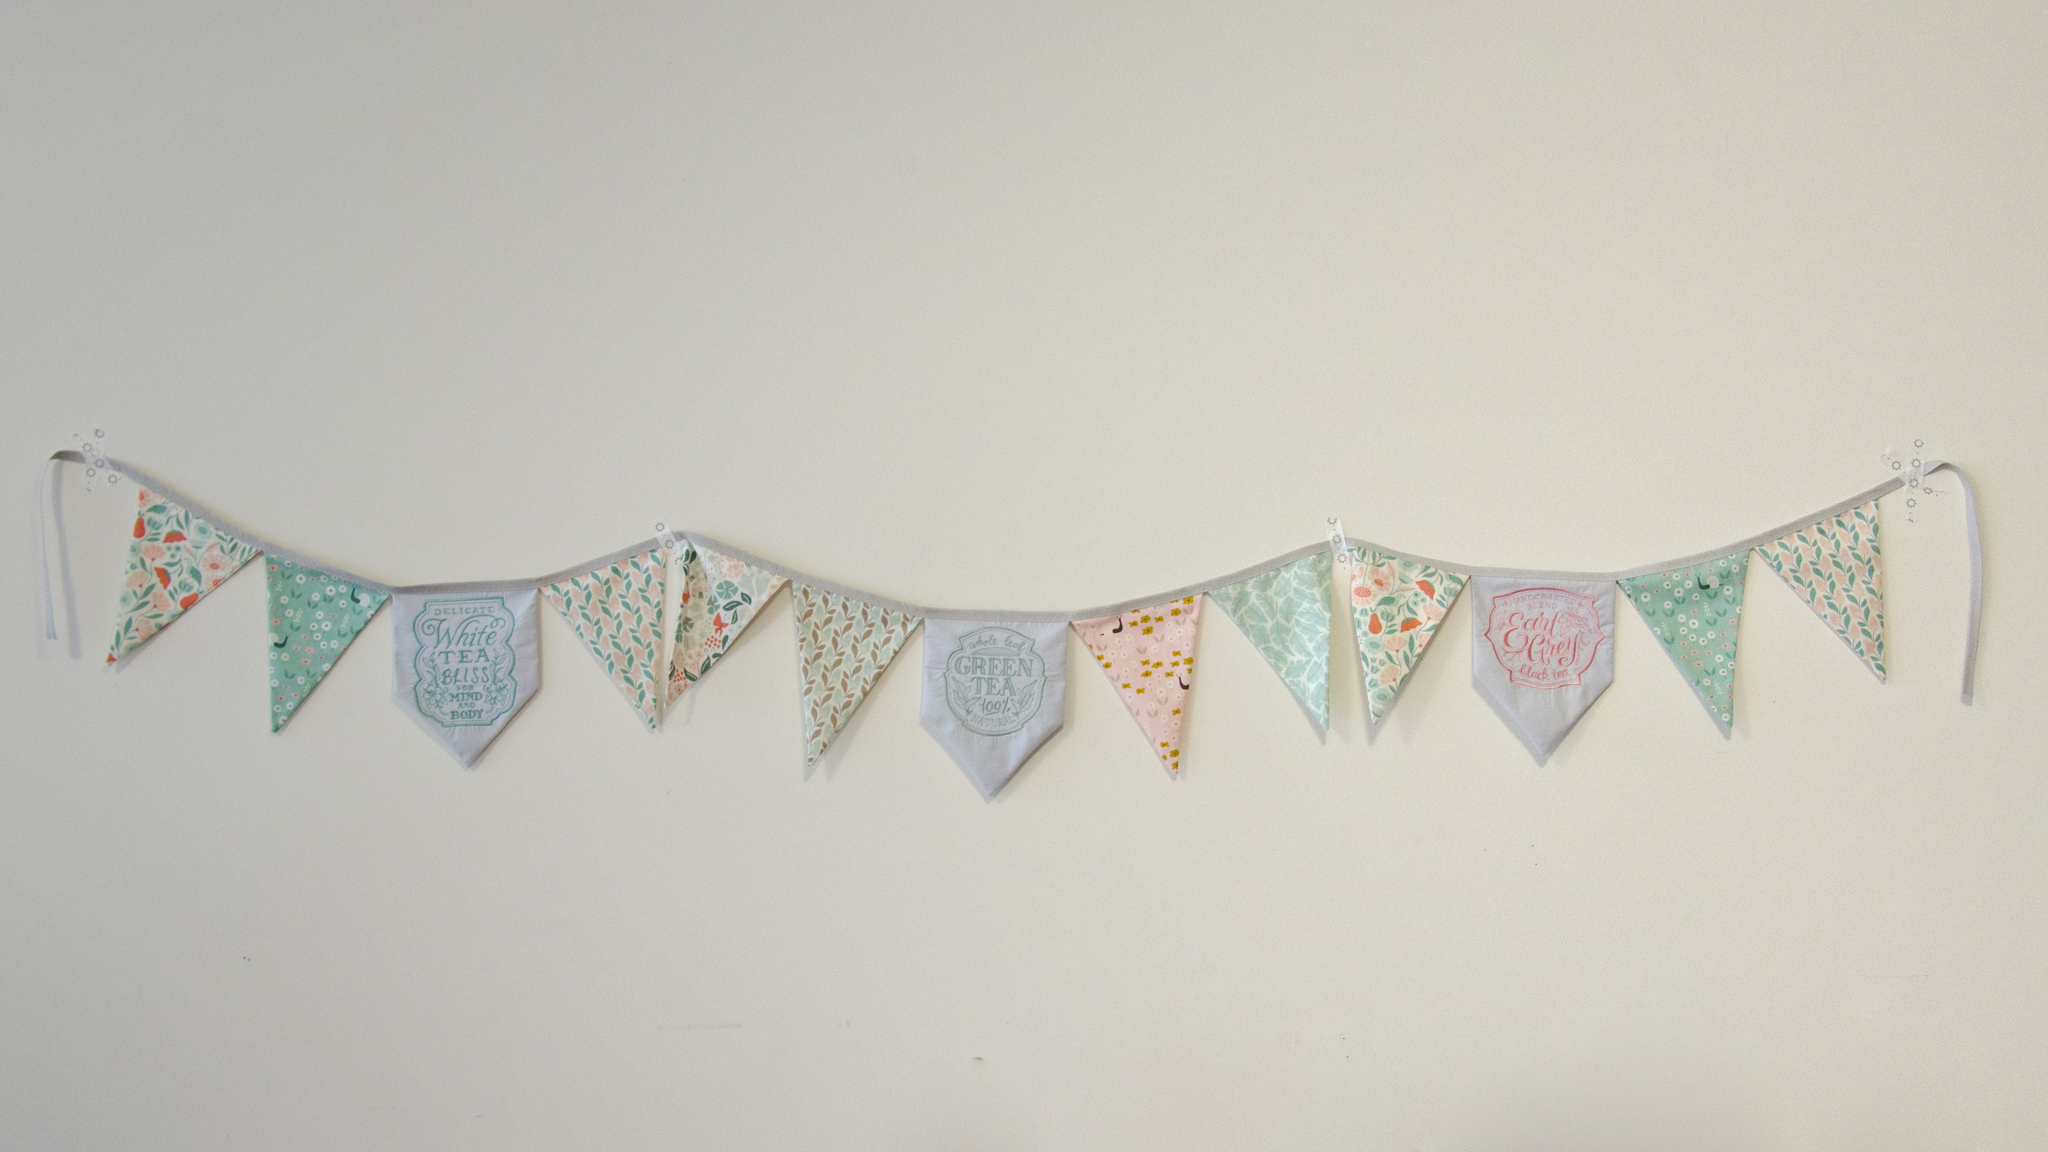
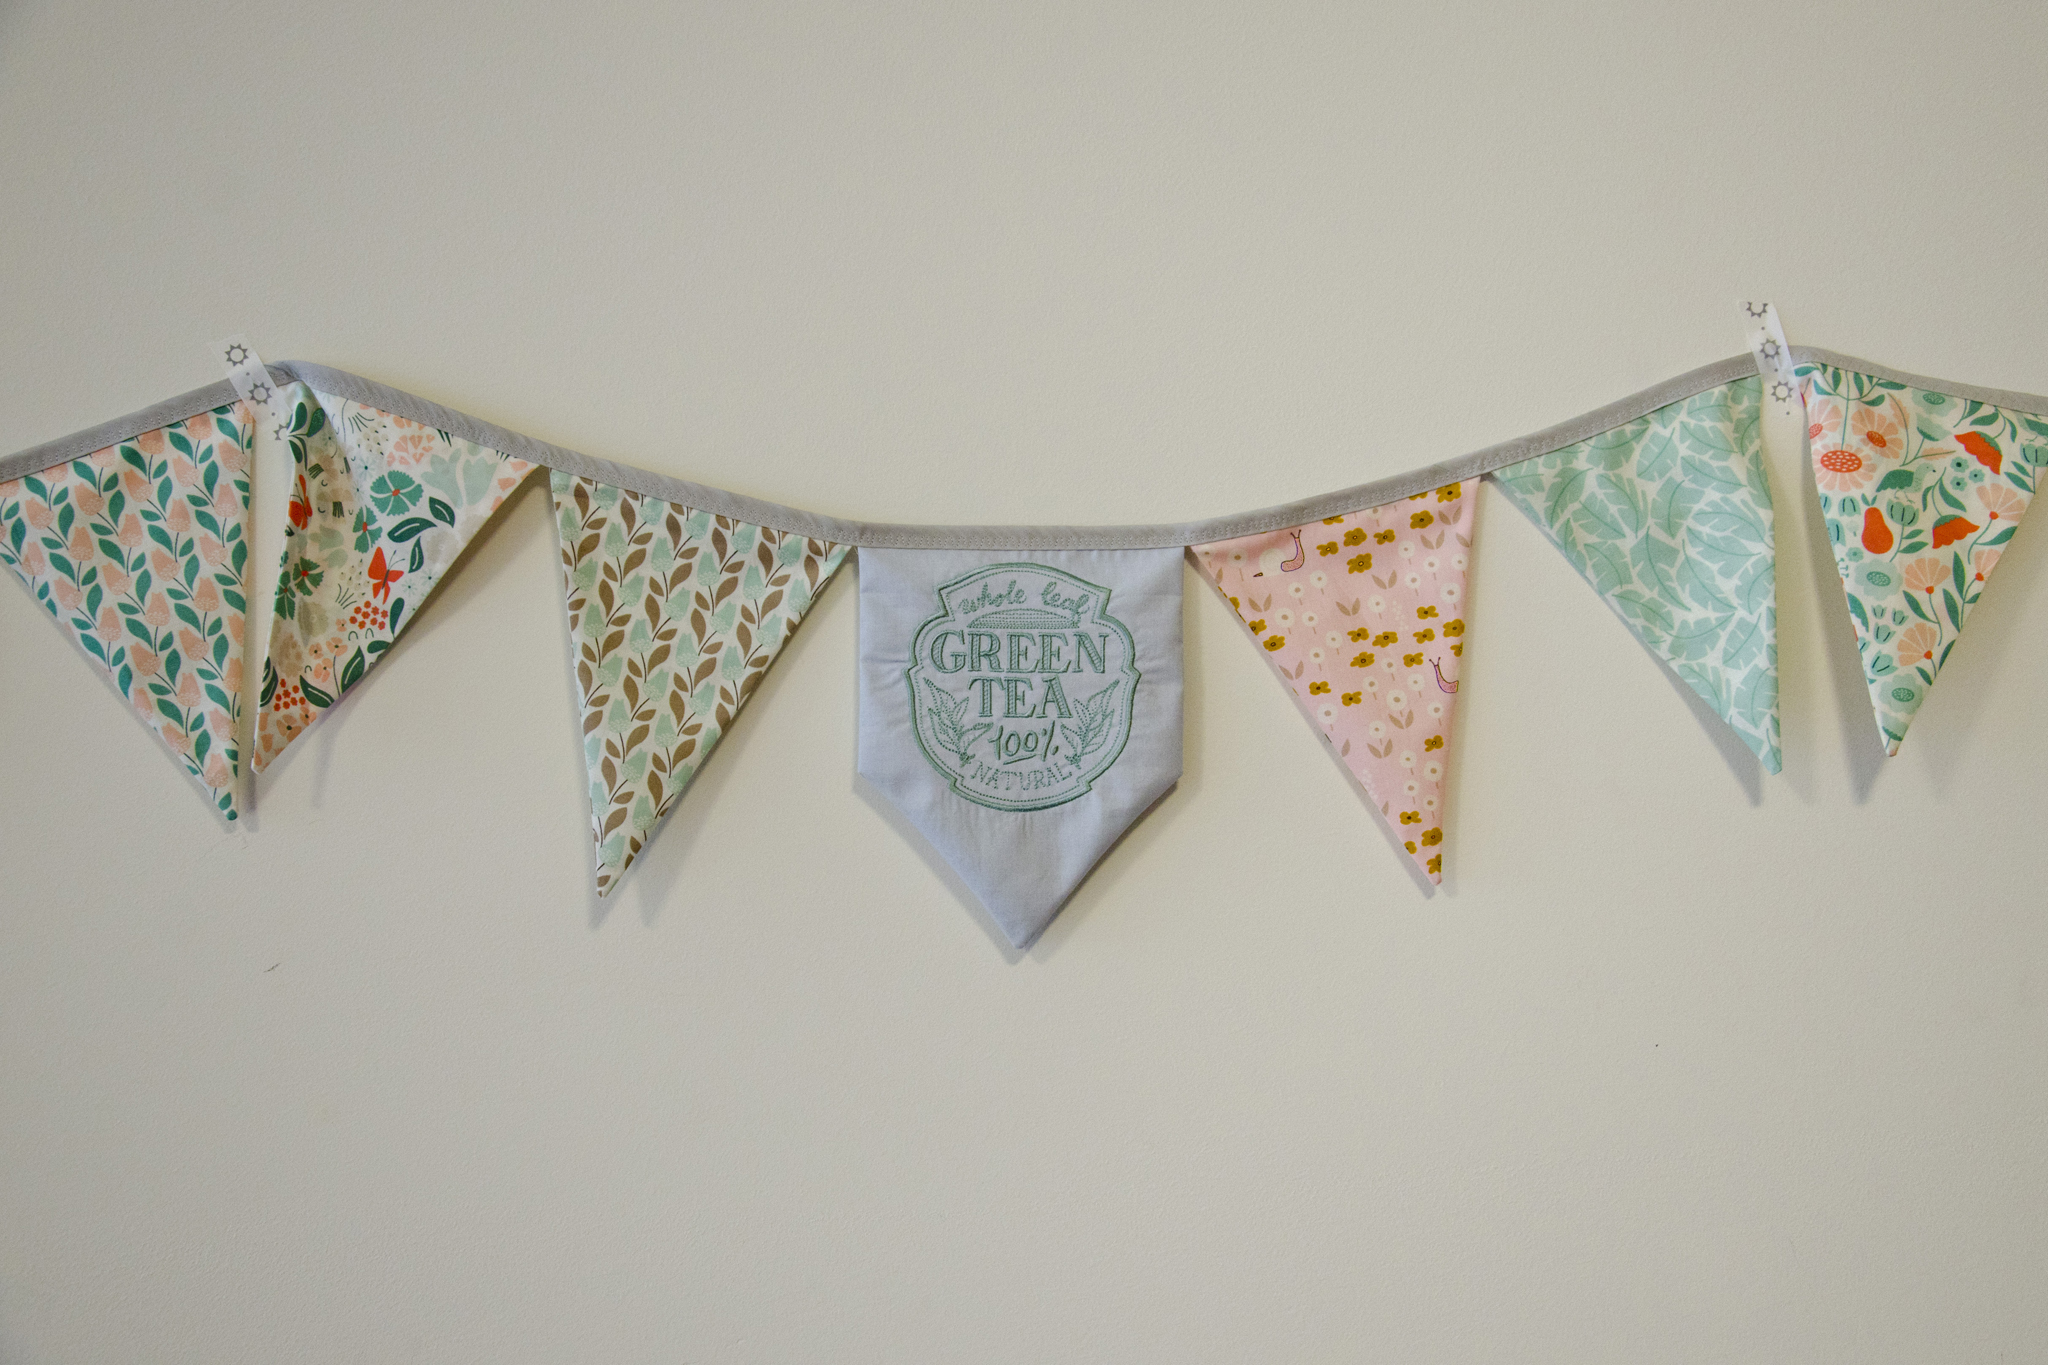
My sister’s bridal shower is fast approaching, and we’re planning it with a tea party theme. (The whole concept of what one does at a bridal shower is a bit of a mystery to me, having not been given one when I married, nor having attended any for others.) Seeing as I’m 1,300 miles away, my ā€˜hosting’ status is mostly honorary, but I am able to lend a hand with the decorations. Armed with a few embroidery files from Urban Threads and some half-yard cuts of Park Life by Elizabeth Olwen for Cloud9 Fabrics, I whipped up bunting for the party. Where by whipped, I mean I spent a lot of time at my machine over the course of a week or so, considering the 40 minute stitch out time of each of the embroideries.

I dare say the final result is pretty sweet. I made two of these strands, each 9’ long.

Tea Party Bunting

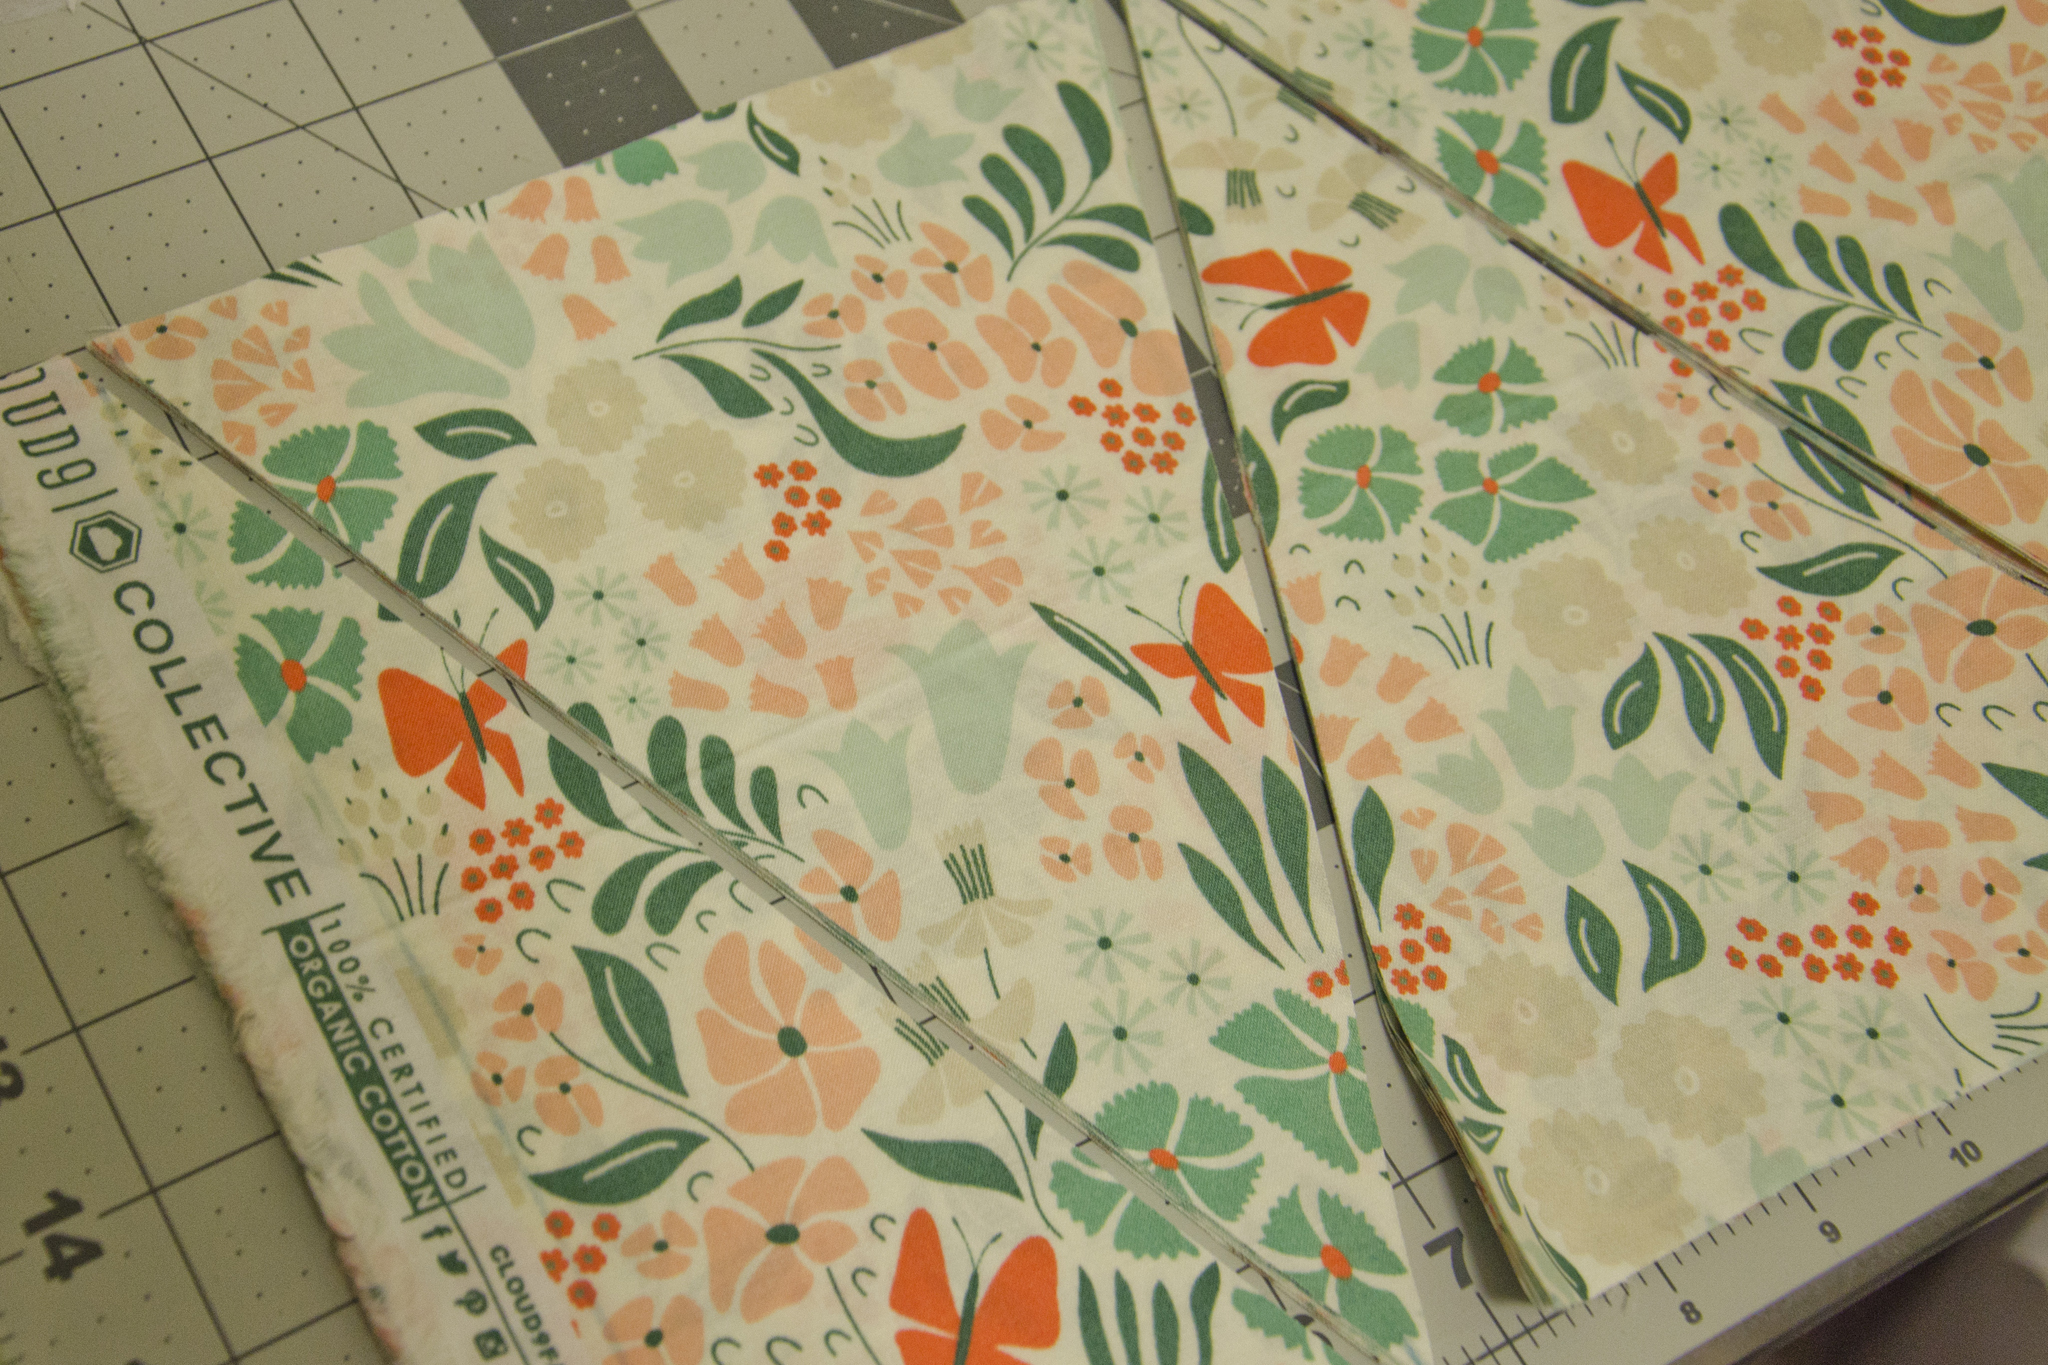
Here are a few tricks I found helped with creating it. When making your own, you can actually get a lot more bunting out of just a quarter yard of each fabric than I ended up making—my cut triangles had 7ā€ bases and were 9ā€ tall. I have so much fabric left over—stay tuned for future projects with it.

Tea Party Bunting

Tip 1

Cut strips of fabric, then rotate your template (or cutting marks) for easy cutting. If your fabric is directional, you can use the upside-down cuts on the back of your pennants.

Tea Party Bunting

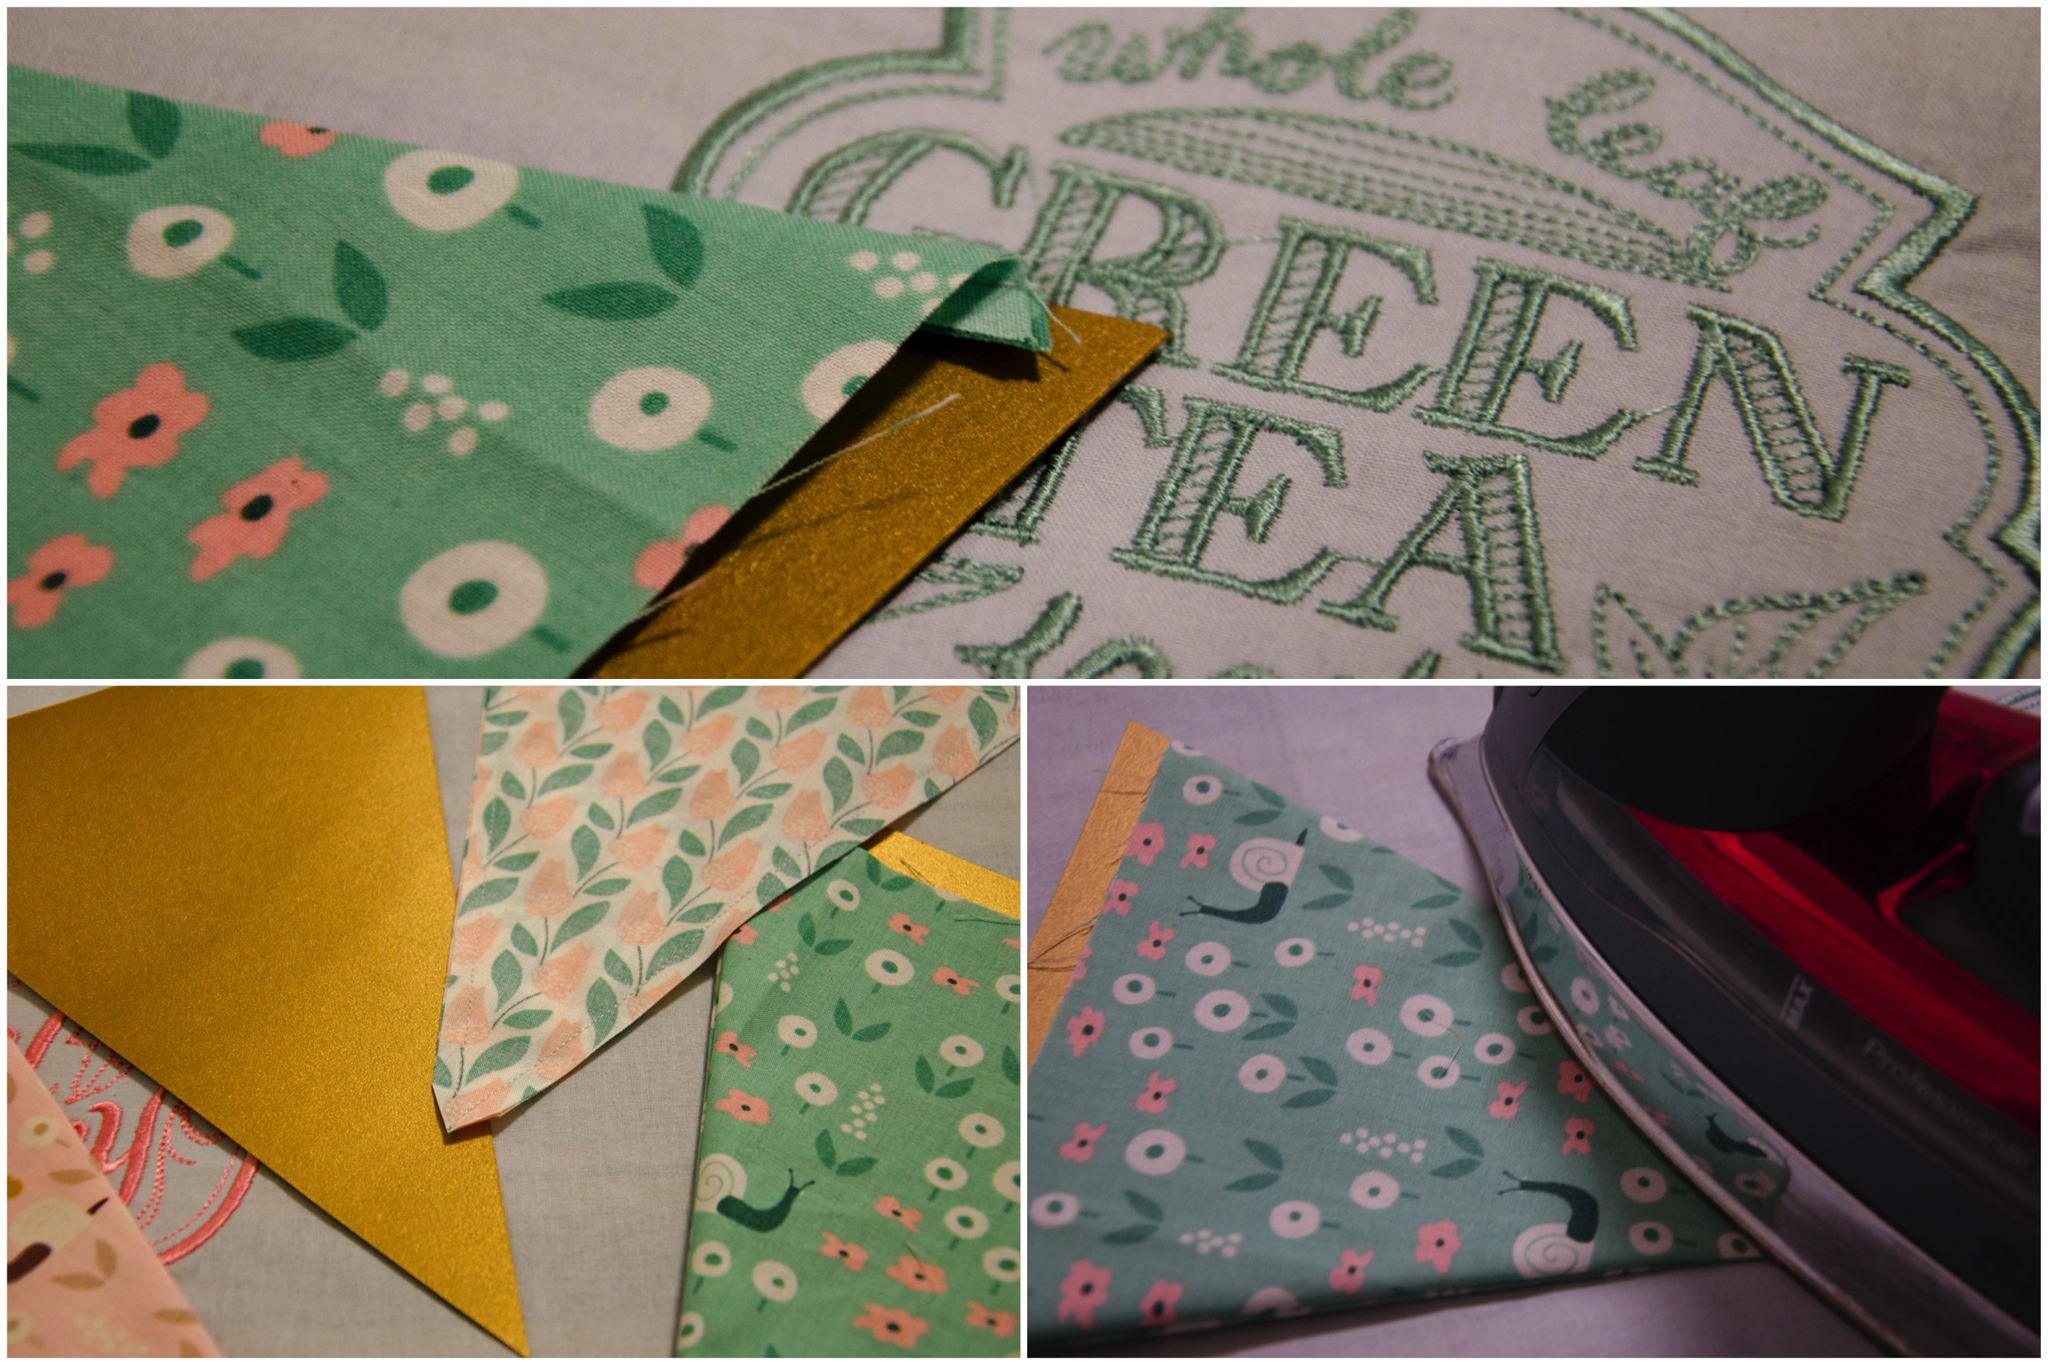
Tip 2

Trim the seam allowances and use a chopstick to turn the point. I’m not great at sharp points, regardless of how I trim the seam allowances, but the chopstick is awesome.

Tea Party Bunting

Tip 3

Cut a template out of card stock to help with pressing. If you cut the template to the finished size, then slide it in with the seam allowances behind it, you get a nice sharp edge to your pressed pennants.

Tea Party Bunting

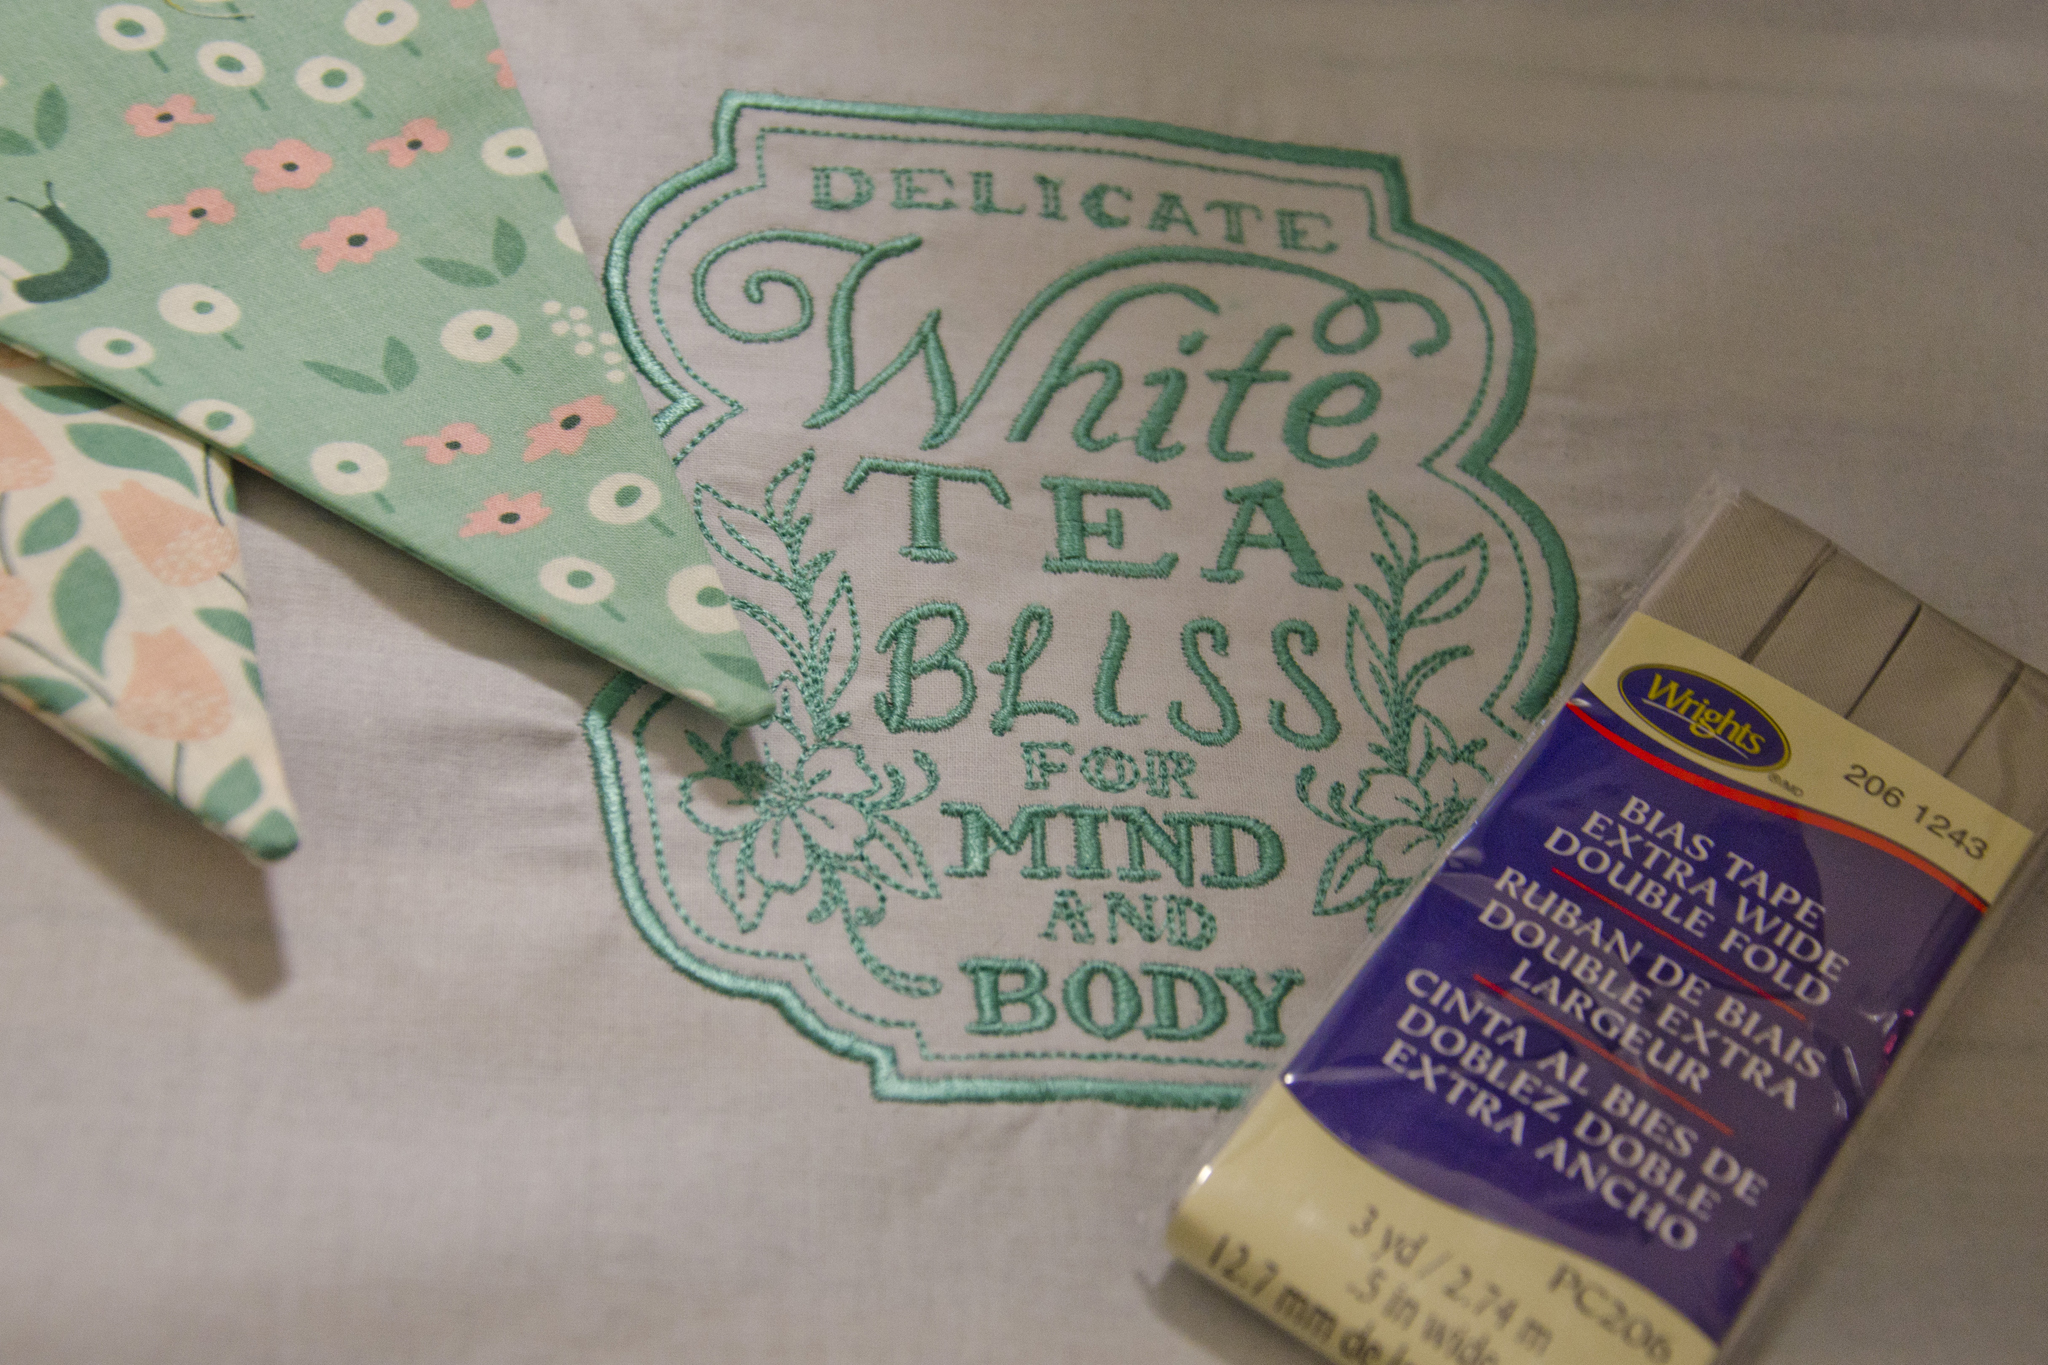
Tip 4

Use packaged double fold bias tape for a quick and easy finish, and a glue stick to hold everything in place while you sew the flags down.

Tea Party Bunting

Best of luck in your bunting endeavors!

May 21st, 2016

Foto Freitag

Posted in Quilting

  • Applique
  • Home decor
  • Quick project

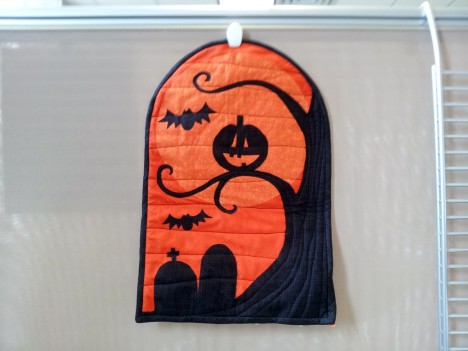
Sat and sewed this quick hanging from Fons and Porter Celebrations earlier this week with a group of other ladies. Nothing special, just some fusible applique and some very simple quilting. Trying to finish up the binding over lunch here at work.

Found out that my walking foot and tulle don’t play that well together, but it’s an otherwise fine project.

September 14th, 2012

A Pair of Pillows

Posted in Crafting

  • Gifts
  • Home decor
  • Pillow
  • Tutorials

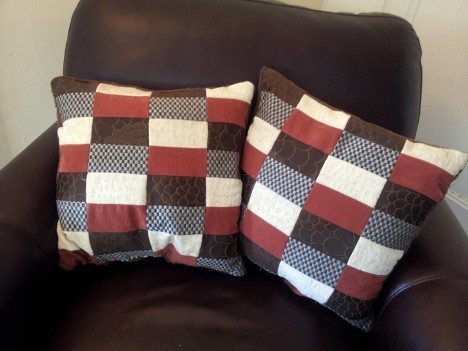
Our friend just moved apartments and bought a new couch set (which I’m rather jealous of, although it wouldn’t fit properly in our house). When we were shopping with him, he really seemed to like this one set of pillows that unfortunately didn’t really match the new set very well.

So, Carl and I decided that I should make simliar ones in colors that will match. It’s a very simple design of upholstery fabric and fuzzy stuff on the back (for cuddle-ability):

Ignore the slightly puckered bottom—it’s from the pins, because I still have to whipstitch them closed over lunch before delivery tonight.

The brown floral (which reads more like scales in some of the rectangles) is the same fabric as two of the pillows that came with the set—a happy find in the fabric store that will also help these blend in with the other pillows.

Here’s a super quick tutorial for how to make your own matching pair.

Materials

  • 1⁄6 yard each of four different fabrics for the front (these were upholstery-weight)
  • ½ yard of backing fabric (these were a cuddle fabric, but upholstery works too)
  • 2 16″ pillow forms (or make your own. It’s better to have that extra layer of fabric than to just stuff the case you make)
  • Neutral thread

If you use quilt-weight fabrics, you probably want a yard of muslin to use as an interlining for the front and back, just to give it more body. Unless your 42″-wide quilt-weight fabric is also super square, you will need a bit more than 1⁄6 yard (you need a strip that is 6″×40″ for standard width, or 5″×48″ for wider fabric).

Cutting

Cut 16 3″×5″ rectangles from each of the four front fabrics.

Cut two 17″ squares from the backing fabric.

If you’re using lightweight fabric, cut 4 17″ squares from the muslin.

Construction

Because I recommend using heavy fabric, I’ve given all measurements assuming a seam allowance of ½″. Sewing a true ¼″ seam with upholstery fabric is annoying, fiddly, and begging for problems (not to mention it gives room to deal with the horrid fraying).

Front piecing

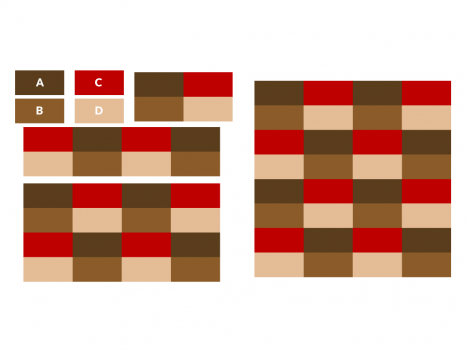
Pair up the two darker fabrics and the two lighter fabrics for the front (A and B, C and D).

Create blocks by sewing all of the A pieces to the B pieces along the long side. Do the same for the C and D pieces.

Construct the rows by alternating two AB blocks and two CD blocks. You’ll need four rows that start with AB and four that start with CD, with A and C always being at the top of the row.

Sew four rows together for each pillow, alternating the AB-starting rows and the CD-starting rows.

Making the pillow

One you’ve completed the fronts, place a front and back piece right-sides together. If you used light-weight fabric, baste a piece of muslin to the wrong side of each piece first.

Pin, then sew all the way around, leaving a 10″ opening on one side (or smaller, if you feel comfortable stuffing your pillow form in).

Turn out, clipping corners as needed.

Insert the pillow form through the opening, then sew the opening closed with a whipstitch or your preferred closing method.

Repeat for your second pillow.

VoilĆ ! A pair of pillows.

September 13th, 2012

Ā 

© 2008–2025 Raevenfea